Platform Quick-Start (v1)
Learn how to set up a simple data integration using the OpenFn platform. If you get stuck along the way, post a question to our community forum so we can give you a hand.
In this walkthrough, we’ll connect a KoboToolbox form to Google Sheets. If you don’t have a KoboToolbox account, we'll provide you with a demo account you can use for the tutorial or you can create one for free.
We’ll be completing the following steps:
- Identify your source and destination system
- Create a project and send data from your source system to your OpenFn inbox
- Create credentials to connect your destination system
- Create a your job
1. Identify your source and destination system
The best way to figure out what an integration flow should look like is to phrase it in the following way: When A happens [in system 1], I want B to happen [in system 2].
When a ‘Case registration’ form is submitted [in KoboToolbox], I want the response to be inserted into my ‘Kobo case registrations’ sheet [in Google Sheets].
This tells us that system 1 (KoboToolbox) is our source application, and system 2 (Google sheets) is our destination system.
2. Create a project and send data from your source system to your OpenFn inbox
First, create an OpenFn account or login. Navigate to your Project dashboard - you'll see that a sample project has been created for you.
Create a new project called ‘Kobo case registrations’ by clicking on the blue + icon at the bottom right hand corner of your dashboard.
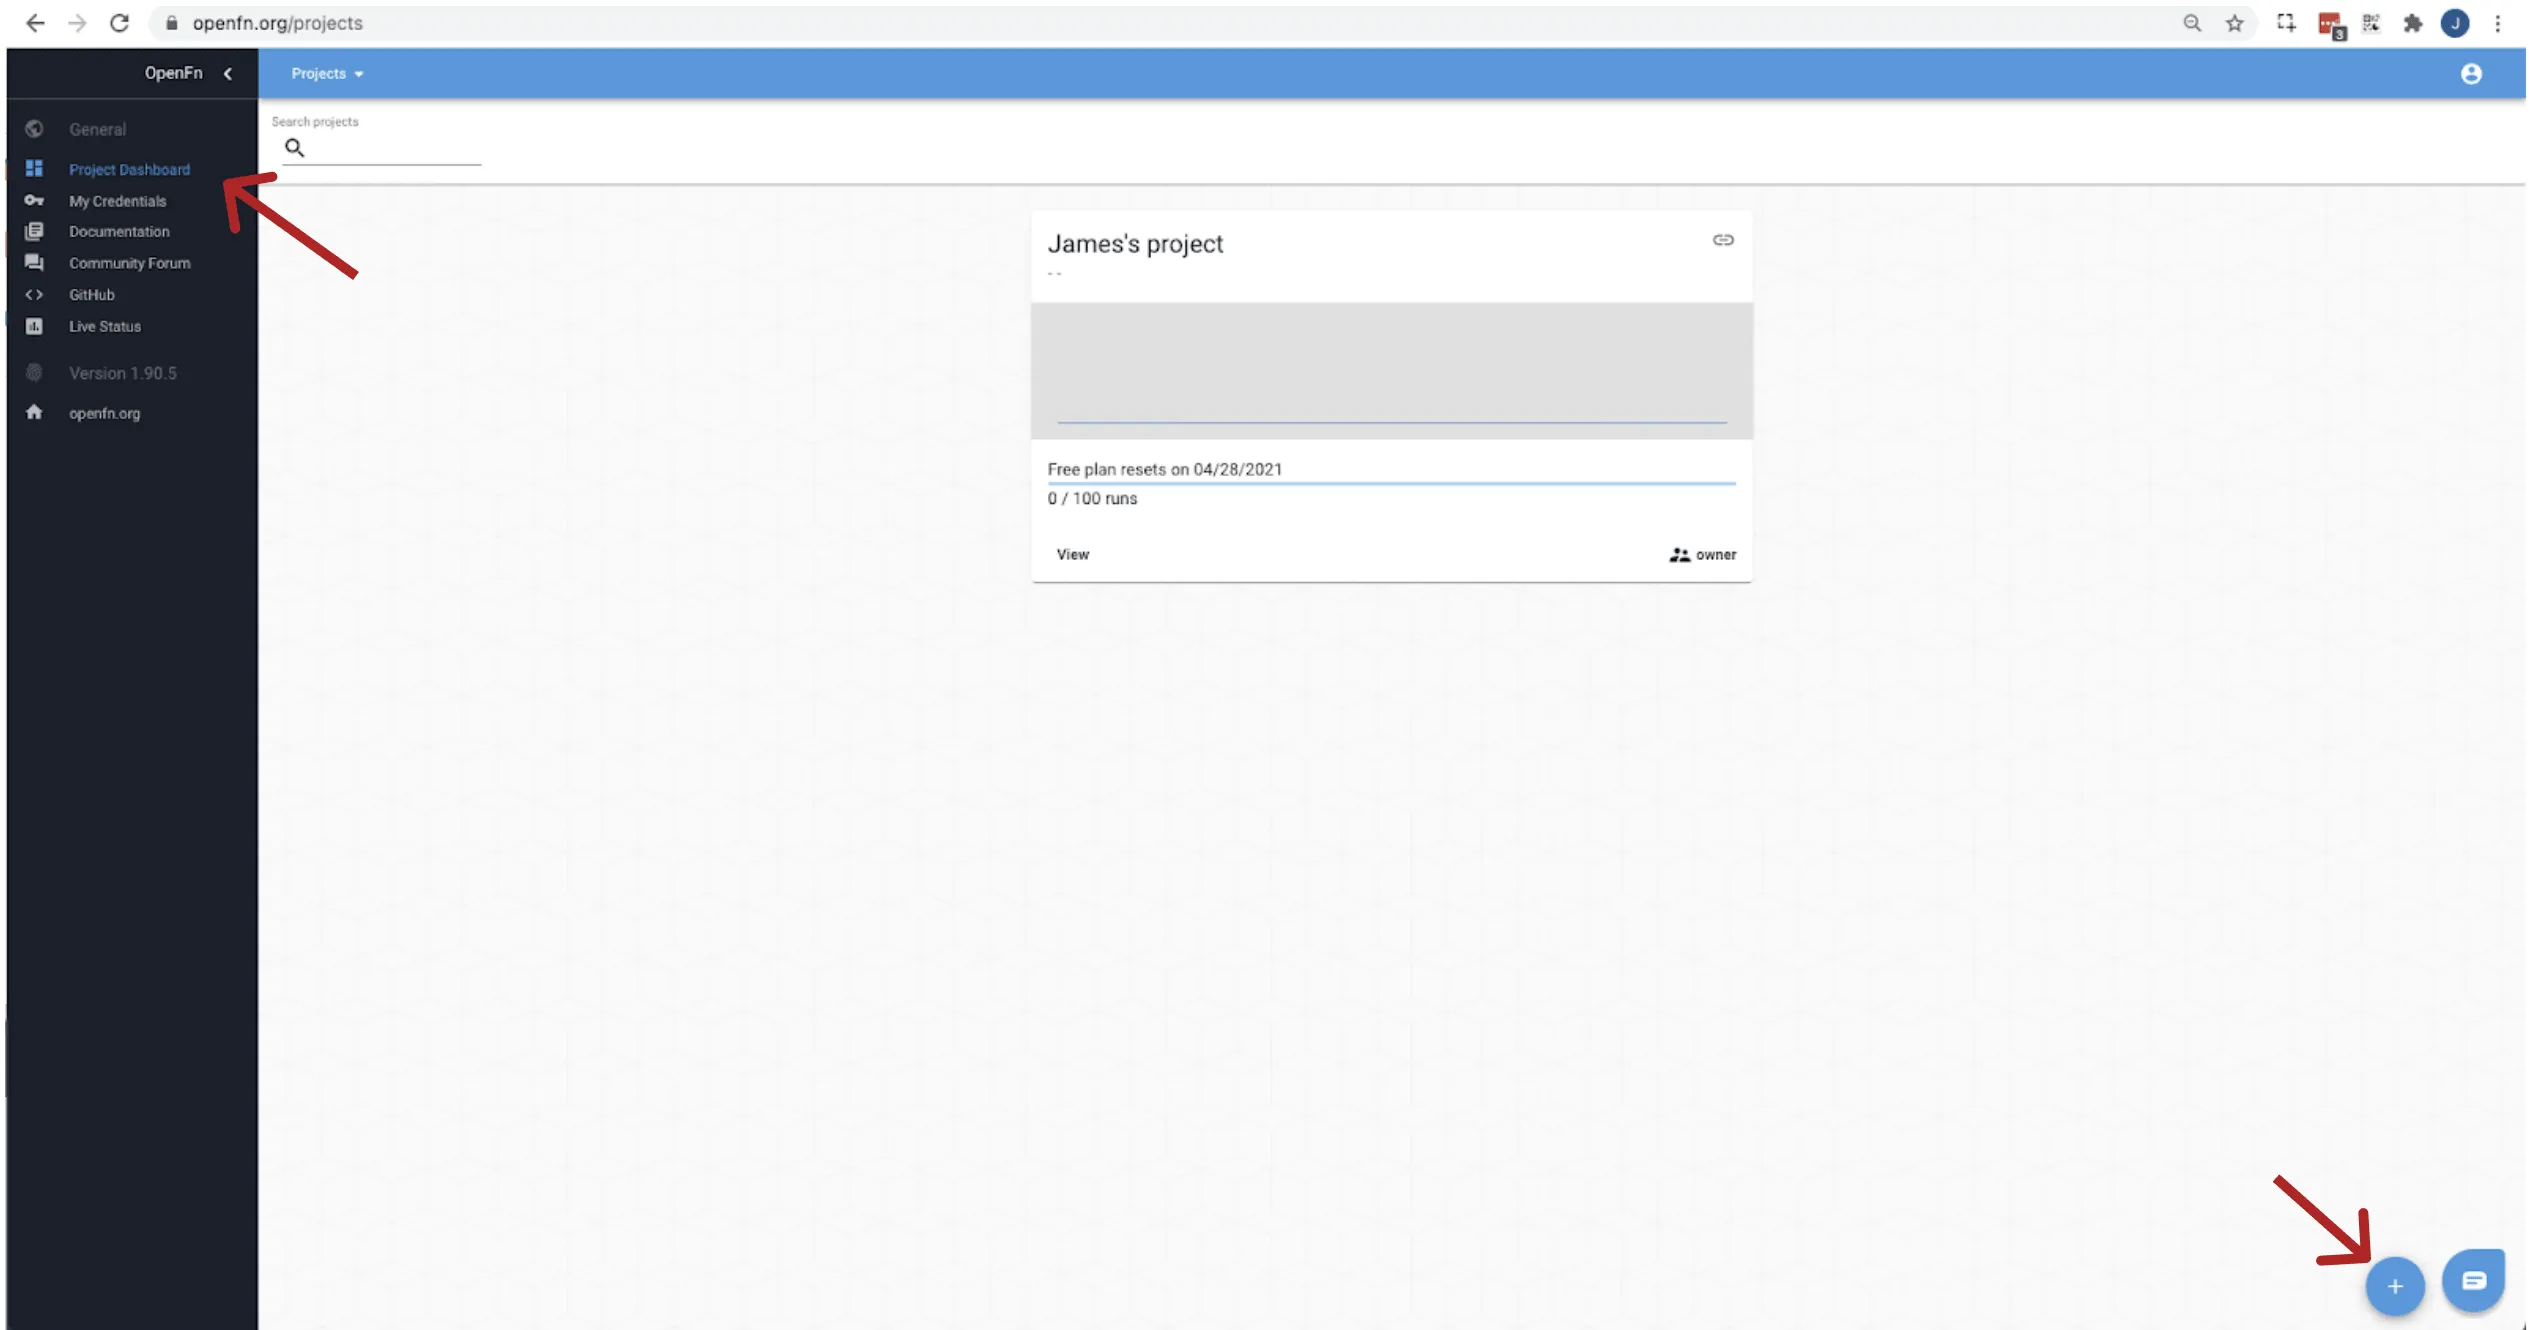
When you click 'View' to enter your project space, you'll be taken to your inbox. This is where you will receive messages - the data that gets sent from your source system to OpenFn. Copy your inbox url to configure KoboToolbox to send data to it.

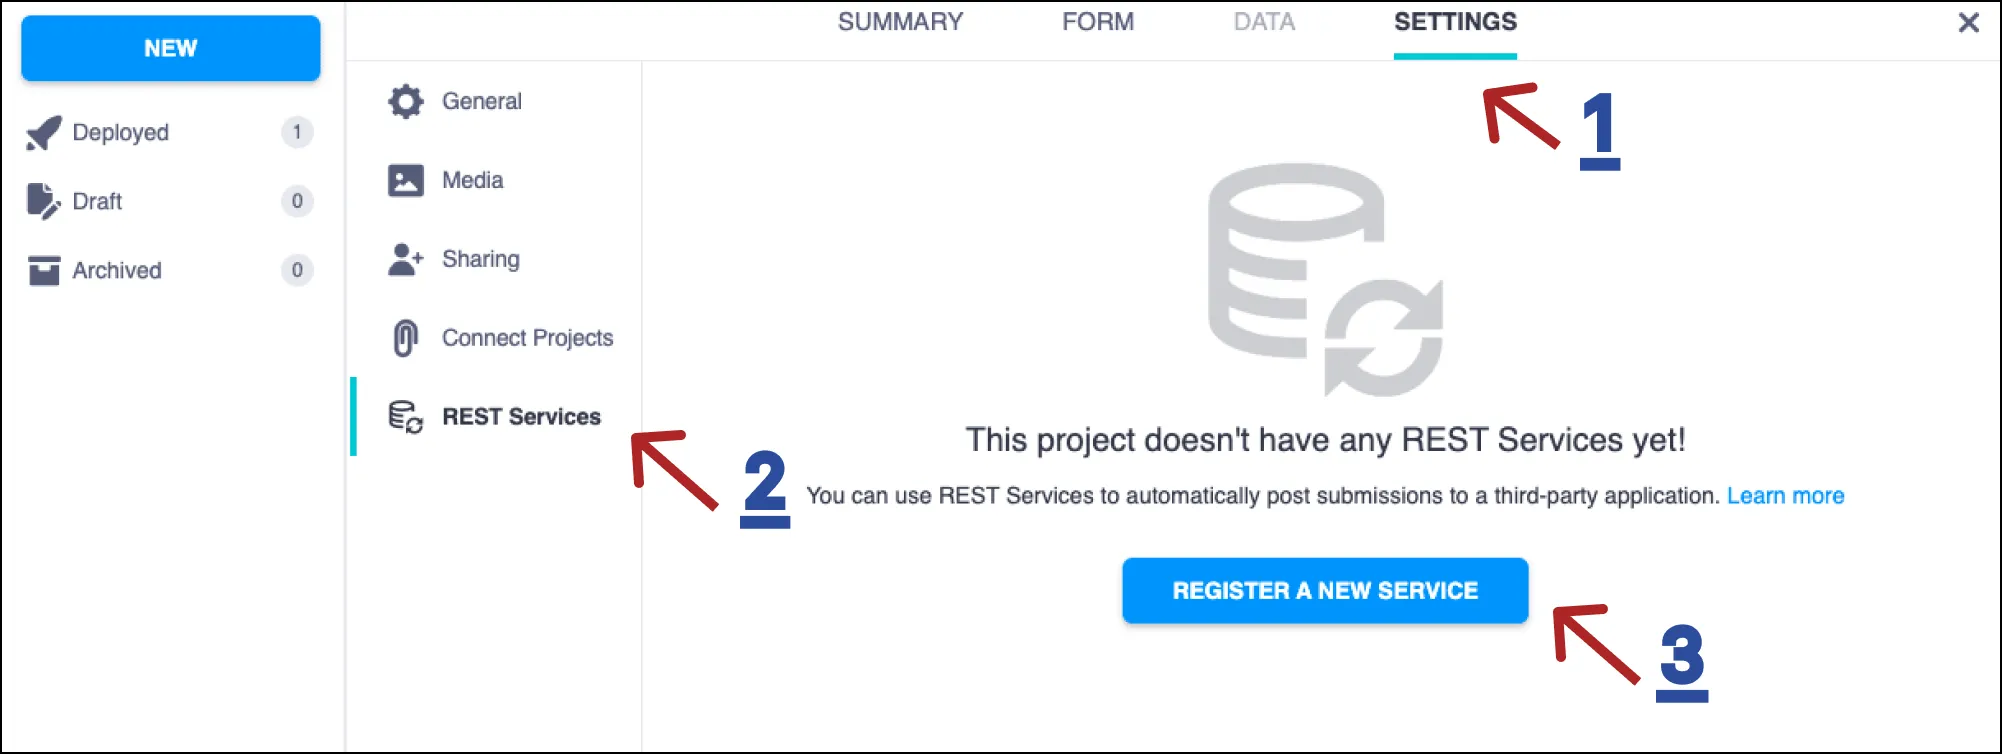
Log into our KoboToolbox demo account with username: openfn_demo and password: openfn_demo. Select the form you’d like to connect (if using our demo account this will be 'COVID 19 case registration') and go to Settings -> REST services -> Register a new service.
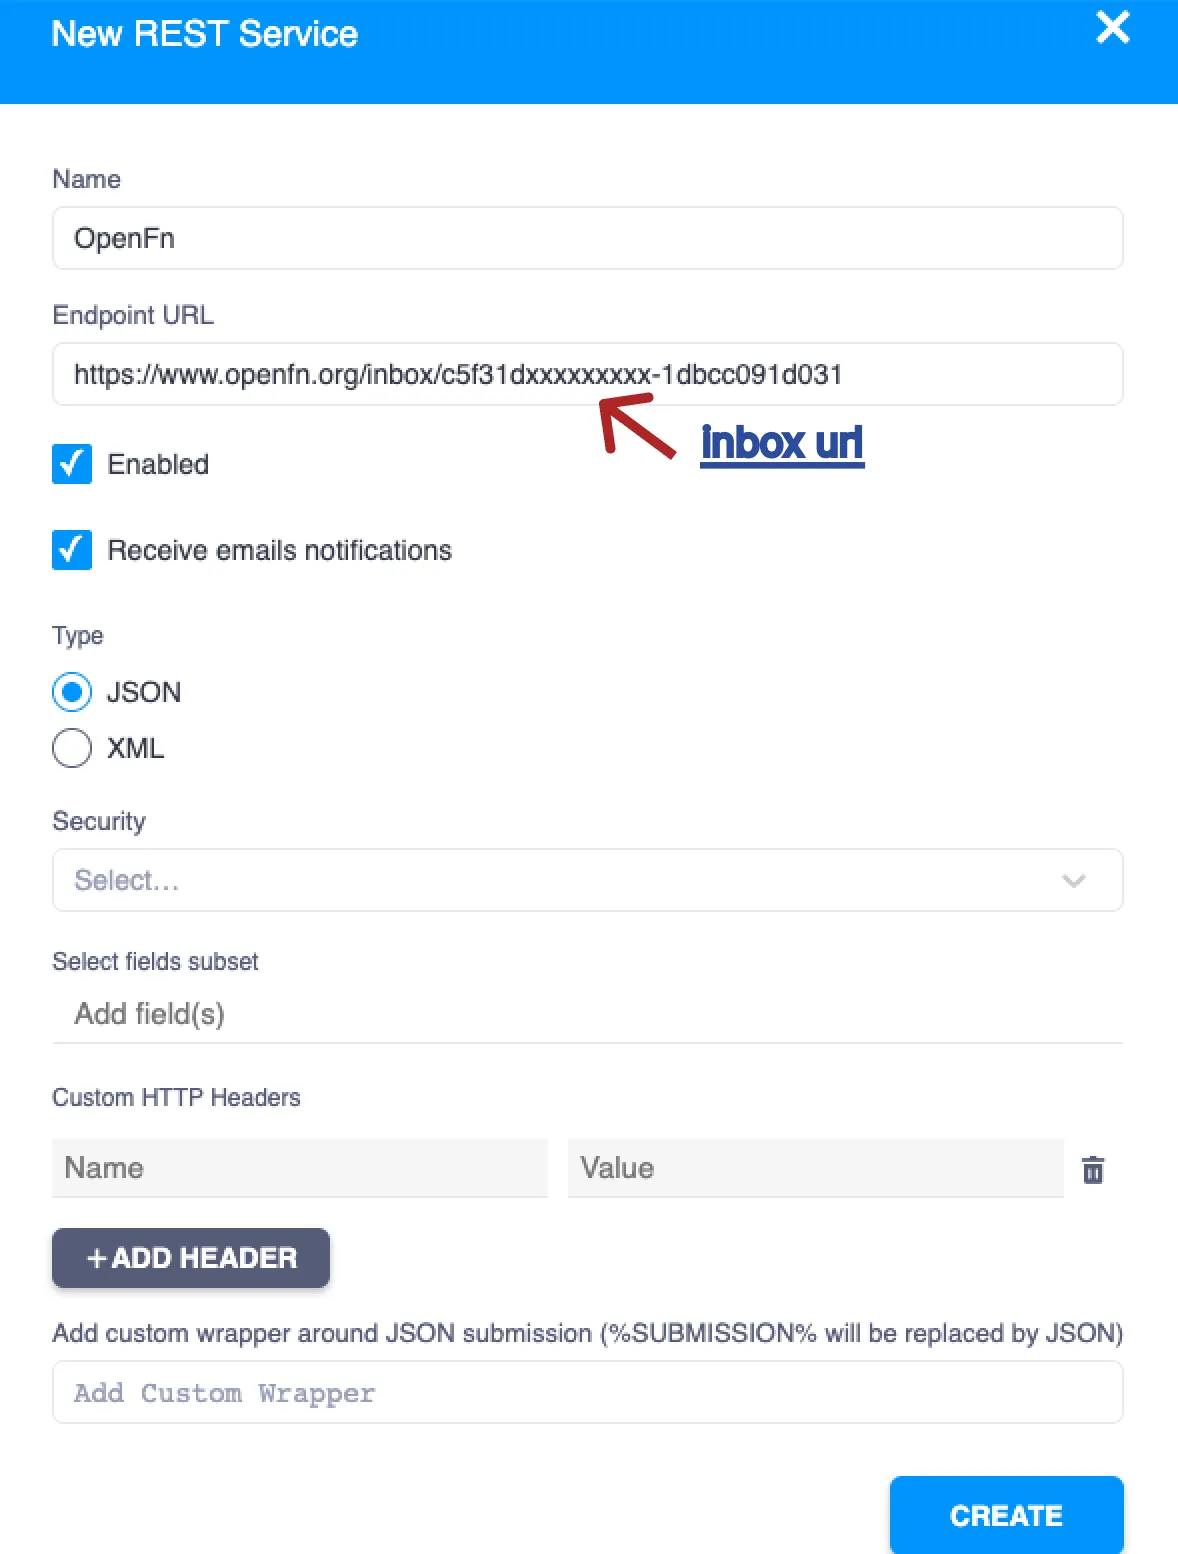
Set the service name to OpenFn and the URL to your project inbox url.
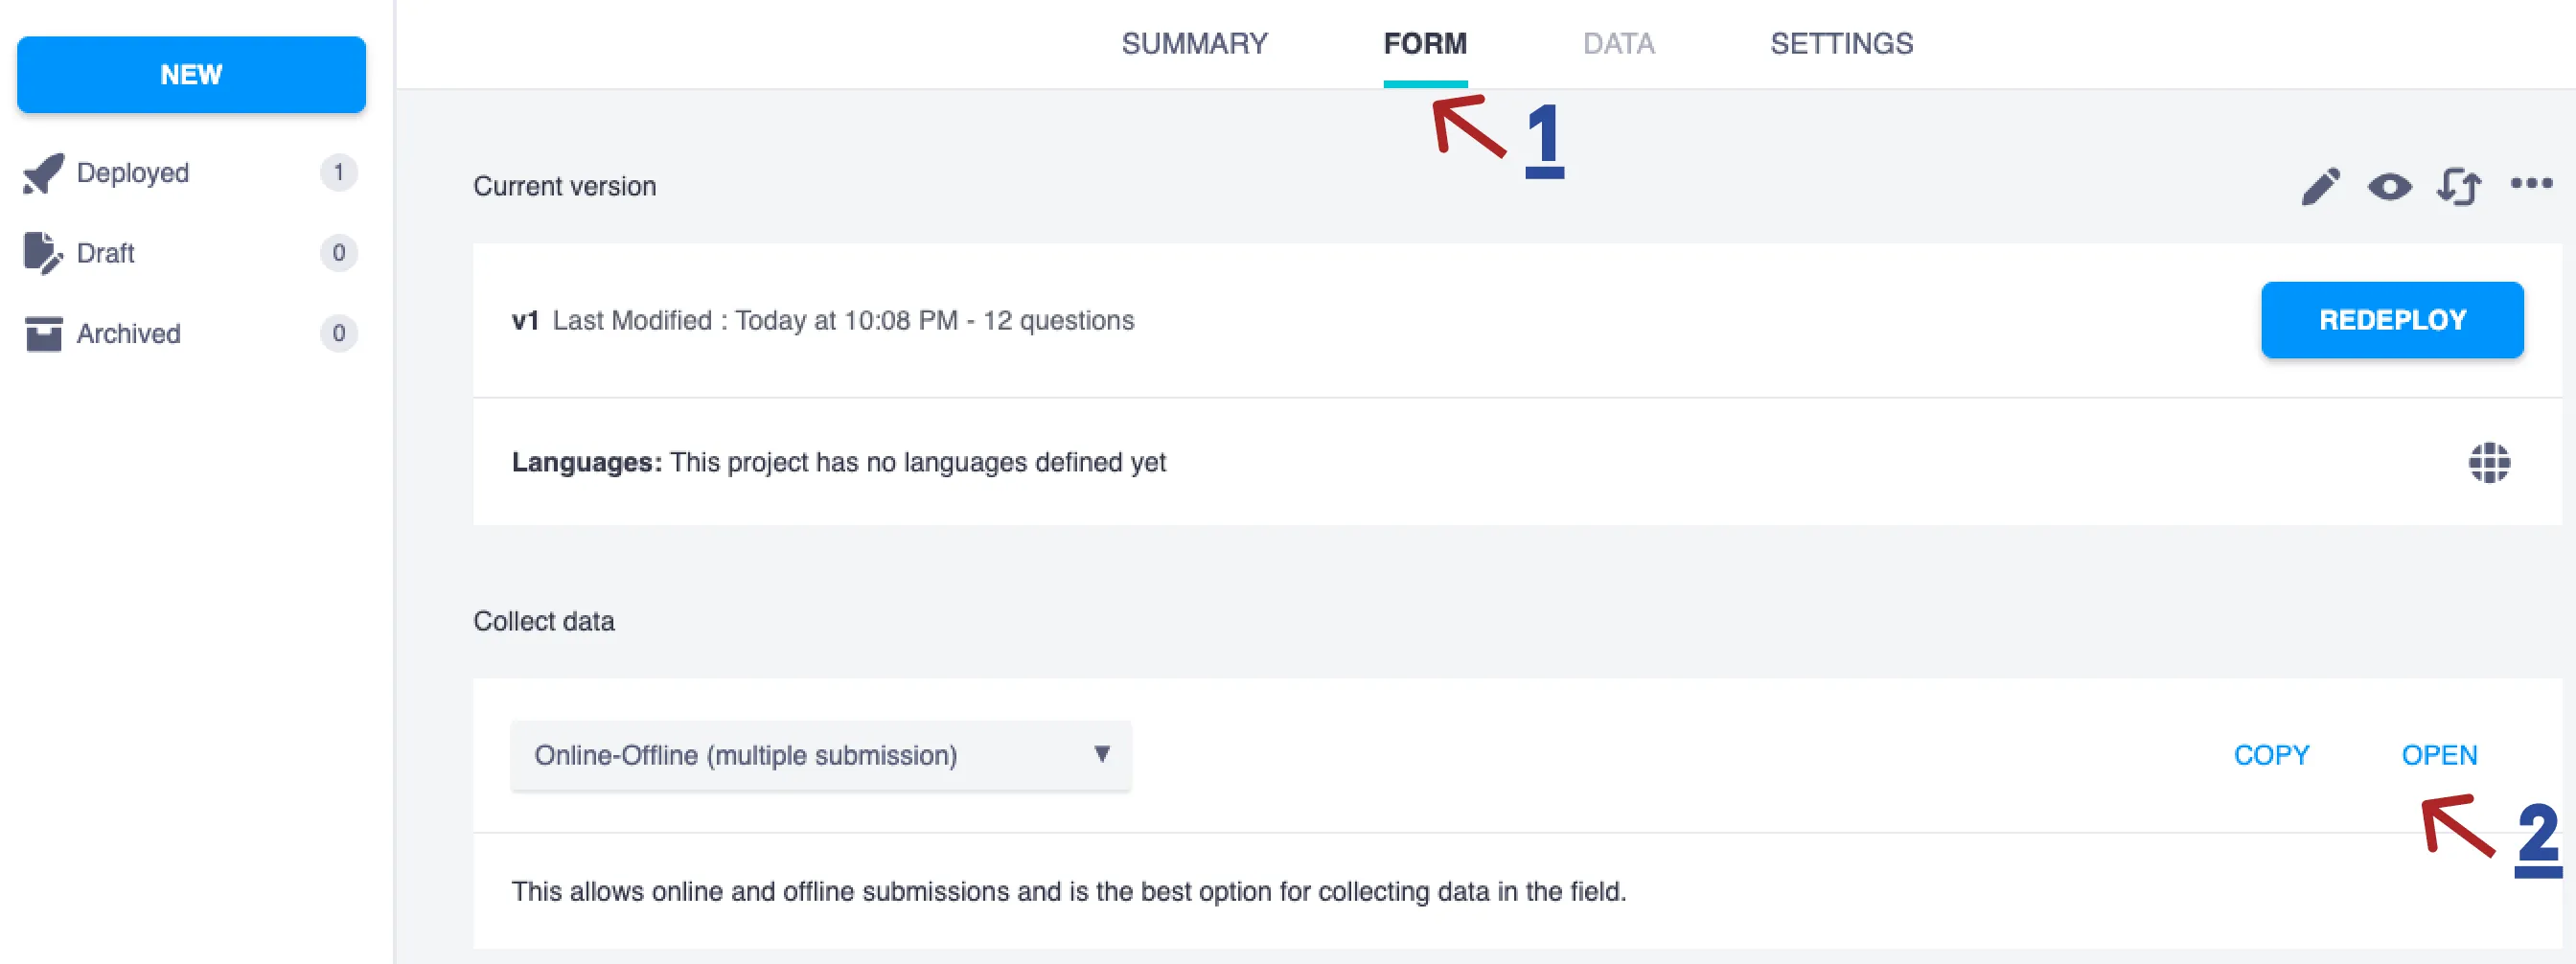
Your form should now be configured to send data to your OpenFn project inbox whenever a response is submitted. We can test this out by submitting some form responses at Form -> Open.
Return to your project inbox. You should see a new message there, which contains the data submitted in the KoboToolbox form response.
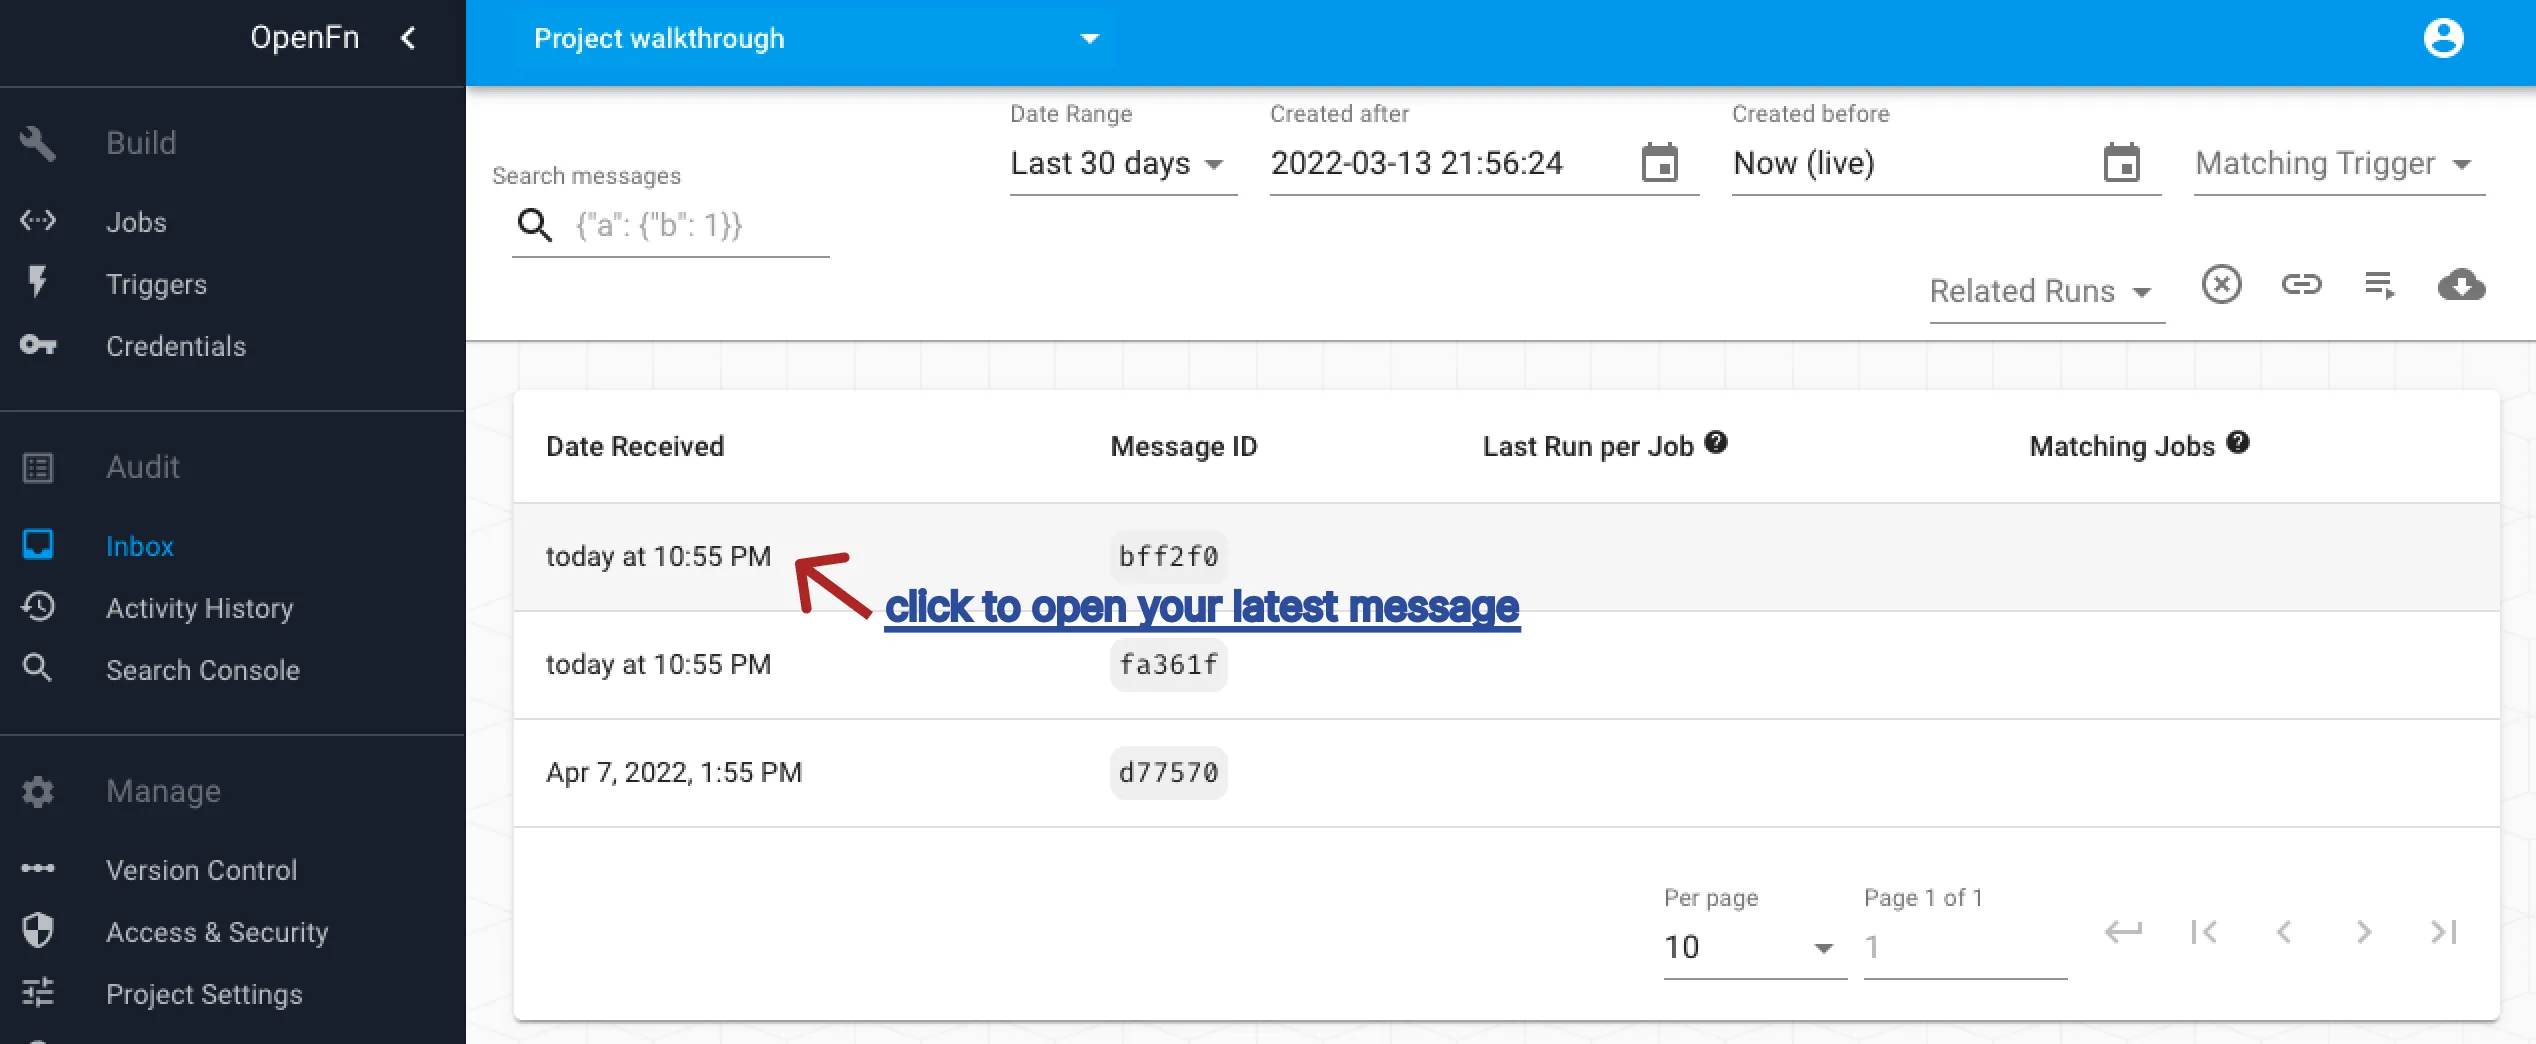
If you click on the message, and open up the message body you’ll see the data that you submitted to the form. To view the entire message, open it in full screen.
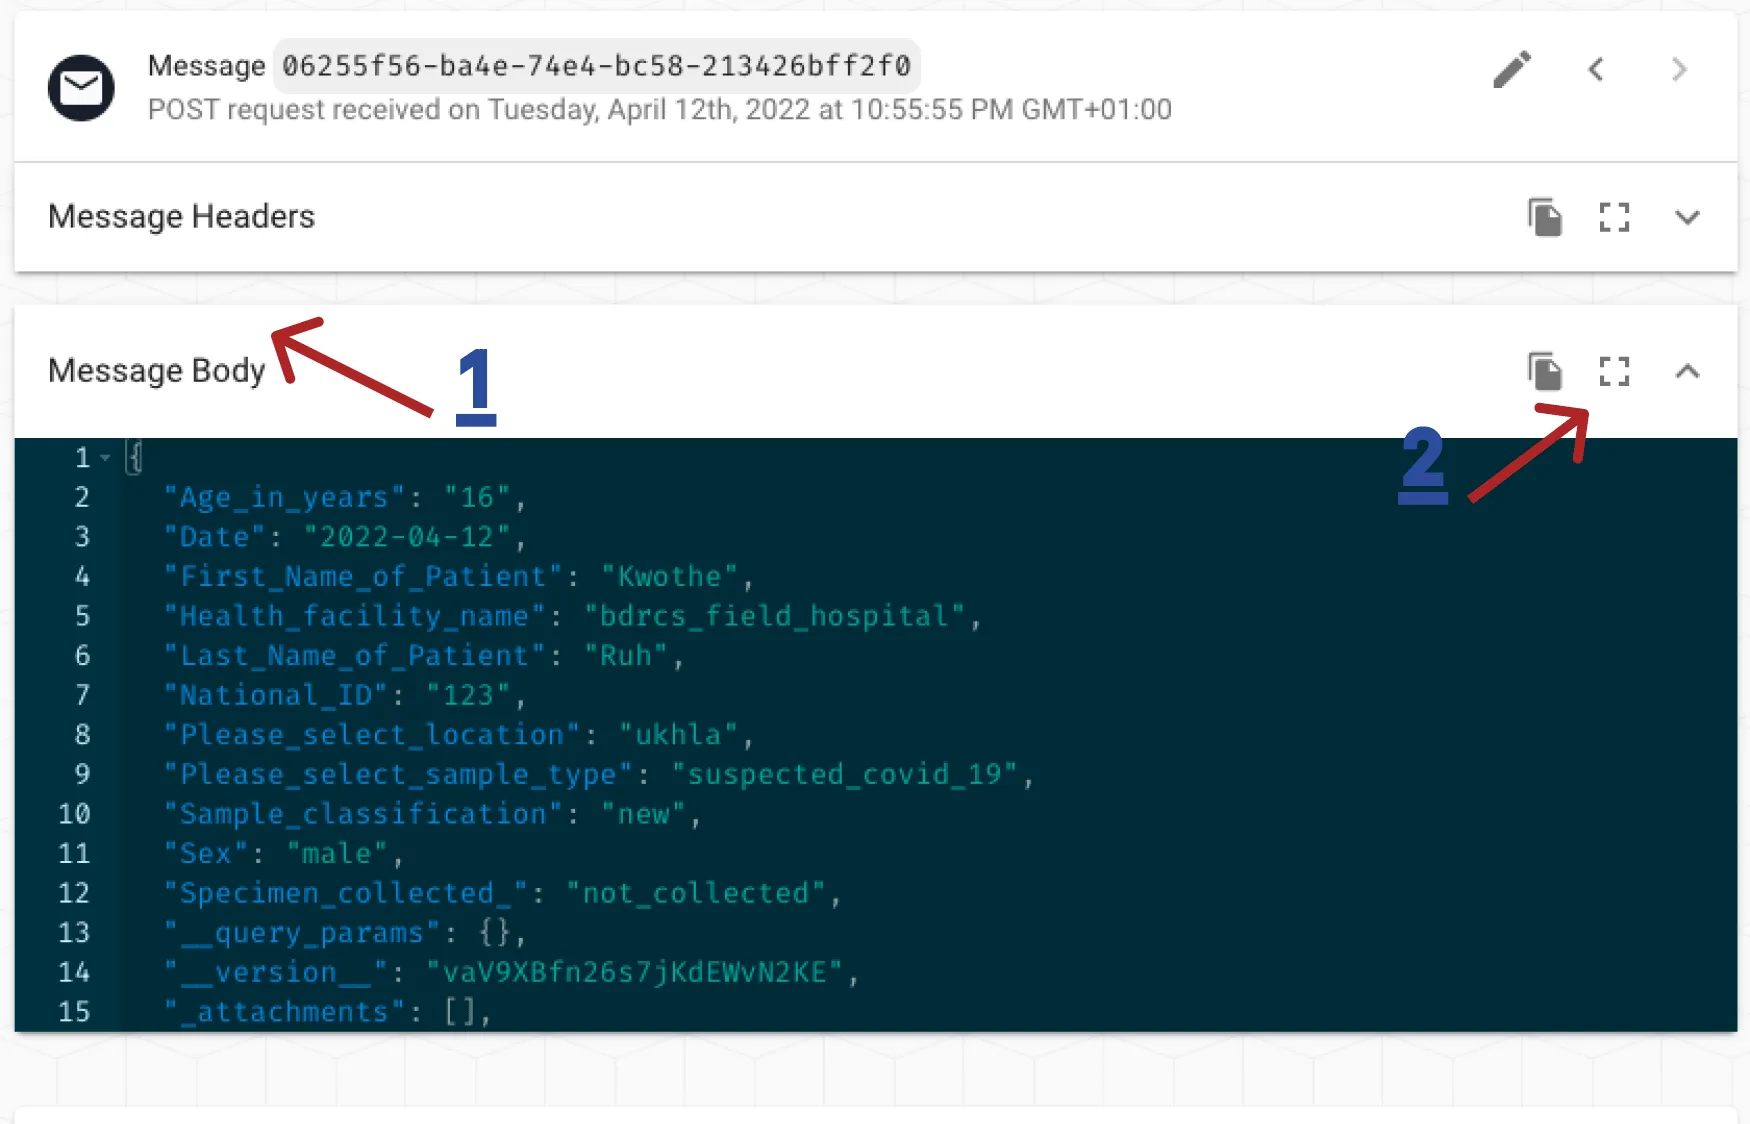
Once you can see the entire message, you need to identify a data point that will
be the same for every submission. In this case, we know that all of our messages
will have the same form ID. Save the snippet you have identified
("\_xform_id_string": "aDReHdA7UuNBYsiCXQBr43"), you'll need it later to
create your trigger.
3. Create credentials to connect your destination system
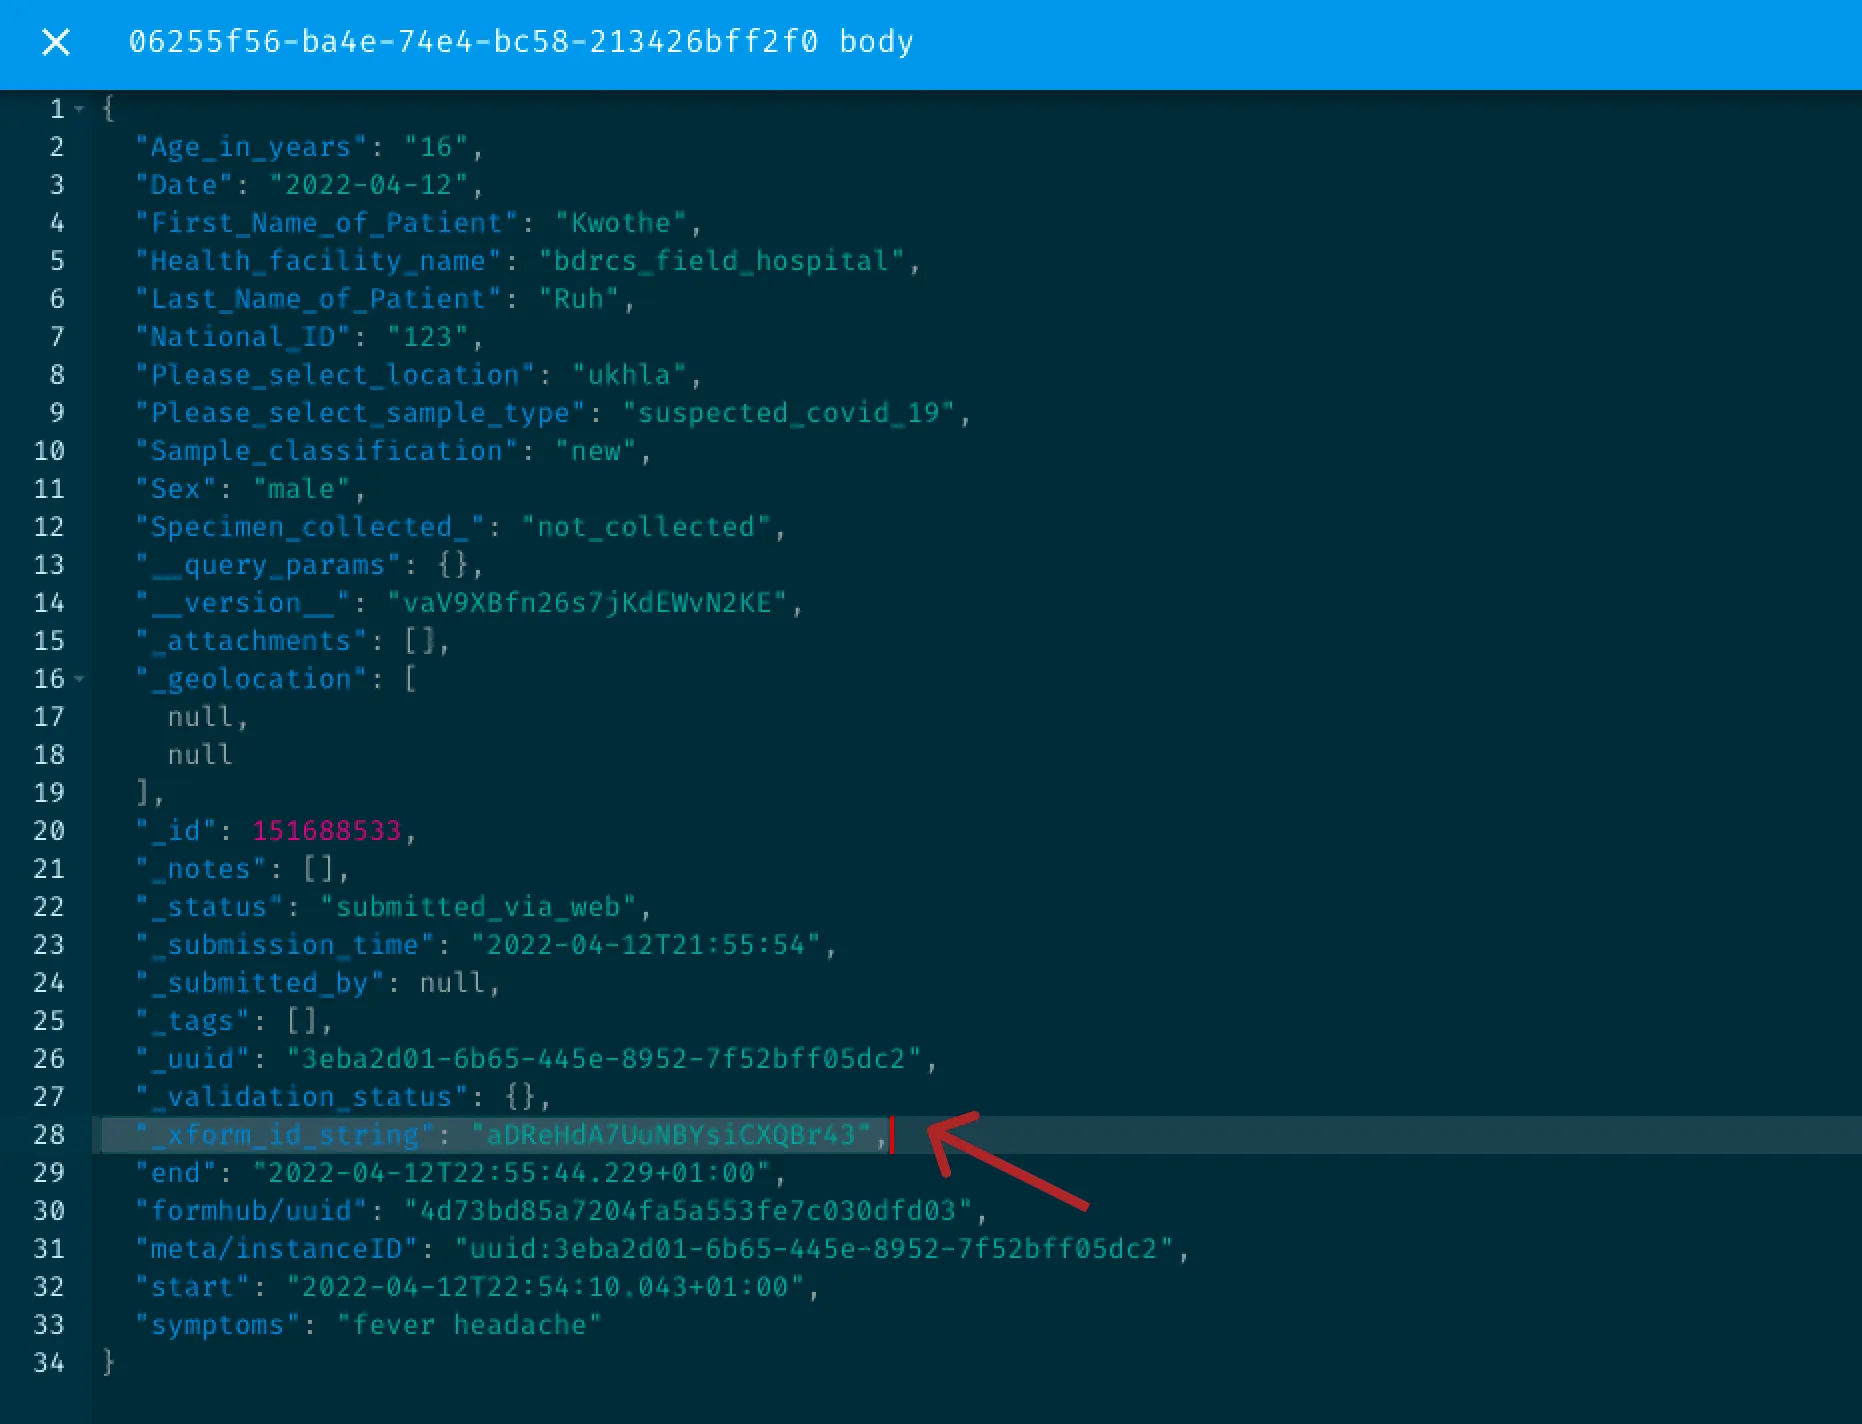
In order to connect to your destination system, you need to sign in through OpenFn to create credentials. These will allow you to send data to your google sheet.
Head to the credentials section of your dashboard, and once again click the blue + sign to create new credentials.
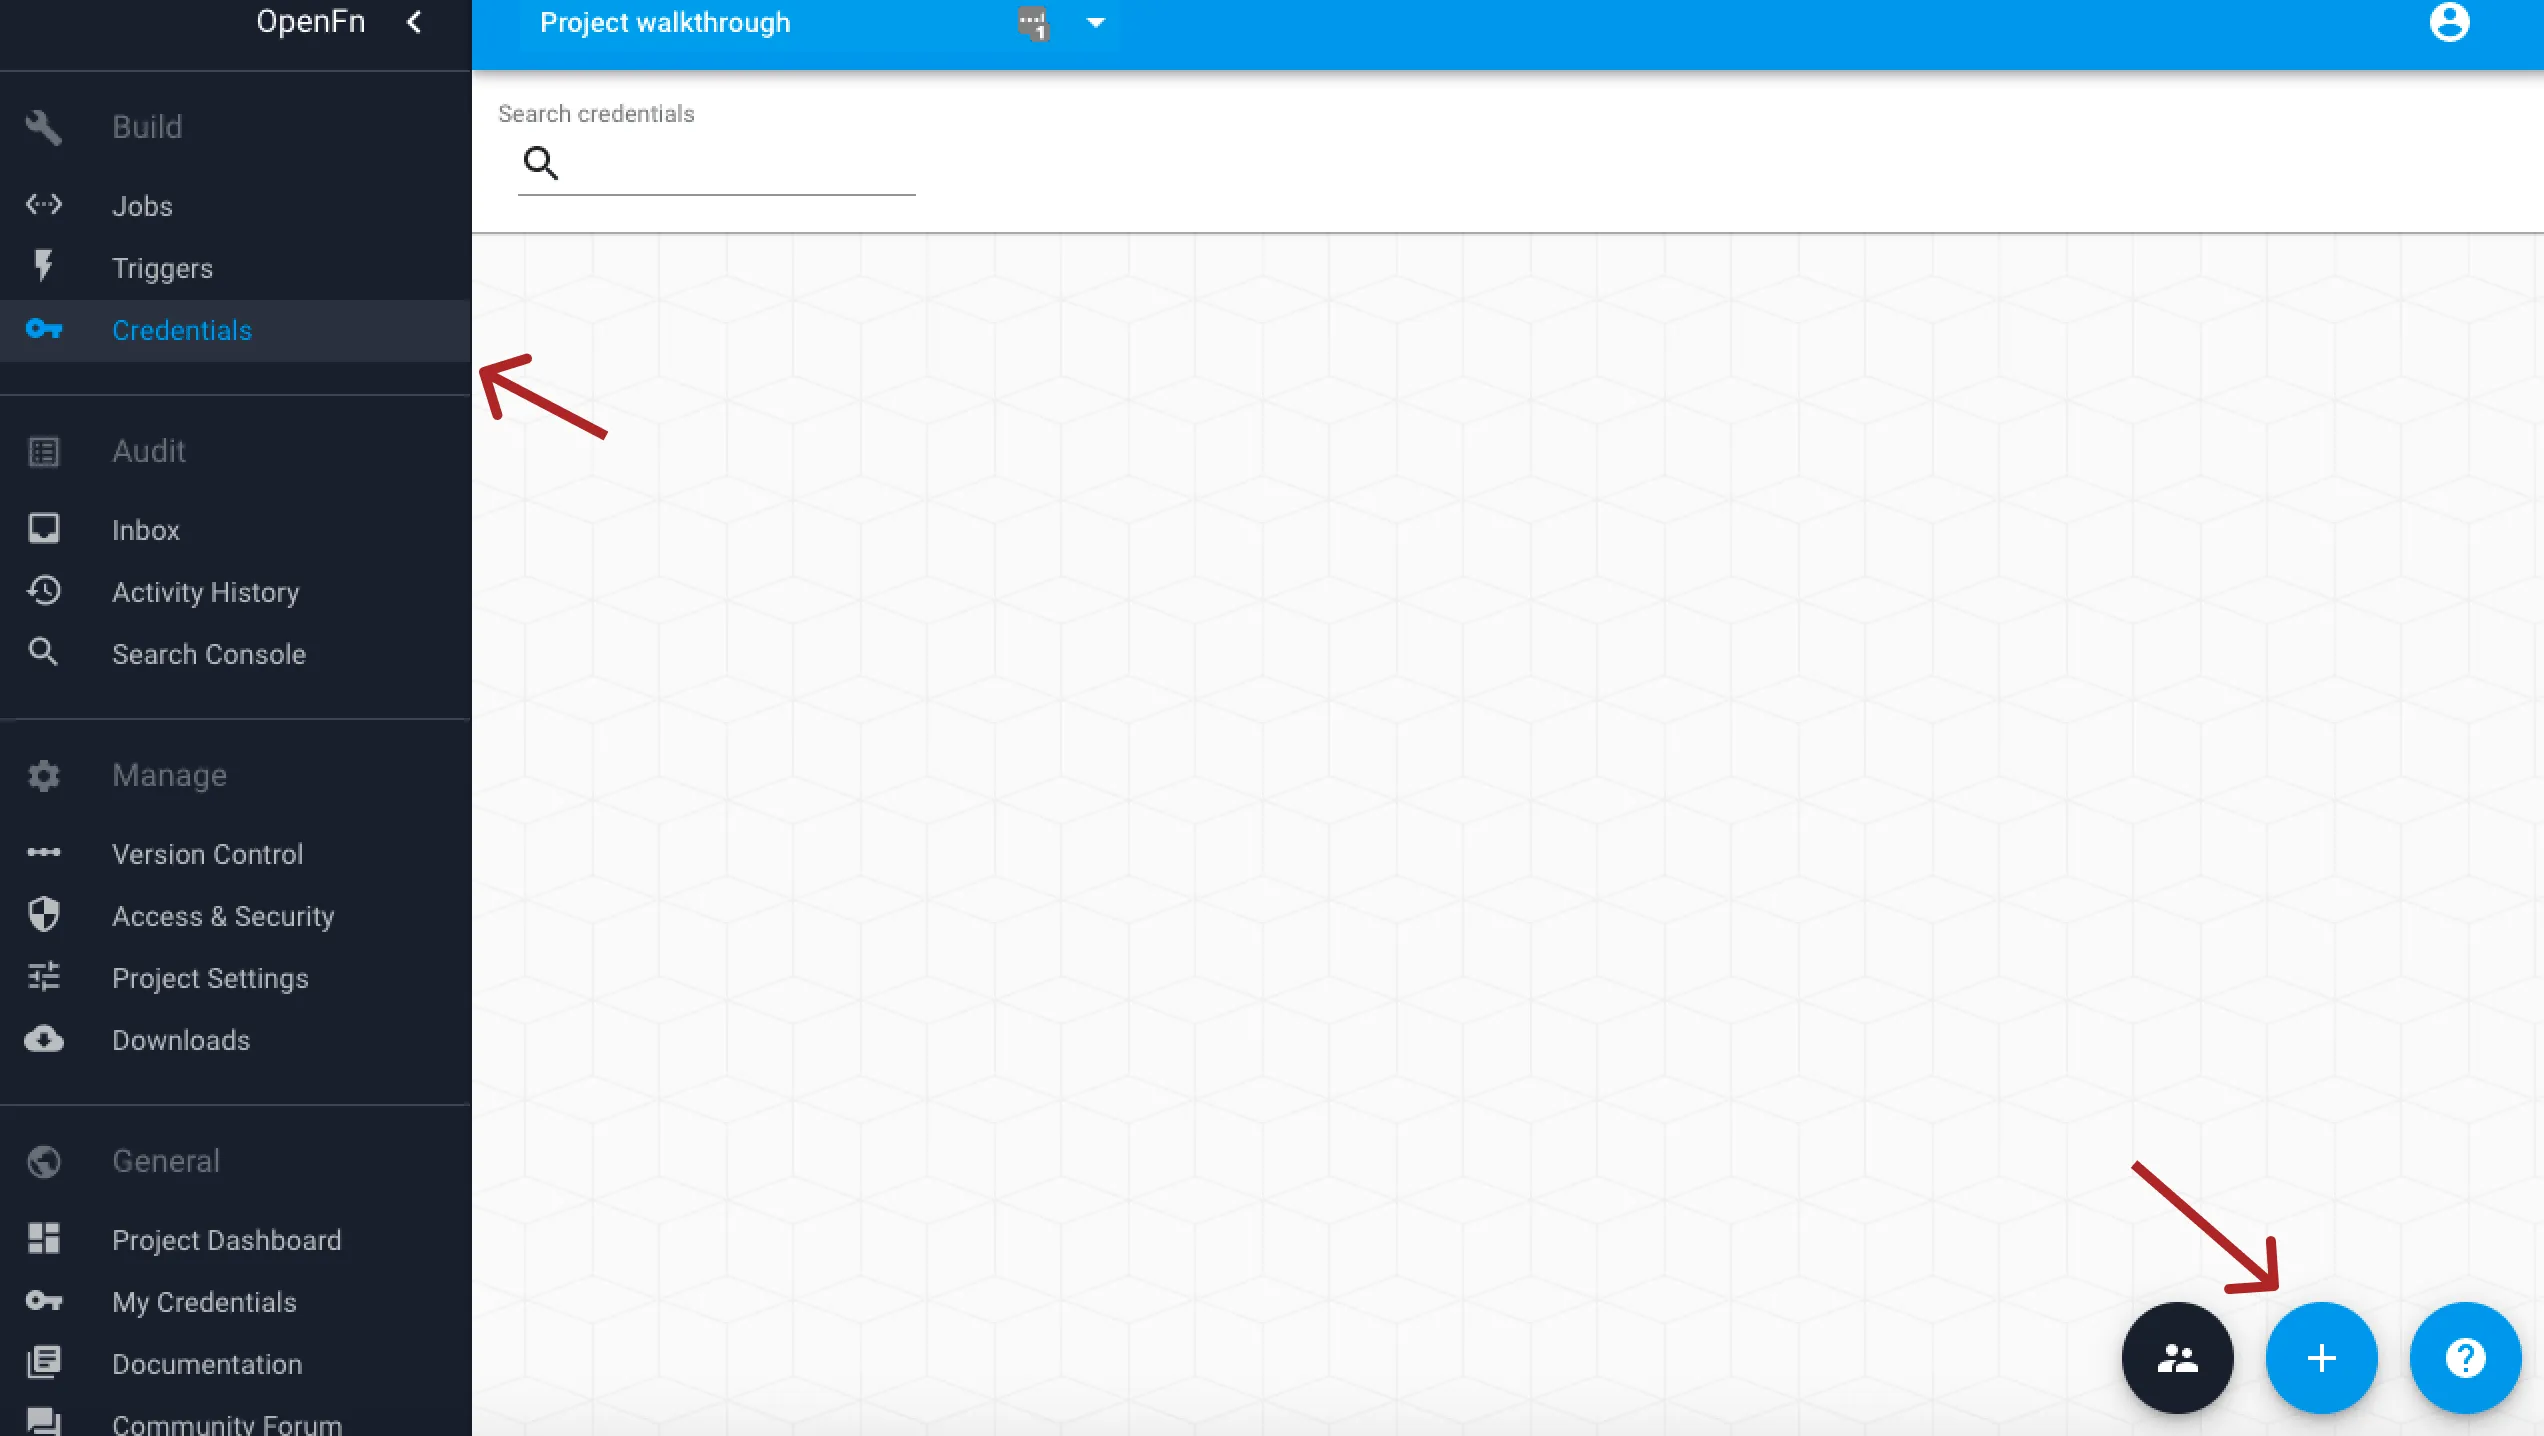
You’ll see various apps you recognise - these are all of the systems that we can
handle credentials for. Select the Sheets one, and log into your google
account when you get the pop up window. You’ll get a confirmation message. Close
the window and give your new project access to these credentials.
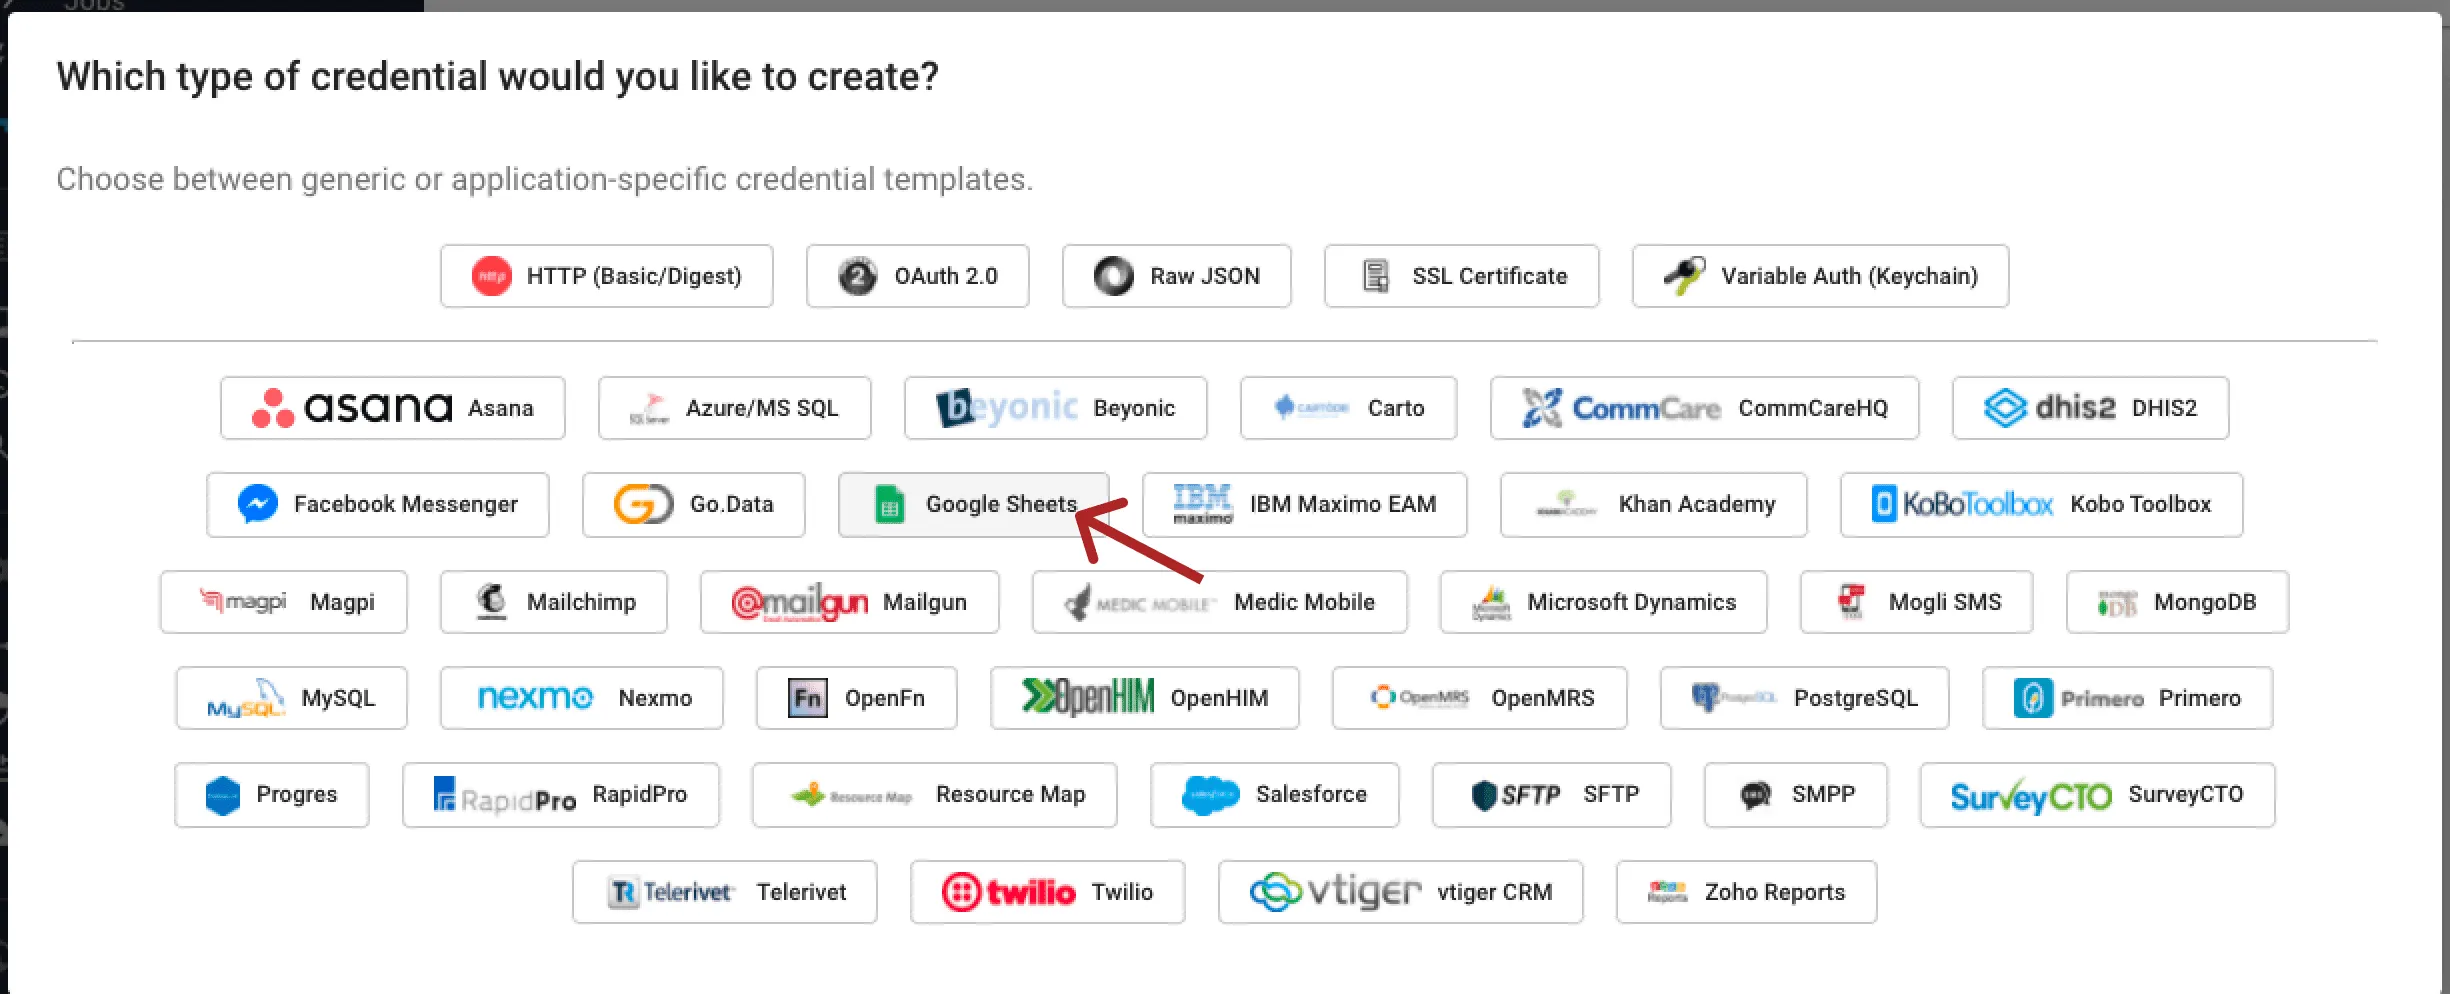
You’ve now created credentials that will allow you to perform operations in google sheets from within your job.
4. Create a new job
A job is a series of operations that formats and transfers data at a given time. It needs a trigger, which determines when these operations should happen, and an expression, which determines what should be done with the incoming data and where it should go.
Navigate to the jobs section in your dashboard, then click the + icon to create a new job.
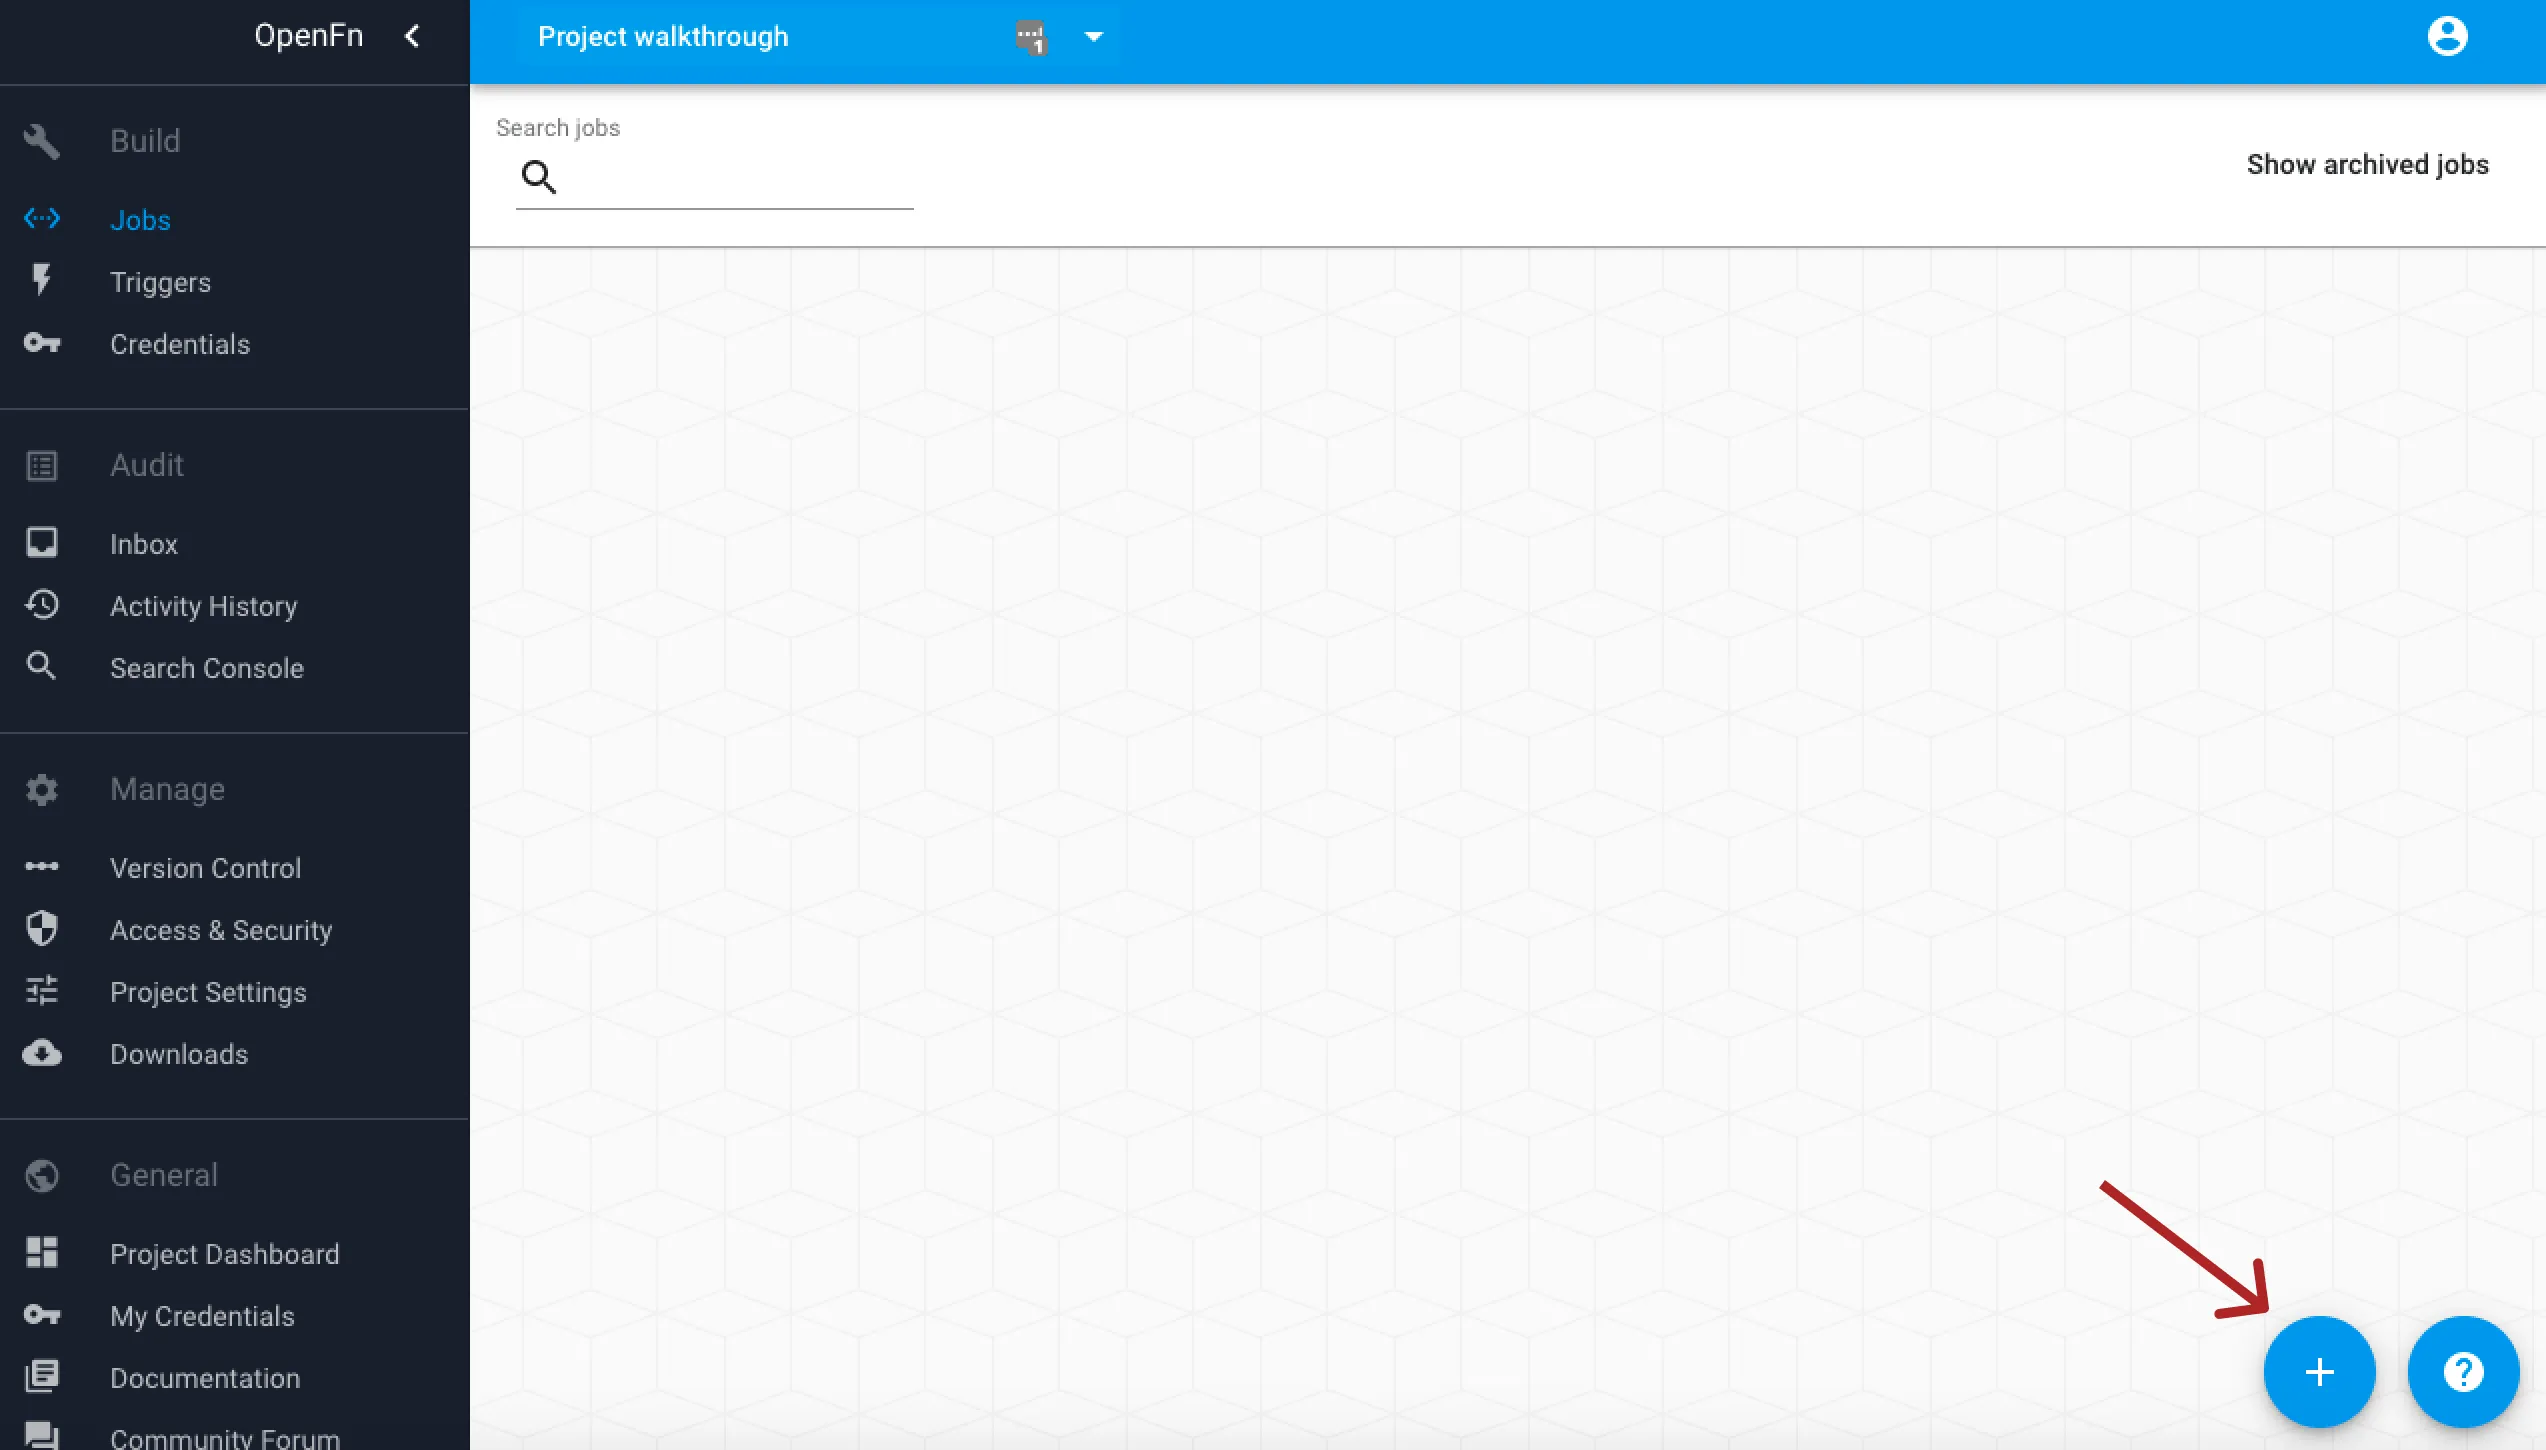
Give the job a name (we’ll make ours “Kobo to sheets”).
4.1 Create a new trigger
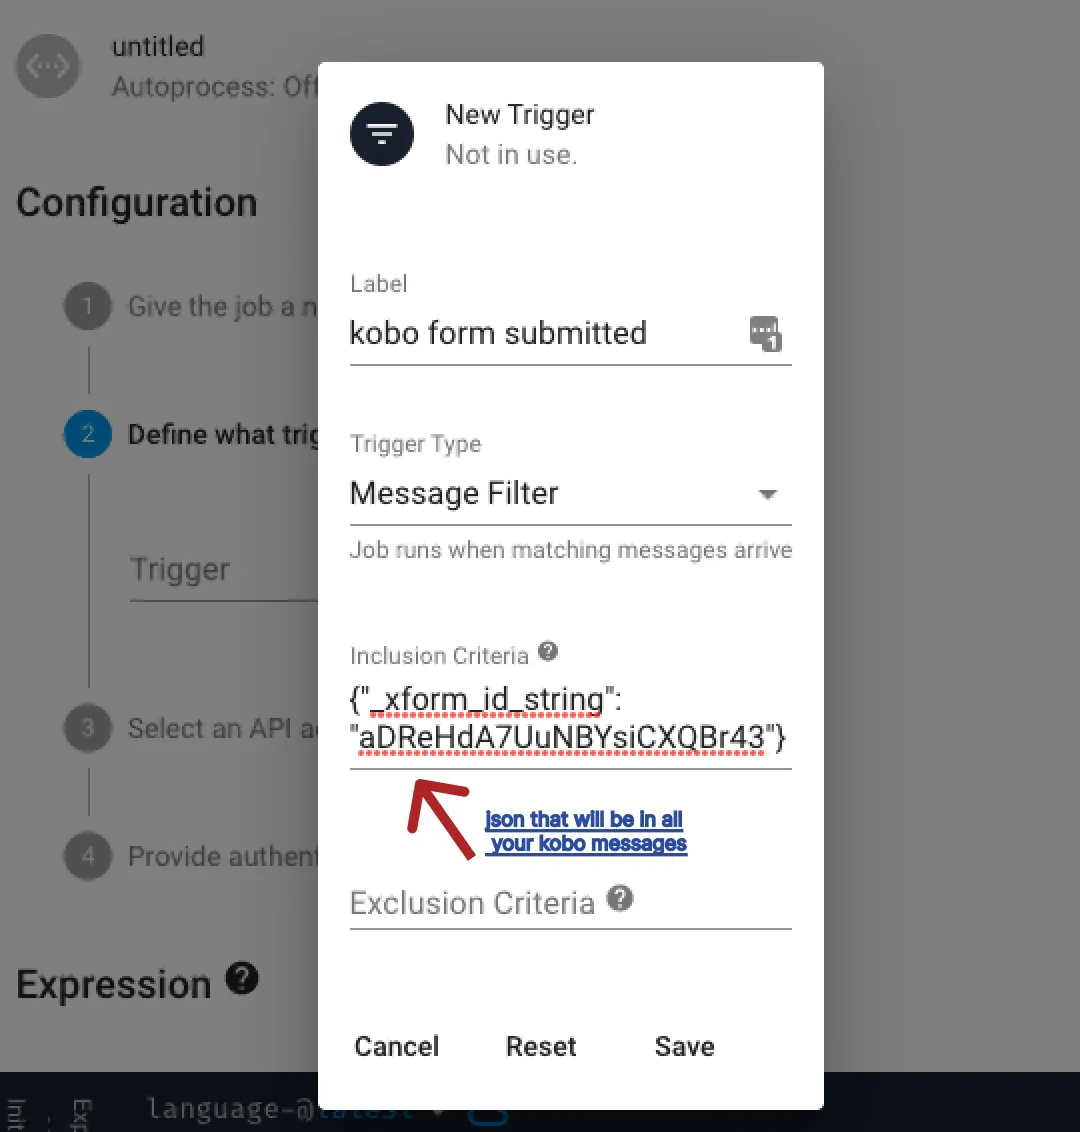
Every job needs a trigger, which determines when it should be run. A message filter is a type of trigger which allows you to trigger a job when a specific message comes into your inbox.
In this example, you want your job to be triggered by any message that has come
from the COVID 19 registration KoboToolbox form. Therefore the inclusion
criteria is the id string of the form which we saved earlier on:
{"\_xform_id_string": "aDReHdA7UuNBYsiCXQBr43"}. (Don’t forget to add curly
brackets "" around your inclusion criteria snippet.) This is found in the
message body sent by each submitted form response to your inbox.
This message filter will trigger your job whenever a message which includes the snippet comes into your inbox.
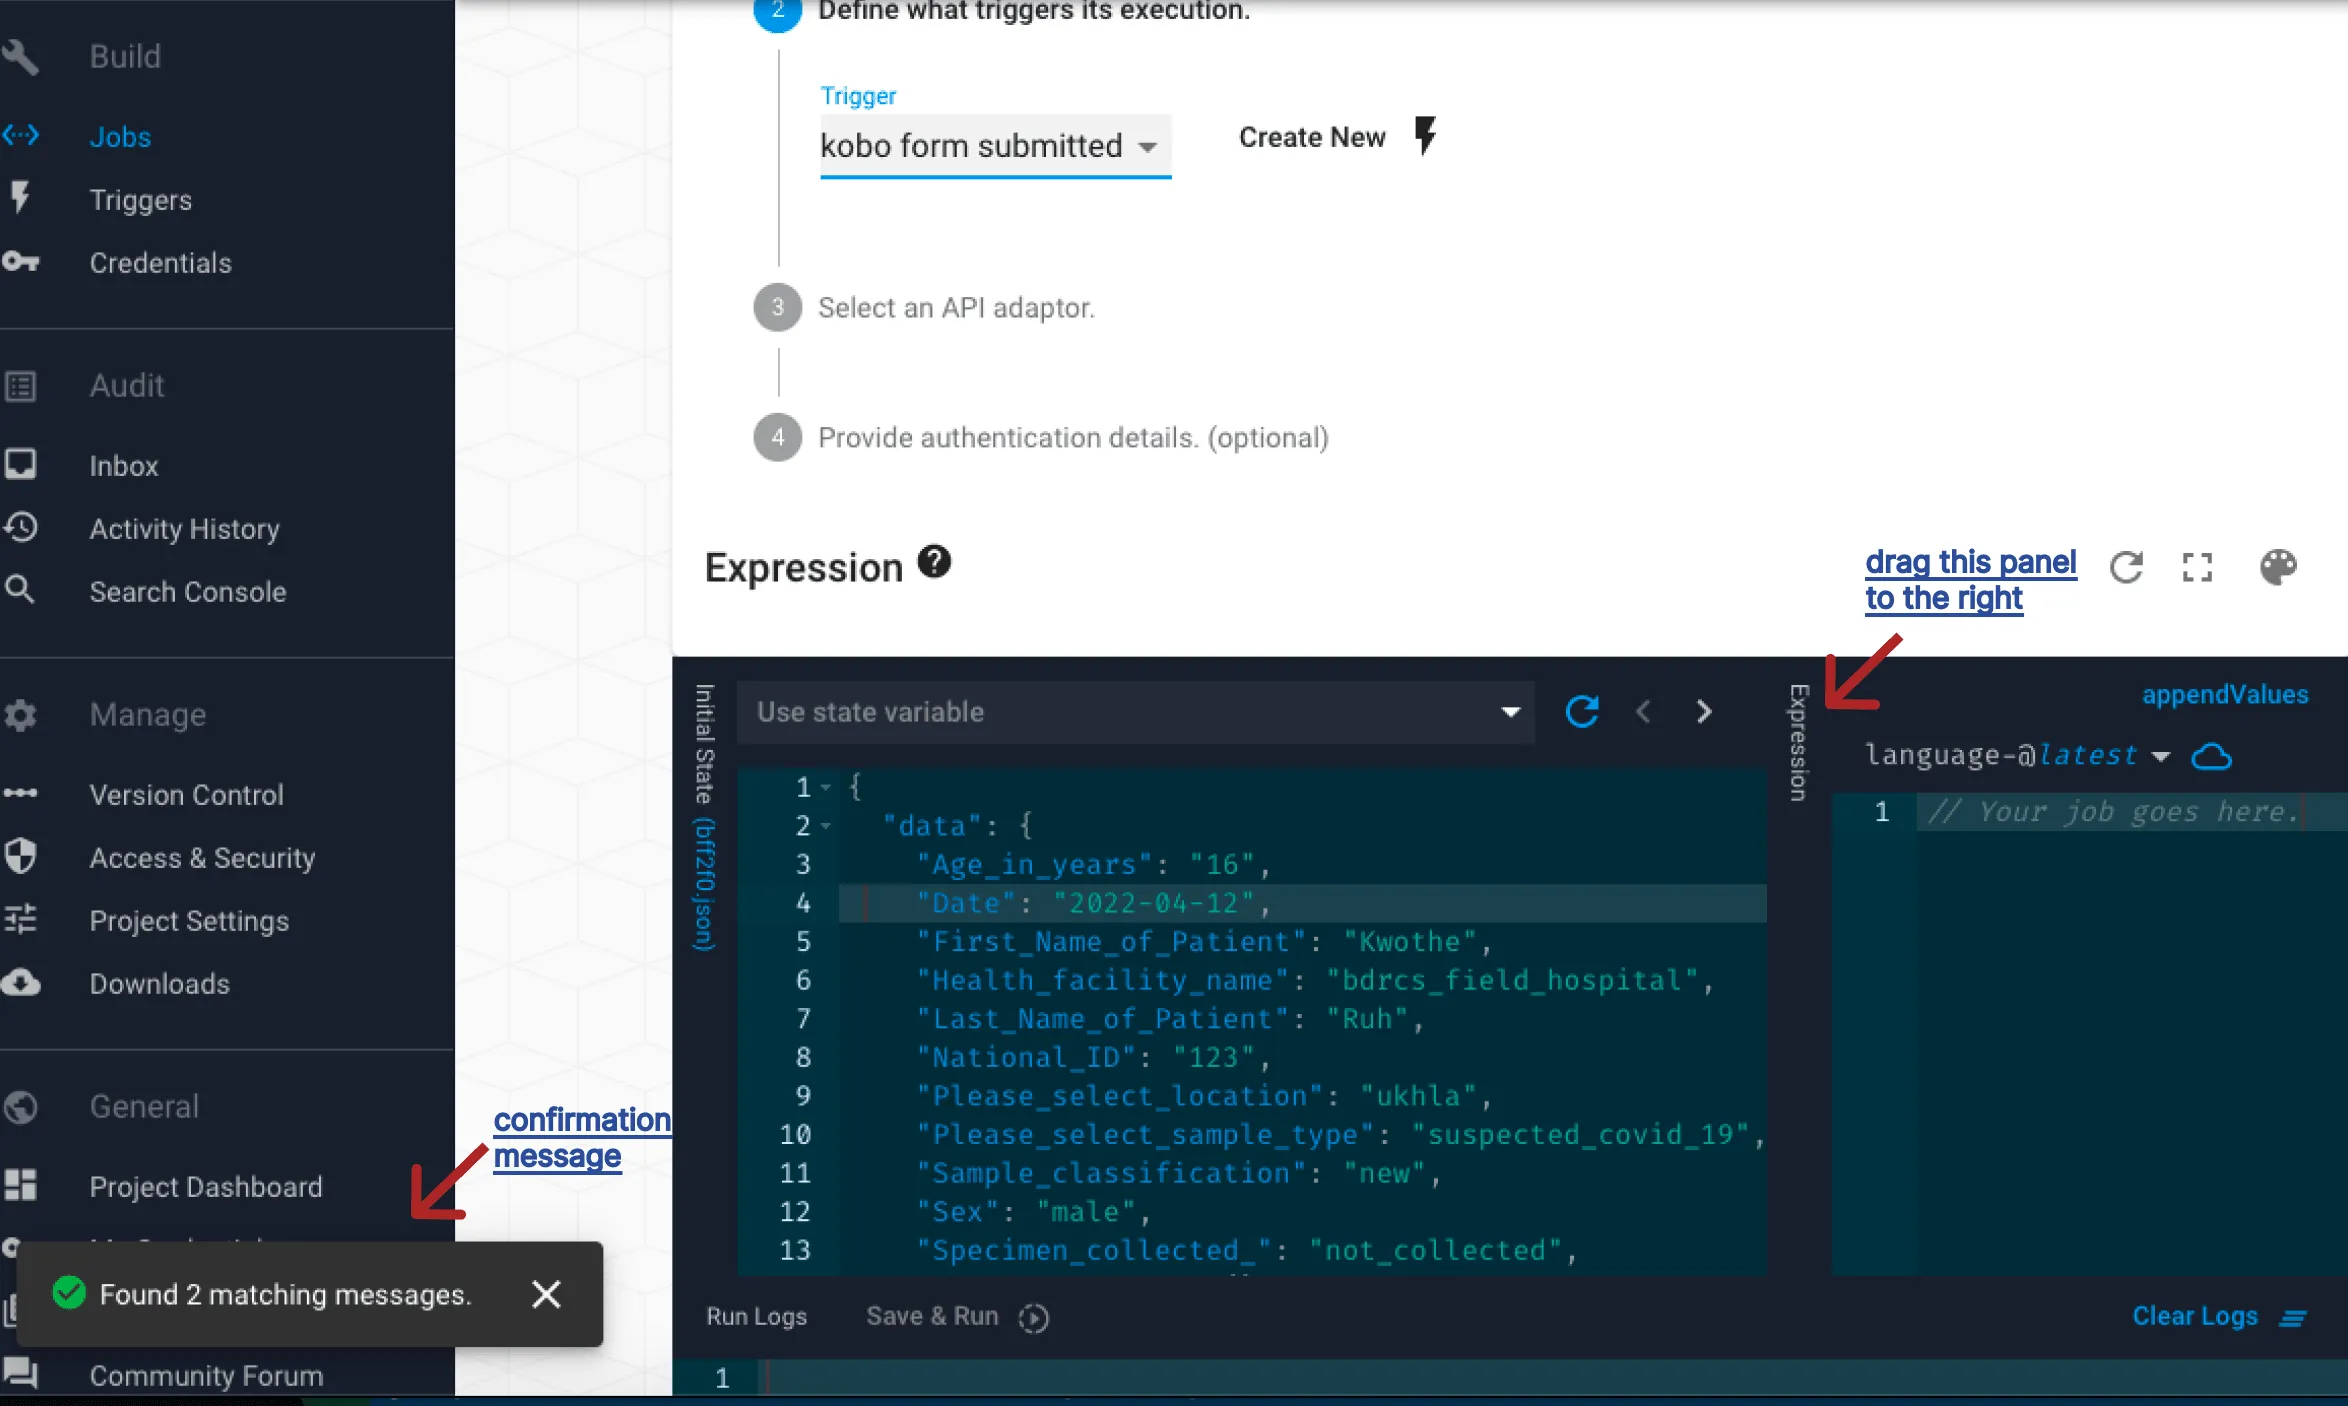
Save your trigger. You should see a confirmation message “Found x matching messages”. To see the data from your last message inside the initial state, drag the Expression panel to the right.
4.2 Select an API adaptor
Adaptors are preconfigured pieces of code that allow communication with destination systems.
In this example, you will send data collected from individual responses to your kobo form (append values) to google sheets.
Your API adaptor is therefore google sheets.
4.3 Choose your adaptor operation
Every adaptor allows you to perform different operations in your destination system. These operations are functions specific to every API adaptor.
Open up the inline documentation for the adaptor to see the available functions. Copy the appendValues function, then paste it into your Expression editor. It should look something like this.
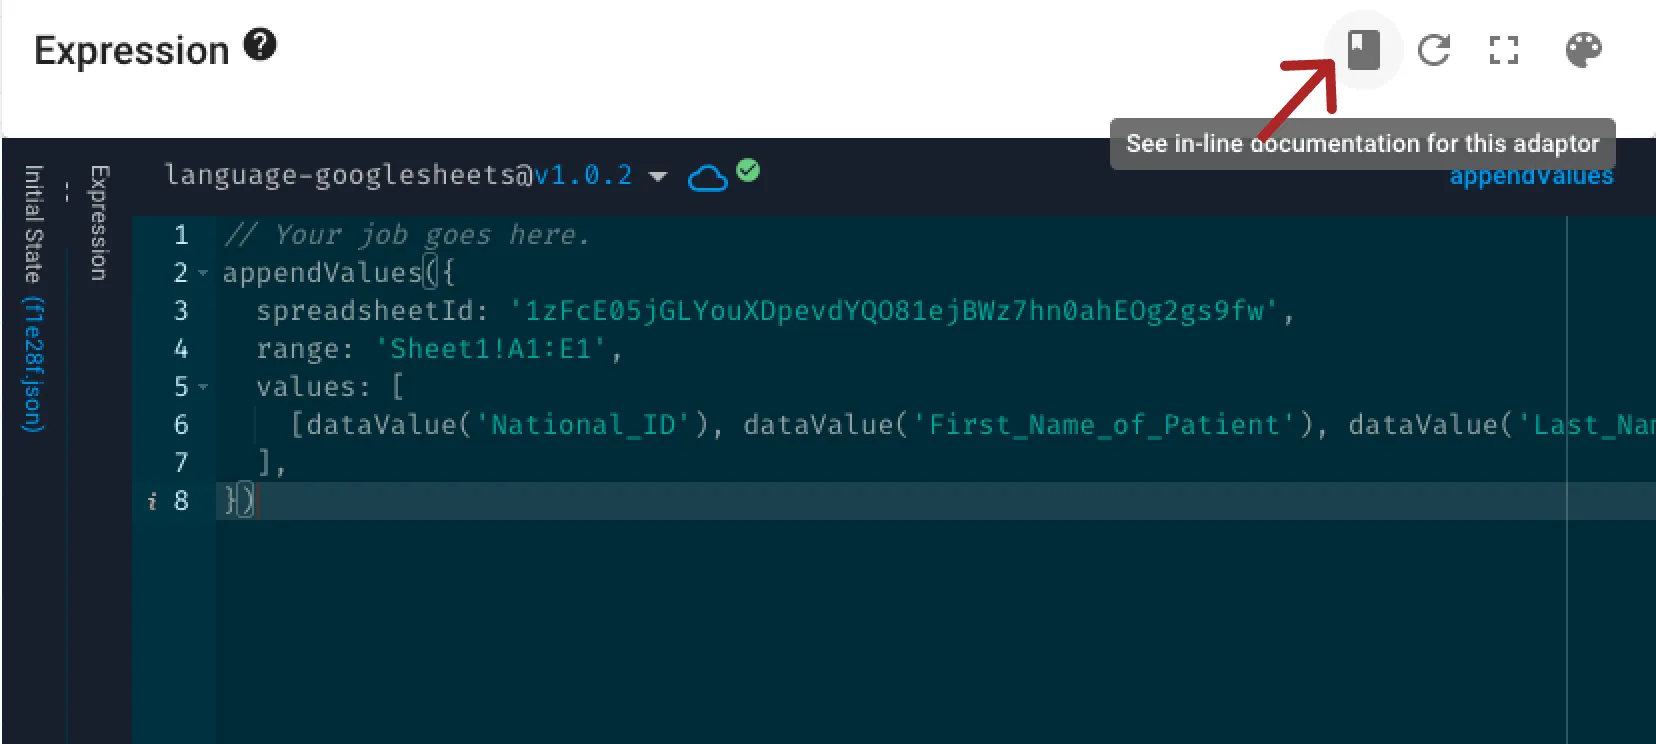
4.4 Edit the function in your expression editor
The function you copy pasted into your expression editor is a template that shows you what your function should look like. This means the text in quotation marks are just placeholders - they need to be replaced with the data entries you want to send.
First, get your spreadsheet ID from the URL of your google sheet (between d/
and /edit).
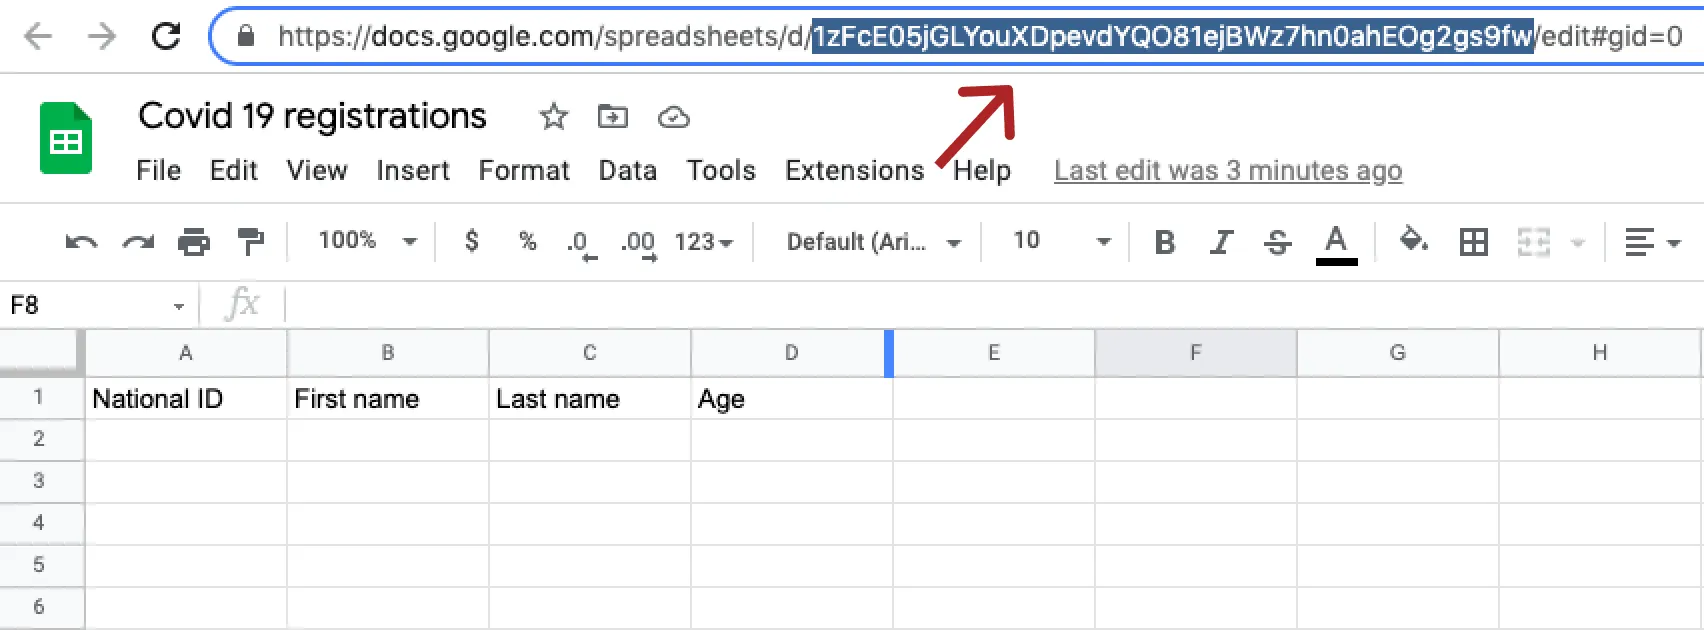
Copy and paste the ID into your appendValues operation to replace the
placeholder value for spreadsheetId. This ensures your values get appended to
the correct spreadsheet.
Next, open up the initial state to select each form value you want to send.
Let’s start with the ‘National ID’, as this is the first column in your google
sheet. Select the desired input from the dropdown menu located in the initial
state window and paste it to replace the placeholder text ('From expression')
inside values: []. Repeat this for the following values, and remove line 7 as
this would add a second row to your sheet.
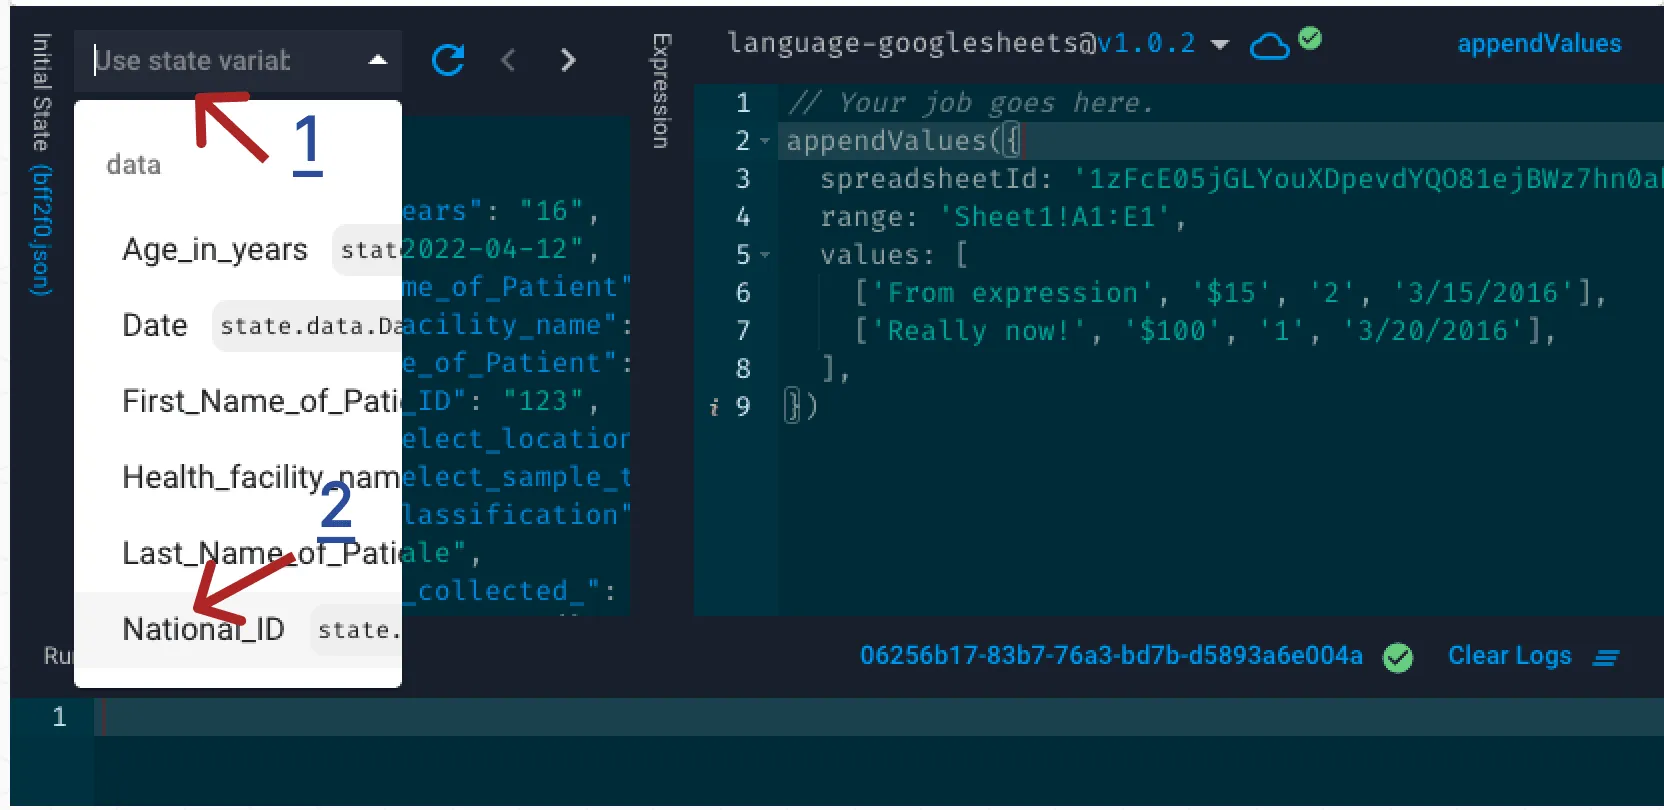
Your operation should now look like this:
appendValues({
  spreadsheetId: '1zFcE05jGLYouXDpevdYQO81ejBWz7hn0ahEOg2gs9fw',
  range: 'Sheet1!A1:E1',
  values: [
    [
      dataValue('National_ID'),
      dataValue('First_Name_of_Patient'),
      dataValue('Last_Name_of_Patient'),
    ],
  ],
});
Click Save and run to get a ‘Success!’ response in the run logs and see that
the data entries between the square brackets [ ] have been added to your google
sheet.
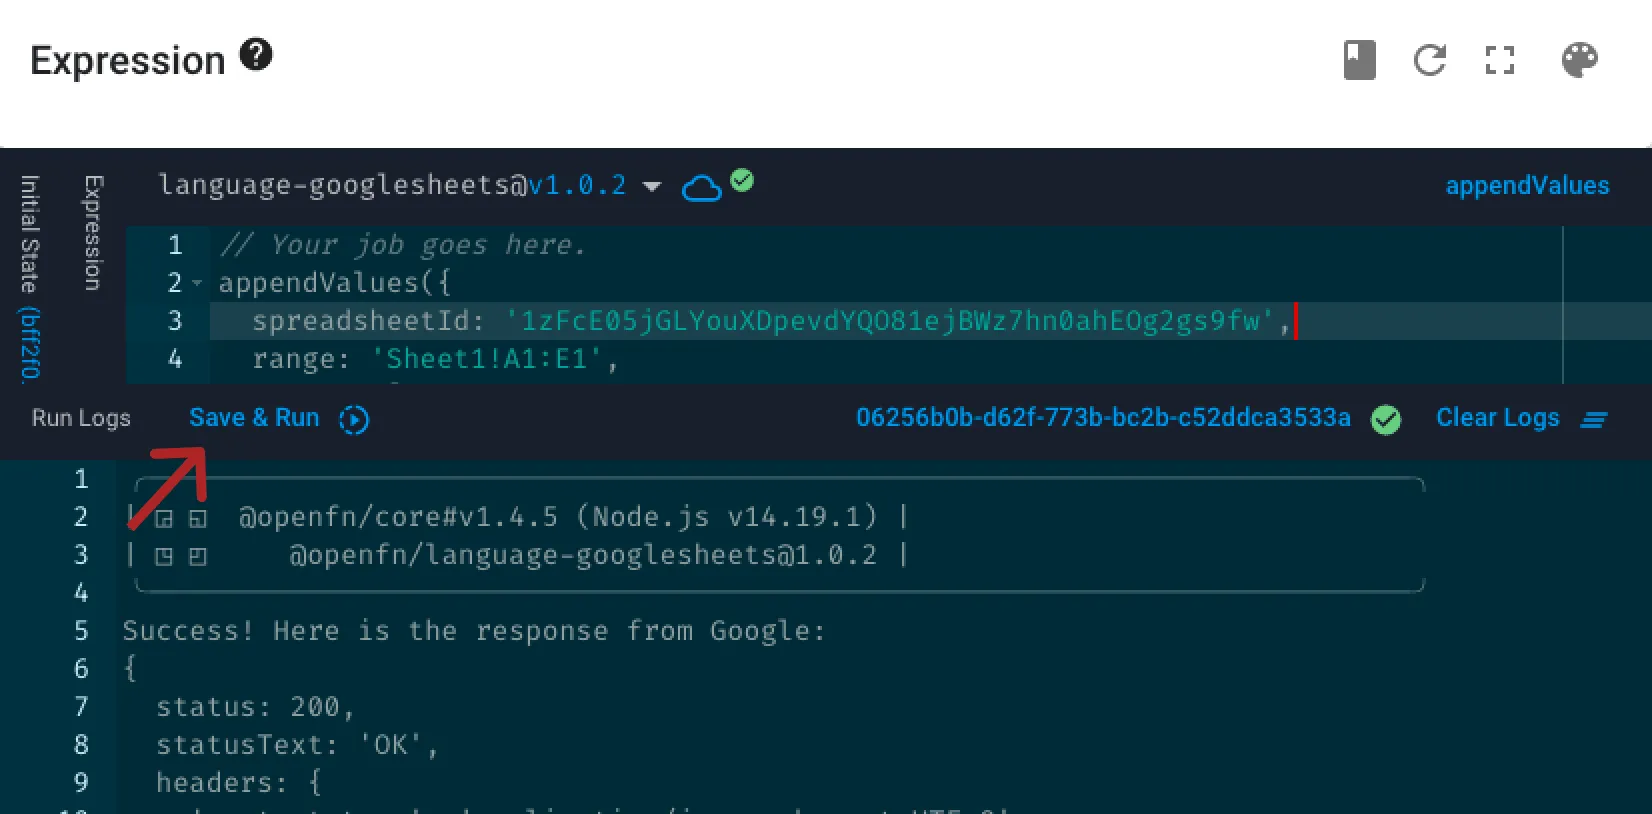
5. Set autoprocess to true
You have now written and tested your job. In order to run your job automatically every time a message matches the trigger inclusion criteria, turn on auto-process.
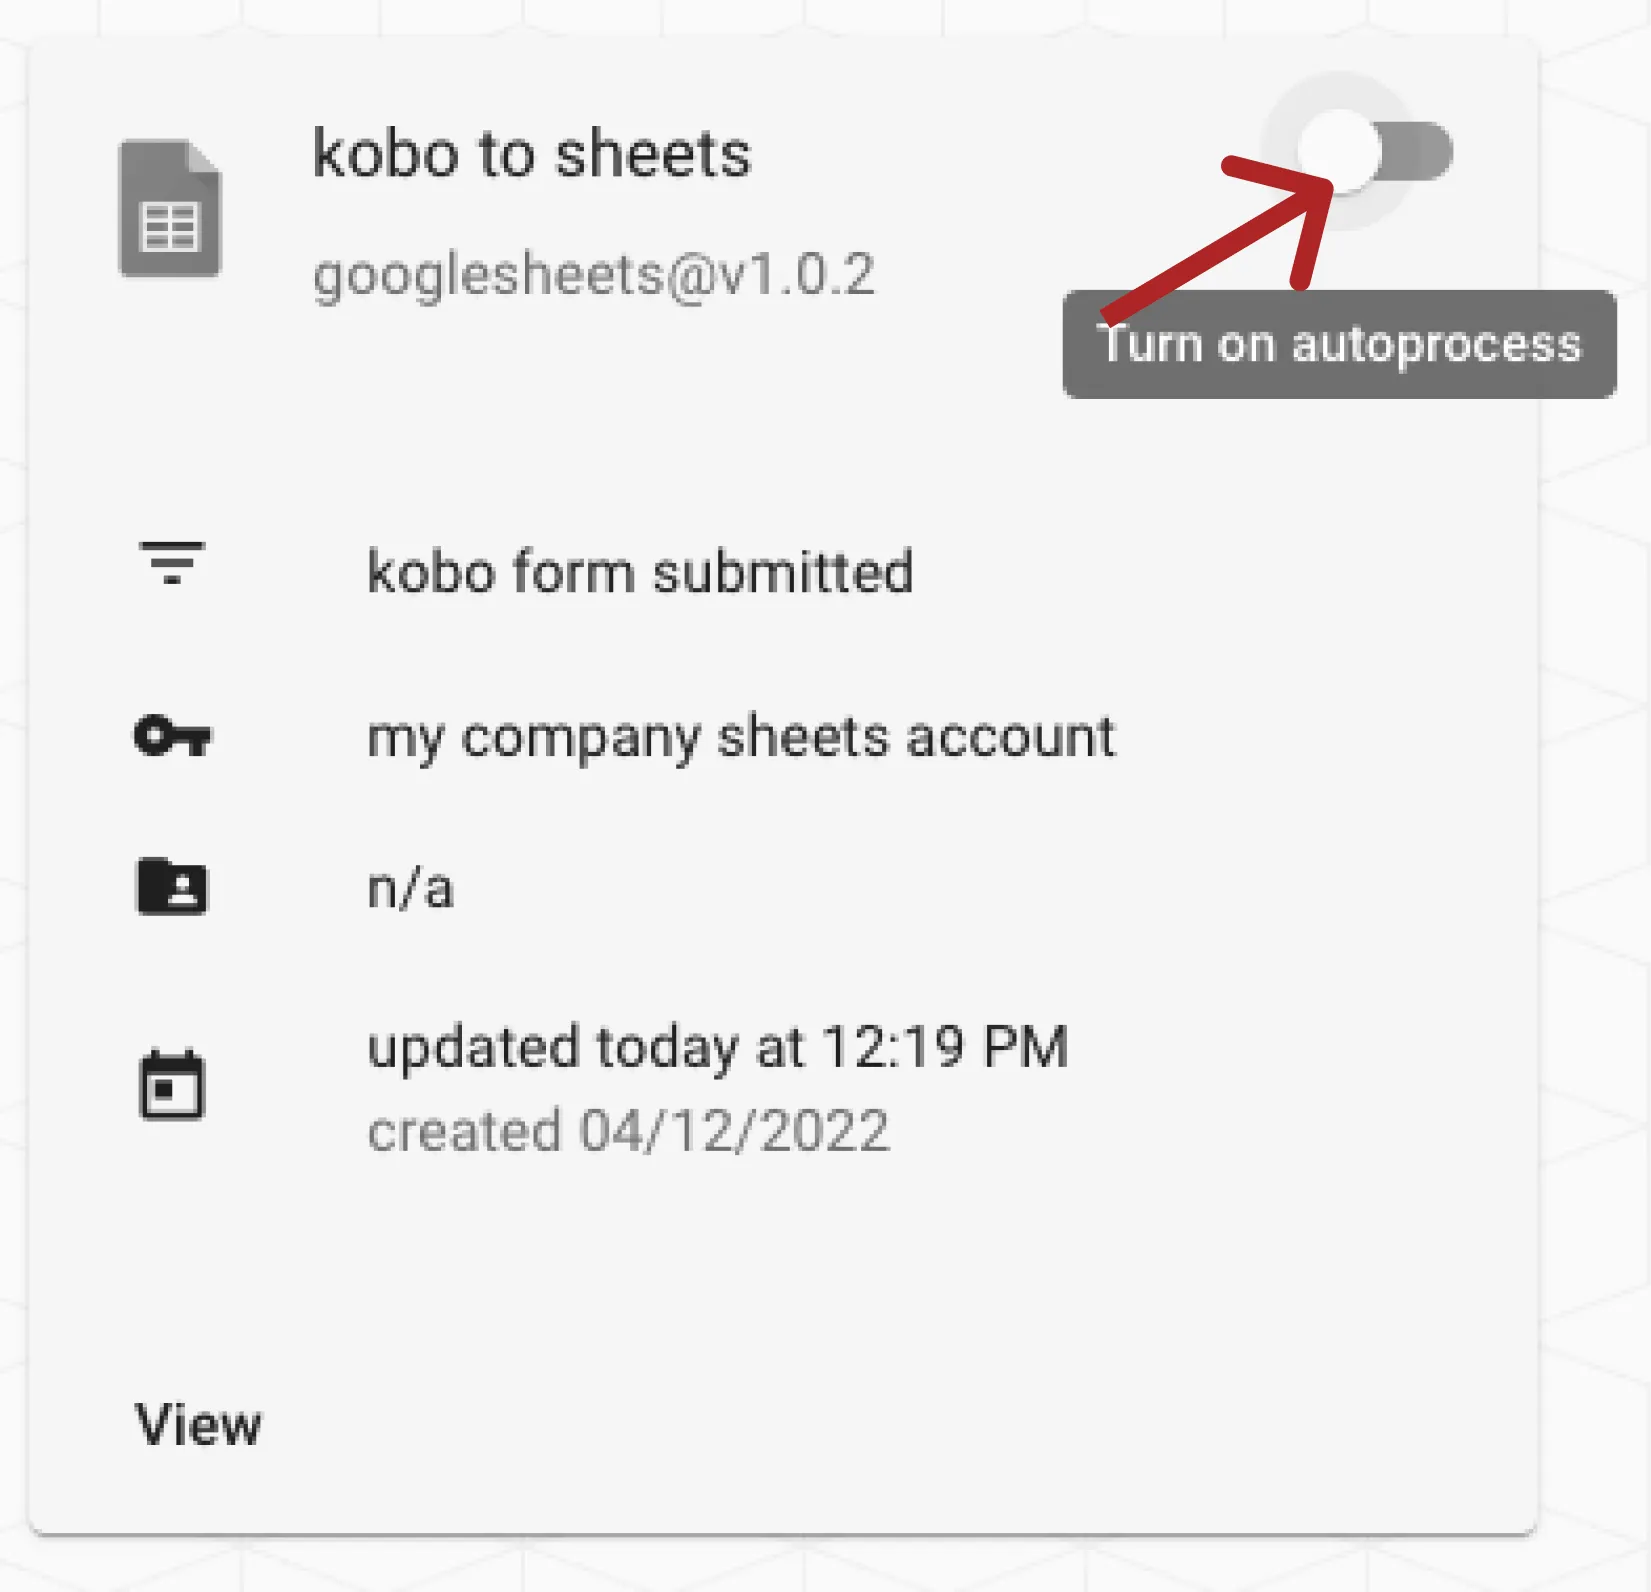
You're all set! Try out your job by submitting another form response to see the data automatically populate your google sheet.