Microservice
Please note that OpenFn/microservice and OpenFn/devtools are being deprecated and replaced by OpenFn/Lightning, When lighting is released.
Intent
OpenFn is used by numerous health and humanitarian organizations around the world to scale their programs through real-time interoperability, systems integration, and workflow automation. OpenFn/microservice makes use of OpenFn's open-core technology—namely OpenFn/core, OpenFn/engine, and the various OpenFn adaptors—to create standalone microservices which can be deployed on any hardware.
This microservice approach helps to ensure that governments and NGOs are never locked-in to OpenFn's SaaS offering, and can port their existing jobs, triggers, and credentials from OpenFn.org to their own infrastructure easily.
Introduction
Similar to platform, OpenFn/microservice runs on project.yaml files. This
means that when organizations or governments have an open-source license
requirement, all their jobs, credentials, and project configurations can be
exported from OpenFn's iPaaS and used to create a microservice deployment.
While this approach doesn't provide the OpenFn platform front-end with its
various project management and configuration features, it's perfect for groups
with DevOps experience and 100% compatible with the platform. You can even build
and test entire projects on platform and then export the project.yaml file
to run on your own servers using microservice.
This microservice approach provides flexibility to governments and NGOs, so they are never locked-in to OpenFn's SaaS platform offering. At any time, an organization can port their existing jobs, triggers, and credentials from OpenFn.org to run with our FOSS integration toolkit, using their own infrastructure.
Prerequisites
Familiarity with other elements of OpenFn's open source integration toolkit is helpful when considering the microservice approach.
Docker up and running
Assuming you've got an .env and a sample project at ./sample-project
directory with a project.yaml spec:
docker-compose up
You can configure either the compose file or the .env, or run the container
using docker run:
docker run -v <path-to-your-project-folder>:/home/microservice/<path-to-your-project-folder> \
  --env-file <path-to-your-env-file> \
  --network host \
  openfn/microservice:v0.3.2
Development up and running guide
- Clone this repo with
git clone git@github.com:OpenFn/microservice.git - Enter the directory with
cd microservice - Install dependencies with
mix setup - Run the tests with
mix test - Make a project directory to hold your project artifacts with
mkdir sample-project - Create a new project specification with
cp project.yaml.example ./sample-project/project.yaml - Create a
.envfile withcp .env.example .env - Install necessary adaptors via
npm install @openfn/language-http --prefix priv/openfn/runtime/node_modules --no-save --no-package-lock --global-style - Start your microservice server with
env $(cat .env | grep -v "#" | xargs ) iex -S mix phx.server
Up and running inside Docker
- Build a docker image with
docker build -t openfn/microservice:v0.3.0 . - Run with the docker run command
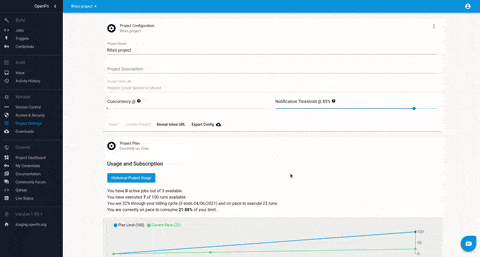
Project configuration
You can configure the jobs, triggers, credentials and language packs used in
your microservice in the project.yaml config file.
First setup using the sample config
The sample project configuration file describes an example project setup to help you get acquainted with this structure.
By default microservice is configured with 4 sample jobs:
job-1is triggered when a matching message arrives to the inbox (seetrigger-1).recurring-jobis a timed job scheduled to run every minute and is linked to theevery-minutecron trigger.flow-jobandcatch-jobrun after thesuccessandfailureof job-1, respectively.
All of the jobs are configured with the language pack openfn/language-common.
In the default sample configuration a new message posted to
localhost:4000/inbox that matches trigger-1 (i.e. the message contains
"number":2) is greeted with an asynchronous acknowledgement receipt
(HTTP 202 Data accepted and processing has begun) and will trigger job-1
to run.
You can try this out with the following snippet:
curl -X POST -H "Content-Type: application/json" \
 -d '{
  "number":2,
  "surveyId": 37479
}' \
 http://localhost:4000/inbox
Posting a message not matching any of the triggers (e.g. “number”:3) equally
prompts an acknowledgement but doesn’t trigger any jobs.
Example message post for this non-match scenario:
curl -X POST -H "Content-Type: application/json" \
 -d '{
  "number":3,
  "surveyId": 37479
}' \
 http://localhost:4000/inbox
HTTP post requests made to
localhost:4000/inbox will be processed by the
Receiver, according to the credential, expression, and adaptor defined
in the project configuration YAML file.
Time-based jobs will be run by Engine according to the credential,
expression, and adaptor defined in your project.yaml file.
Setup from your existing OpenFn platform project
If you have a project configured on OpenFn, you have two ways for exporting your config on the Project Settings page and running your project in microservice.
-
If you export as
project.yaml, you can download your settings inyamlformat from your platform project Download page or from a link in the auto-generated email sent to your address. You can plug this file into your environment as set up using the Development Up and Running Guide. -
If you export as
microservice.zip, you'll get your microservice folder ready to run withdocker, containing
- a
docker-compose.yamlconfig file - a project folder containing
project.yaml .envfile with the default environment variables for docker- a
Readmefile
cd into the folder and run the project with docker-compose up. If you don't
have the docker image, it will be auto-pulled from hub.docker.com.