Automated Migration
You can use our export and deploy functionality to self-migrate your existing OpenFn project configuration from v1 to v2, or between two different v2 instances. This guide walks you through the steps.
v1-to-v2: Automating migration of your OpenFn v1 Project to v2
You can export your existing project configuration containing the jobs and triggers from v1, then use the OpenFn CLI tool to deploy it to your v2 project space. To start, make sure you have the latest version of the CLI installed (see CLI docs). To learn more about the project configuration as code, head over to our Portability page.
In order to be able to deploy the project, you need to have at least admin
access to the v2 project you're deploying to. In addition, if you're migrating
to a project on the OpenFn-hosted platform (on
app.openfn.org) make sure you have the right
pricing plan to accommodate the number of
workflows, runs, and features you desire for your v2 project.
Exporting Your v1 Project
- Navigate to
Project Settingson your https://v1.openfn.org/ project. - Click
Export Configunder the Project Configuration section and chooseExport for v2 (migrate). You'll receive a download link by email, and you can also access the link from theDownloadsmenu. - Download the exported
project.yamlfile and save it in a folder on your computer.
Setup and Deployment to v2
- In a code editor on your computer, create a new
config.jsonfile with the following content:
apiKey: Specify your API Key/ Personal Access Token from your v2 user account. See this page for how to to create one.specPath: Specify the path to theproject.yamlfile exported from your v1 project (wherever you saved it on your computer - e.g.,/usr/rita/Downloads/my_downloaded_project.yamlfile).statePath: Do not edit.endpoint: Set as the web URL where your v2 instance is hosted. If you're using the OpenFn-hosted platform, keep it as "https://app.openfn.org".
See below example config.json file to use as a template.
{
  "apiKey": {"your-v2-api key"},
  "specPath": "4474_2024045092123Z_v2_project.yaml",
  "statePath": ".state.json",
  "endpoint": "https://app.openfn.org"
}
- Next open up the OpenFn CLI. First, you need to pull the config of your v2 project. Start by copying the project ID from the URL of your v2 project like so:

- Then run the
openfn pullCLI command below with the project ID and the path to yourconfig.jsonfile created above.
openfn pull {your-project-id} -c config.json
This will output a new project.yaml file and a .state.json (which is your v2
project configuration, including any Workflows already configured on v2).
- Open up your exported v1
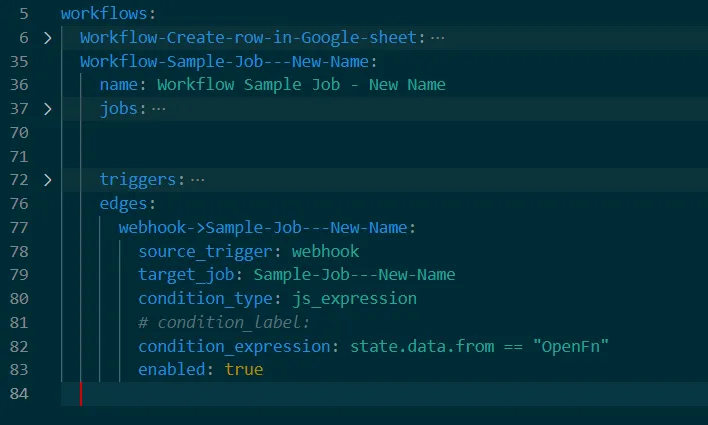
project.yamlfile, copy everything from underworkflows:
- Paste the copied config in the bottom of
workflowssection of your the newly created v2project.yaml. (You are manually copying over the v1 config over to your v2 project's Workflows.)

- You may want to disable all of your workflows at this point, so that when
they're deployed to v2 they are in a disabled state by default. This also
allows you to import all of your workflows regardless of how many active
workflows your v2 subscription allows for. To do this, find all the
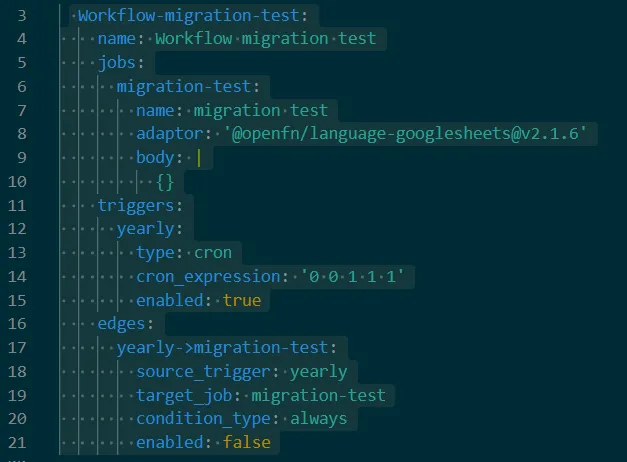
triggersin yourproject.yaml(by default, they will be set totrue), and set them tofalse:
workflows:
  Sample-Workflow:
    name: Sample Workflow
    jobs:

    triggers:
      webhook:
        type: webhook
        enabled: false
- Finally, once you're happy with your new v2
project.yamlfile, it's time to deploy the new config to your v2 project. Run the following command in the CLI to deploy.
openfn deploy -c config.json
When prompted, confirm you want to deploy by typing y ("yes").
- If successful, verify the new Project config on your v2 app.
Ask on Community if you run into issues or questions. For an overview of all the recommended v1-to-v2 migration steps, check out the Migration Steps docs.
v2-to-v2: Automating project migration from one OpenFn v2 instance to another
If you want to migrate a project from one instance of OpenFn v2 (e.g., the cloud-hosted app.openfn.org) to another (e.g., your local deployment of the v2), you can also leverage the OpenFn CLI. To start, make sure you have the latest version of the CLI installed (see CLI docs).
- Export the project you want to migrate from your v2 instance. Go to
Settings, and underSetupclickExport project. Yourproject.yamlfile will be automatically downloaded. - Follow the steps for Setup and Deployment to v2 in the section above.
To learn more about OpenFn deployment, be sure to check out our planning guide and technical guidelines.