Workflows
Workflows are automated processes or sets of instructions that accomplish a task. In OpenFn configuration, a Workflow consists of a Trigger, Steps, and Paths that define automation logic. Read on to learn how to configure Workflows.
Create Workflows
To create a new Workflow in your Project:
- Go to the Workflows page.
- Click the Create new workflow button.
- Give your Workflow a descriptive
Name(e.g.,Register patients,Refer cases,Monthly payroll). - Choose your Trigger
- Edit your first Step
- Modify the Path Condition, if needed, to define when the Workflow should proceed to the next Step.
- Configure more Steps as needed
Check out the video overview below to learn how to create a Workflow.
Merging branches and Skipping Steps
The workflow builder allows branch merging and skipping steps. To merge two or more steps into one step or to skip some steps:
- Hover on the step you want to merge or initiate a skip
- You will see a plus icon
- Click on the plus icon and drag to create a path
- Drop the new path on the desired step in your workflow
Looping workflows are not supported so you have to connect paths to downstream steps. When using branching and skipping paths, you can use edge conditions like with any other step.
Run Workflows
Workflows will run automatically when they are "enabled"—i.e., when their trigger is turned on. A webhook trigger will run your workflow whenever a request is received at that trigger's URL, and a cron trigger will run a workflow whenever its cron schedule matches the current time.
Please note that workflows are disabled by default. When you are ready to have your workflow running, you have to manually enable the workflow.
Enabling or Disabling a Workflow
There are two ways to disable or enable a workflow in your OpenFn project:
- via the workflow state toggle
- via the workflow trigger
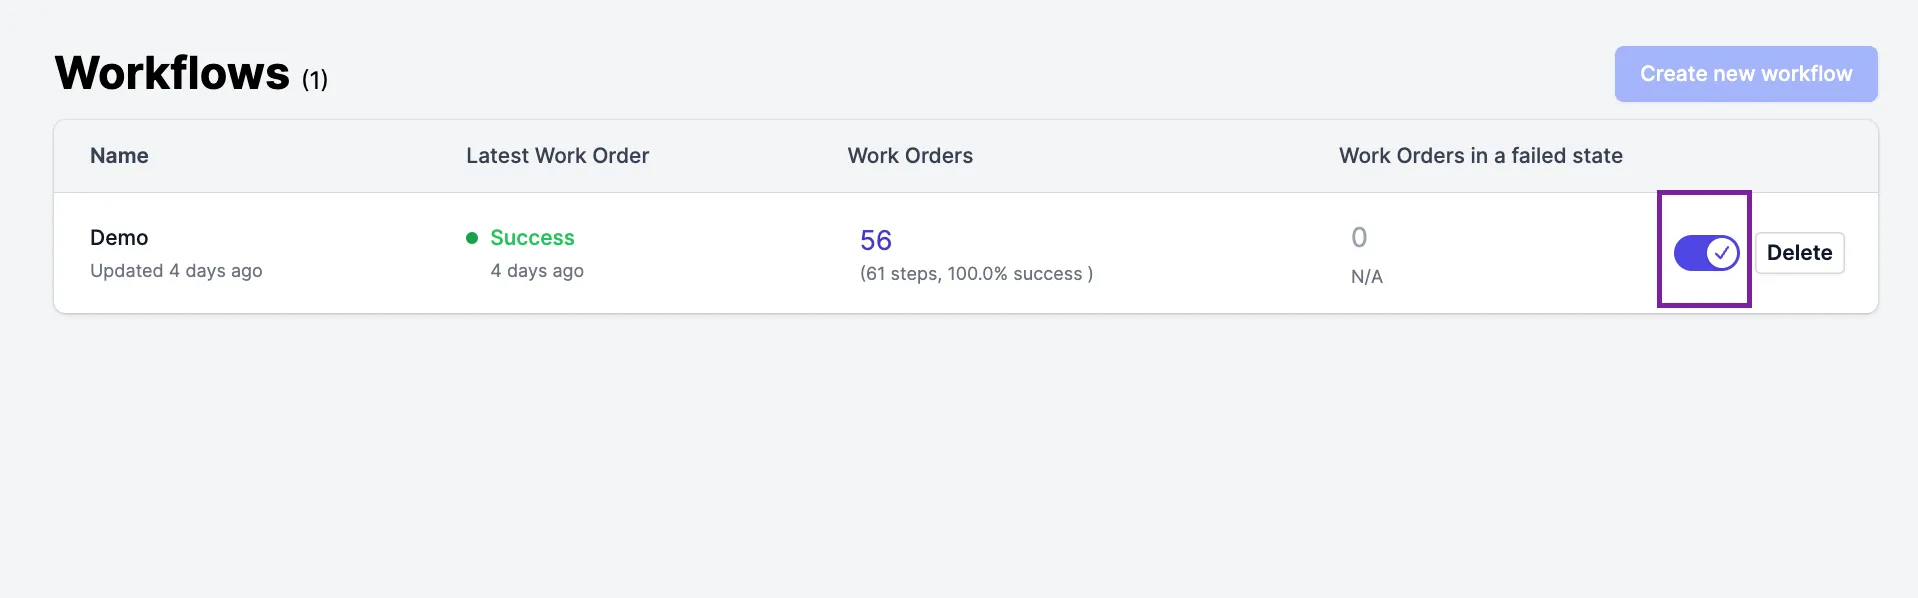
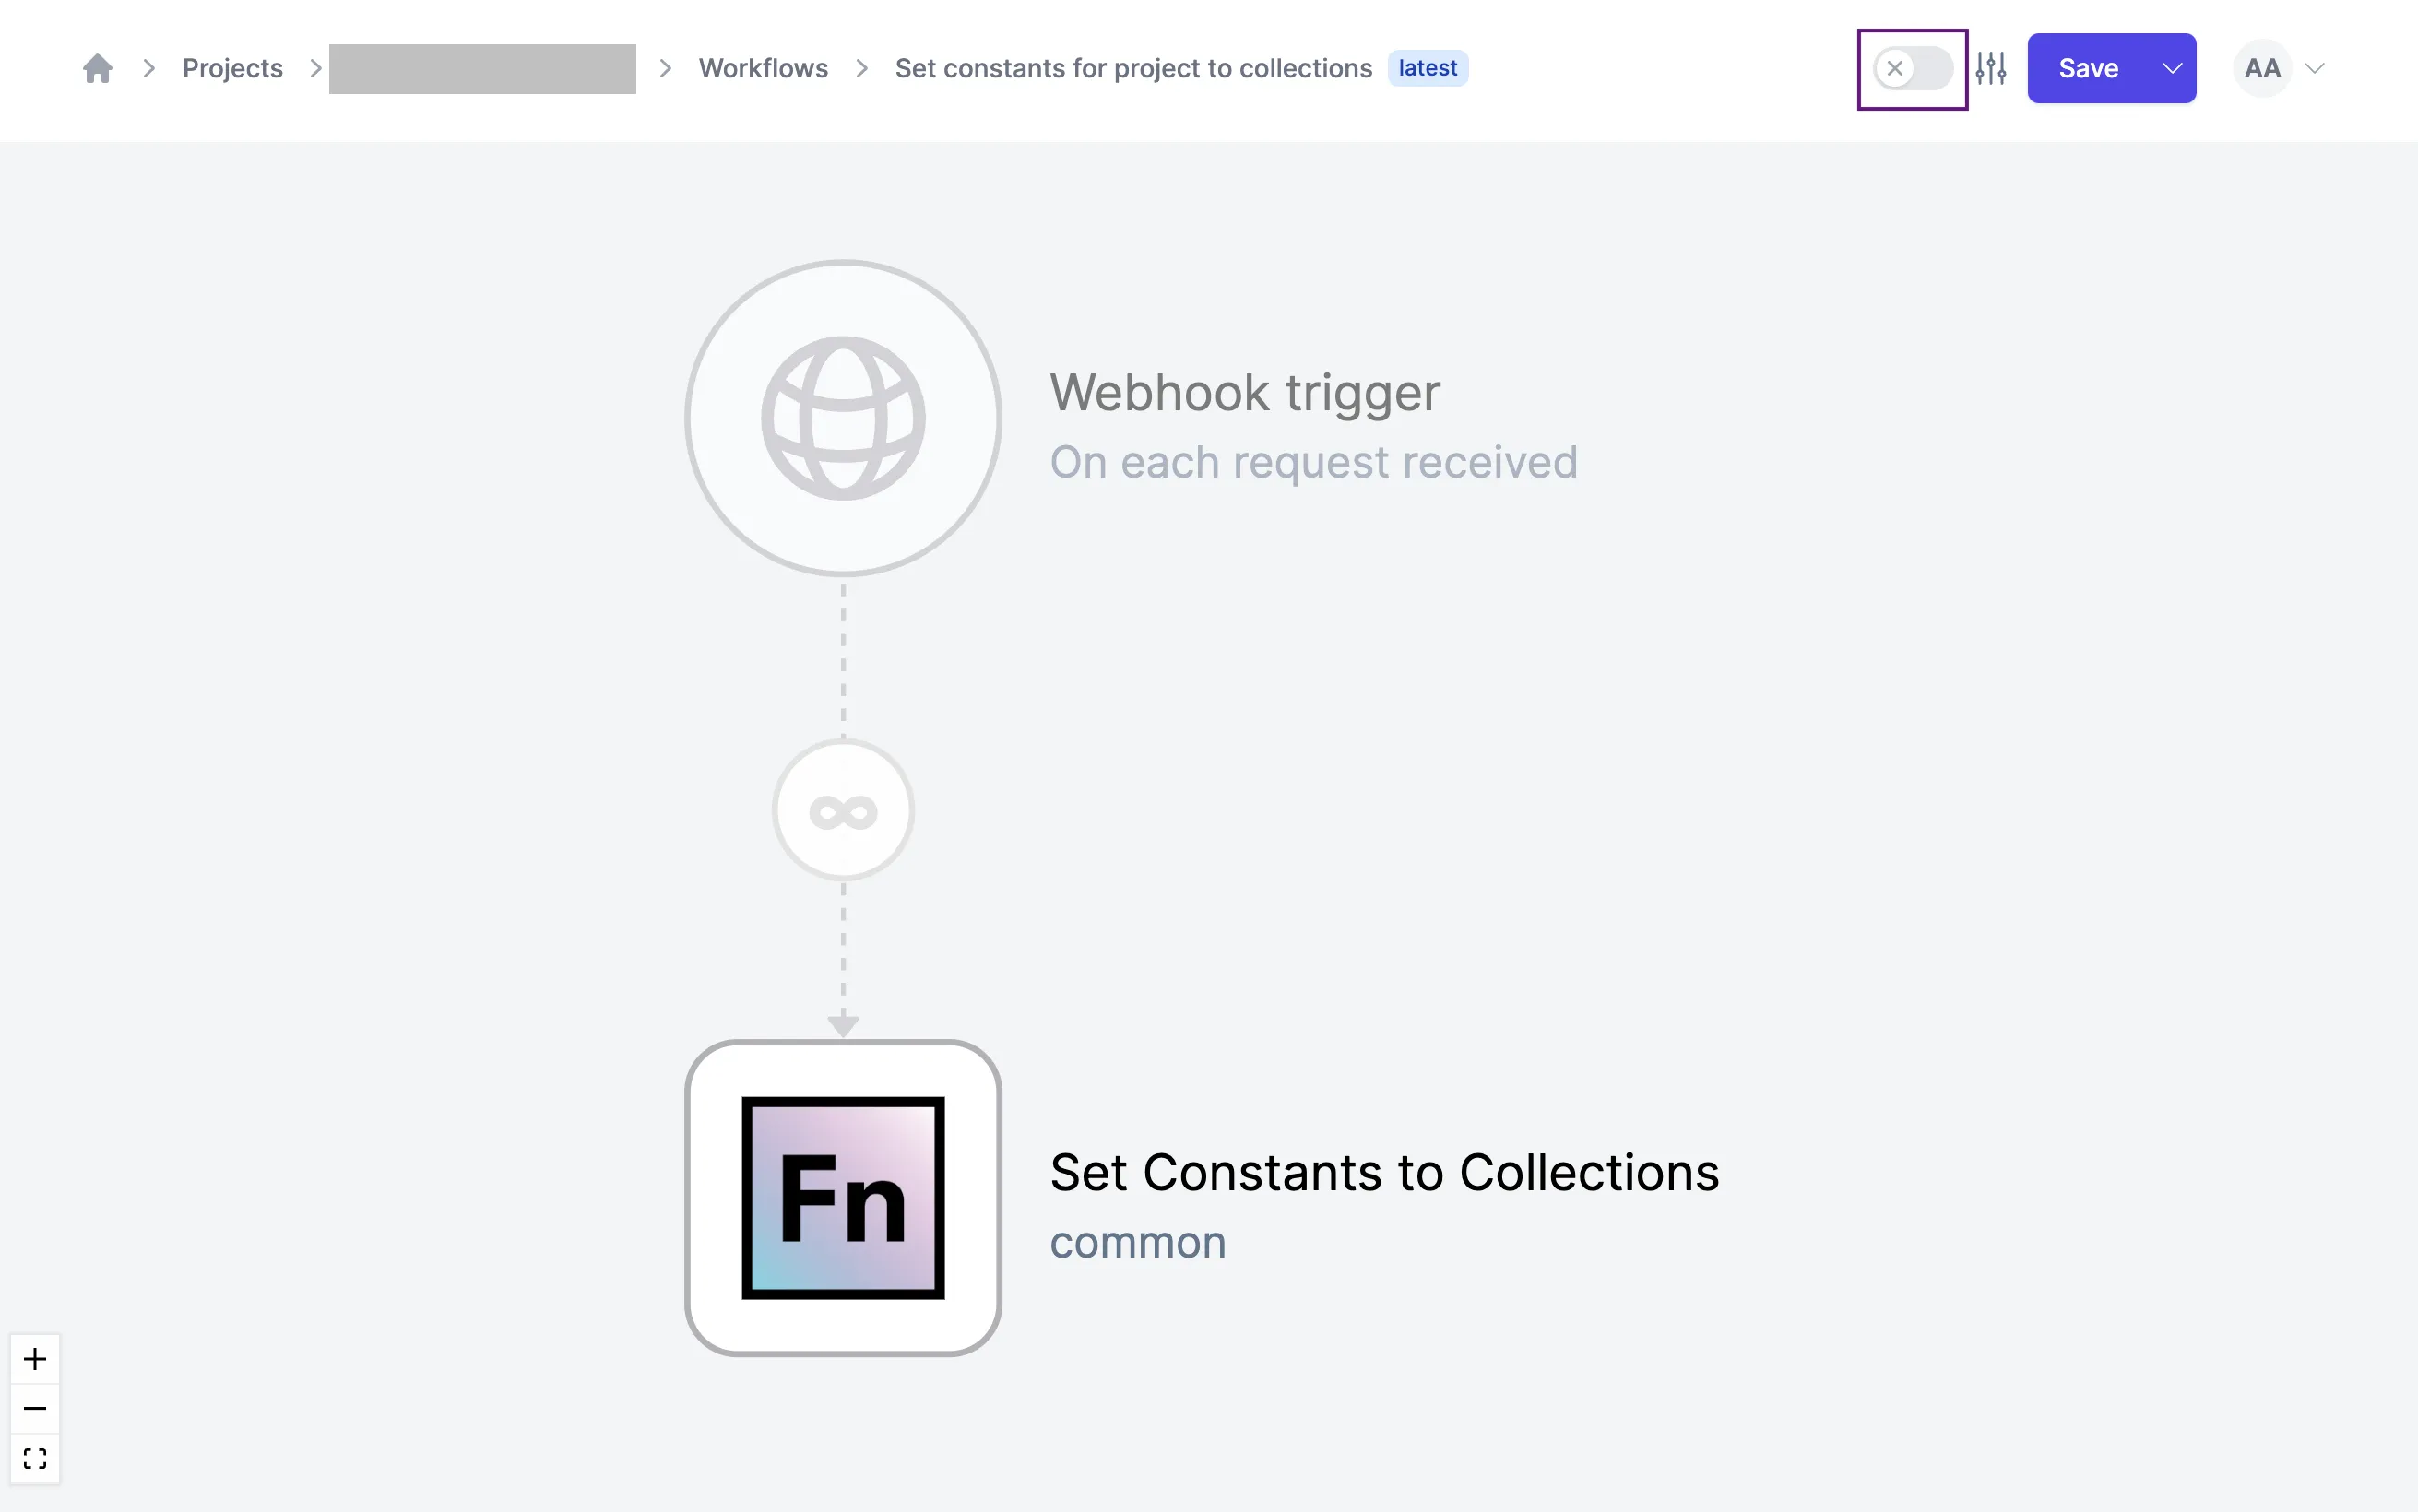
Via the workflow state toggle
You can enable or disable your workflow by using the toggle button located on the corresponding row in the project workflows list or the toggle on the navigation bar in the workflow canvas.
The screenshot below shows an enabled workflow in the workflow list.
The screenshot below shows a disabled workflow in the workflow canvas.
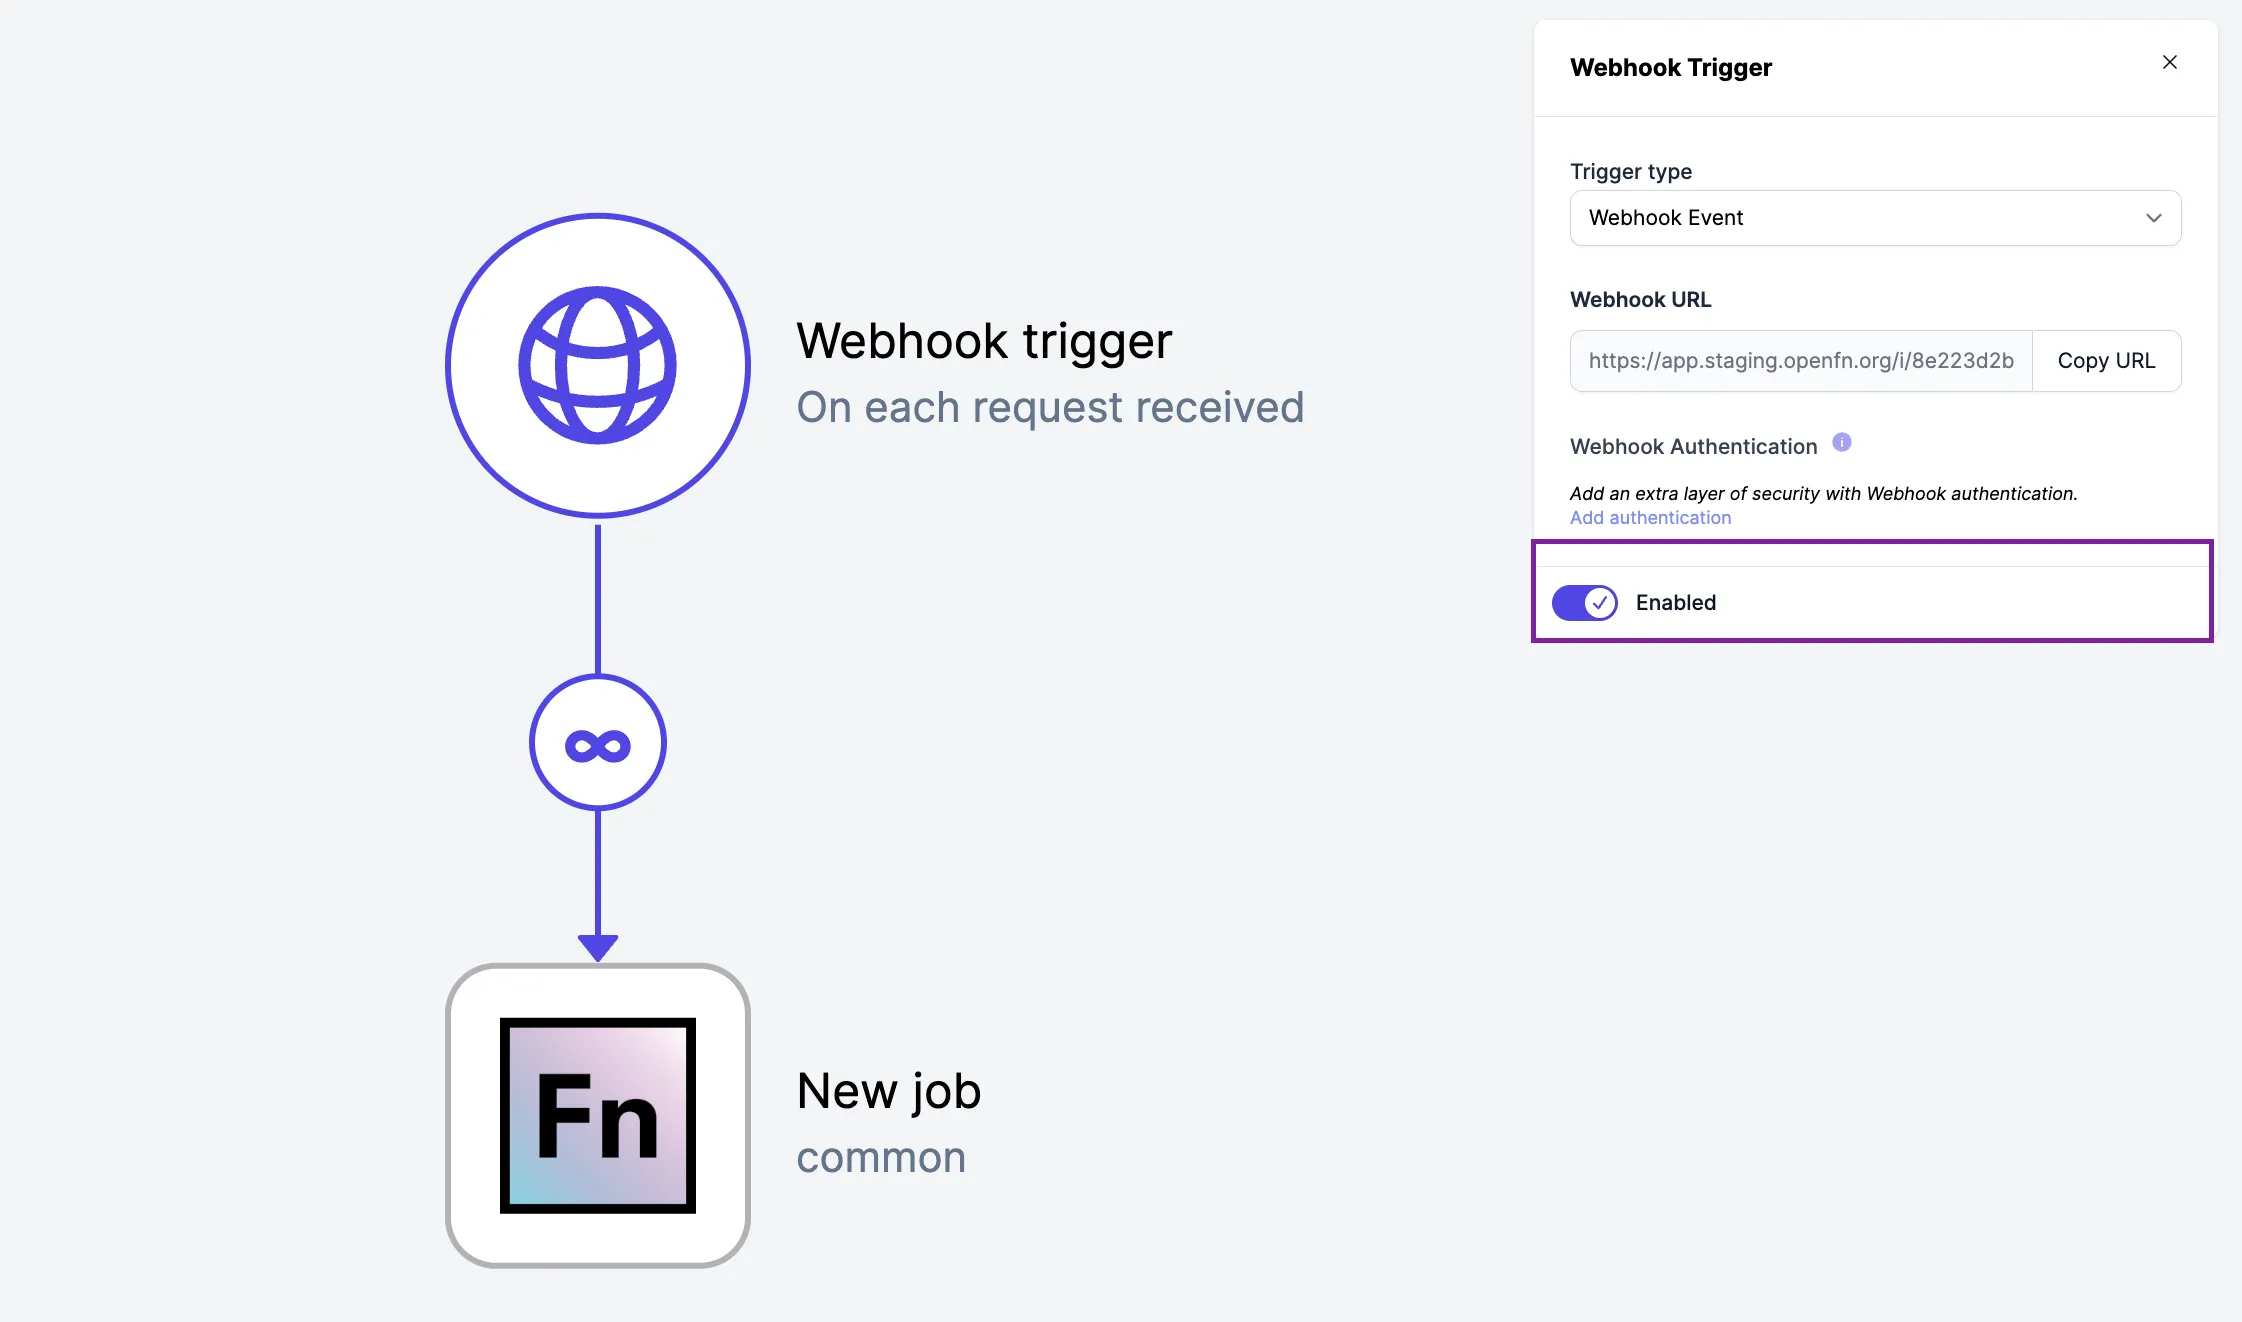
Via the workflow trigger
To enable or disable a workflow via the workflow trigger, select the trigger icon on the canvas and use the toggle in the configuration panel to toggle the workflow state.
Manual Runs
Check out the video for a quick overview.
You can run a workflow manually in three ways:
With an empty input
This is the default behavior and the input dataclip for your run will be {}.
With a custom input
You can type, copy/paste, or import (browse your file system or drag & drop) any file with valid JSON.

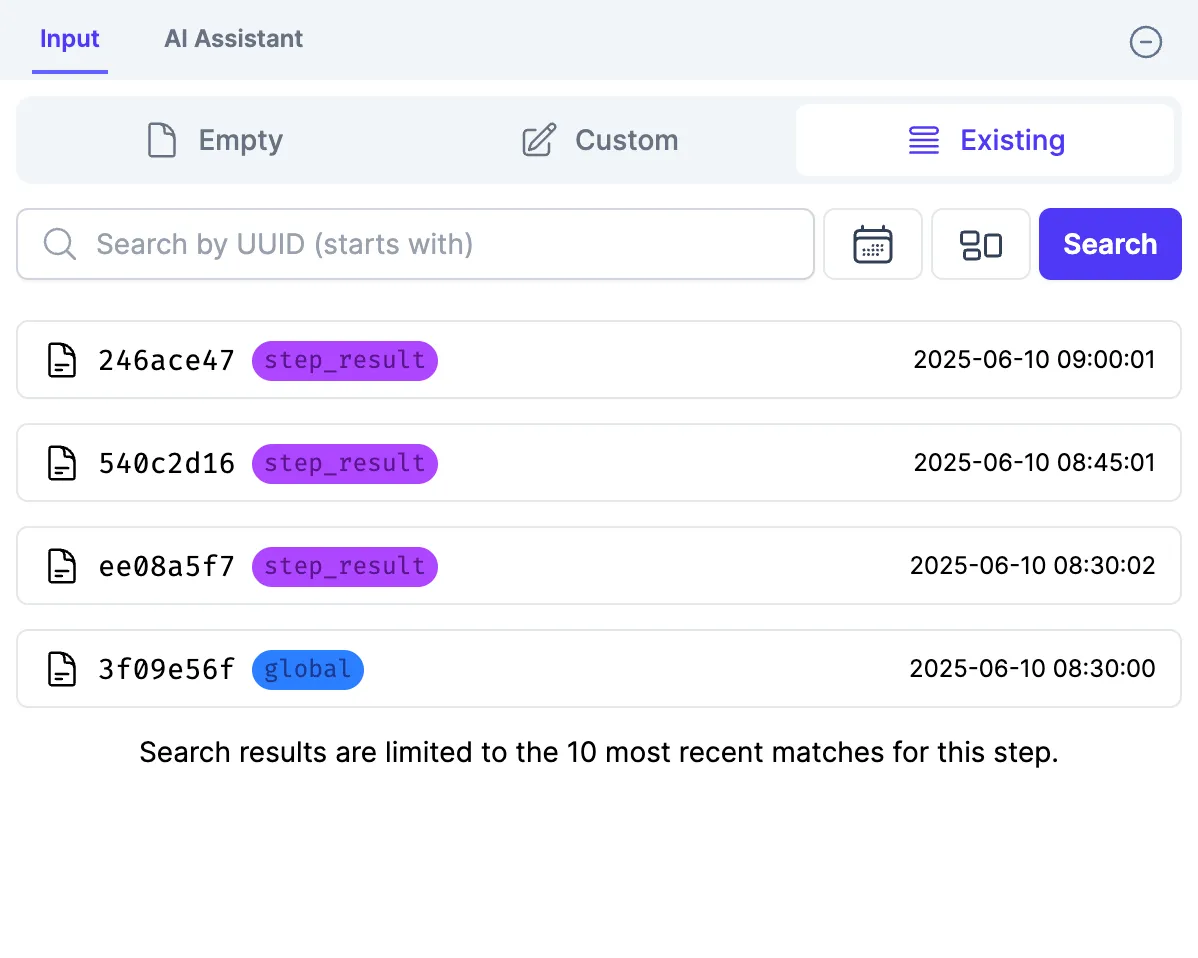
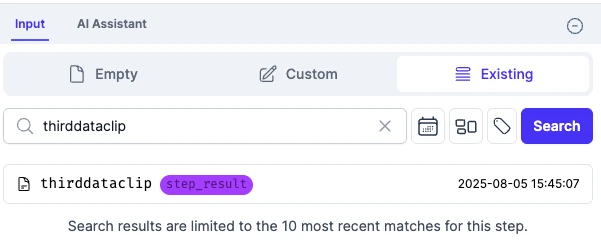
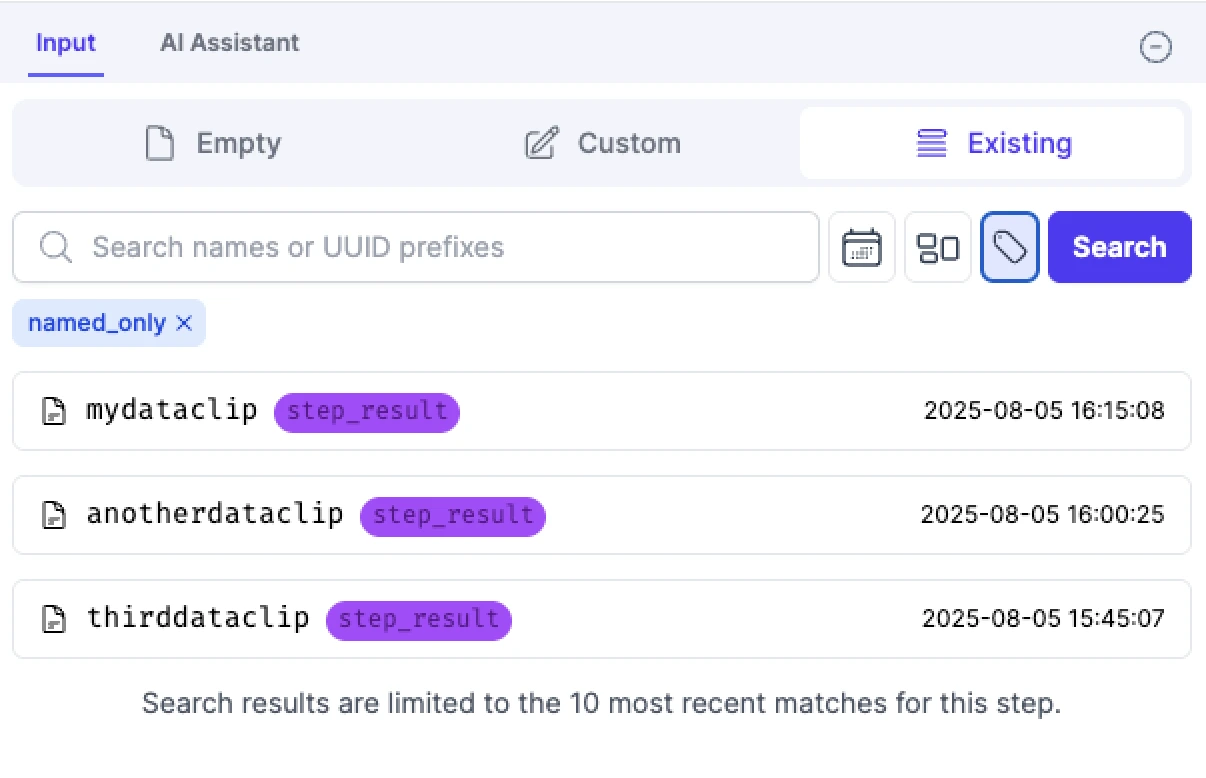
With an existing input
You can pick from a list of previous inputs that were used to run this step.
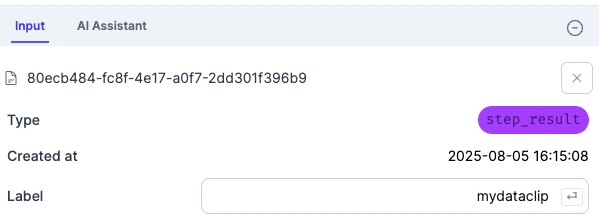
Named Dataclips
Dataclips (custom inputs, step results, webhook requests) can be named to make them easier to find and use for testing.
Named dataclips will not be removed alongside other project history when your retention period is reached. They will be stored indefinitely.
Assign your dataclip a name by clicking the label field.
After assigning names to your inputs you can search for them by their name on the search bar.
Filter only named inputs by clicking the tag button.
Limit Concurrency
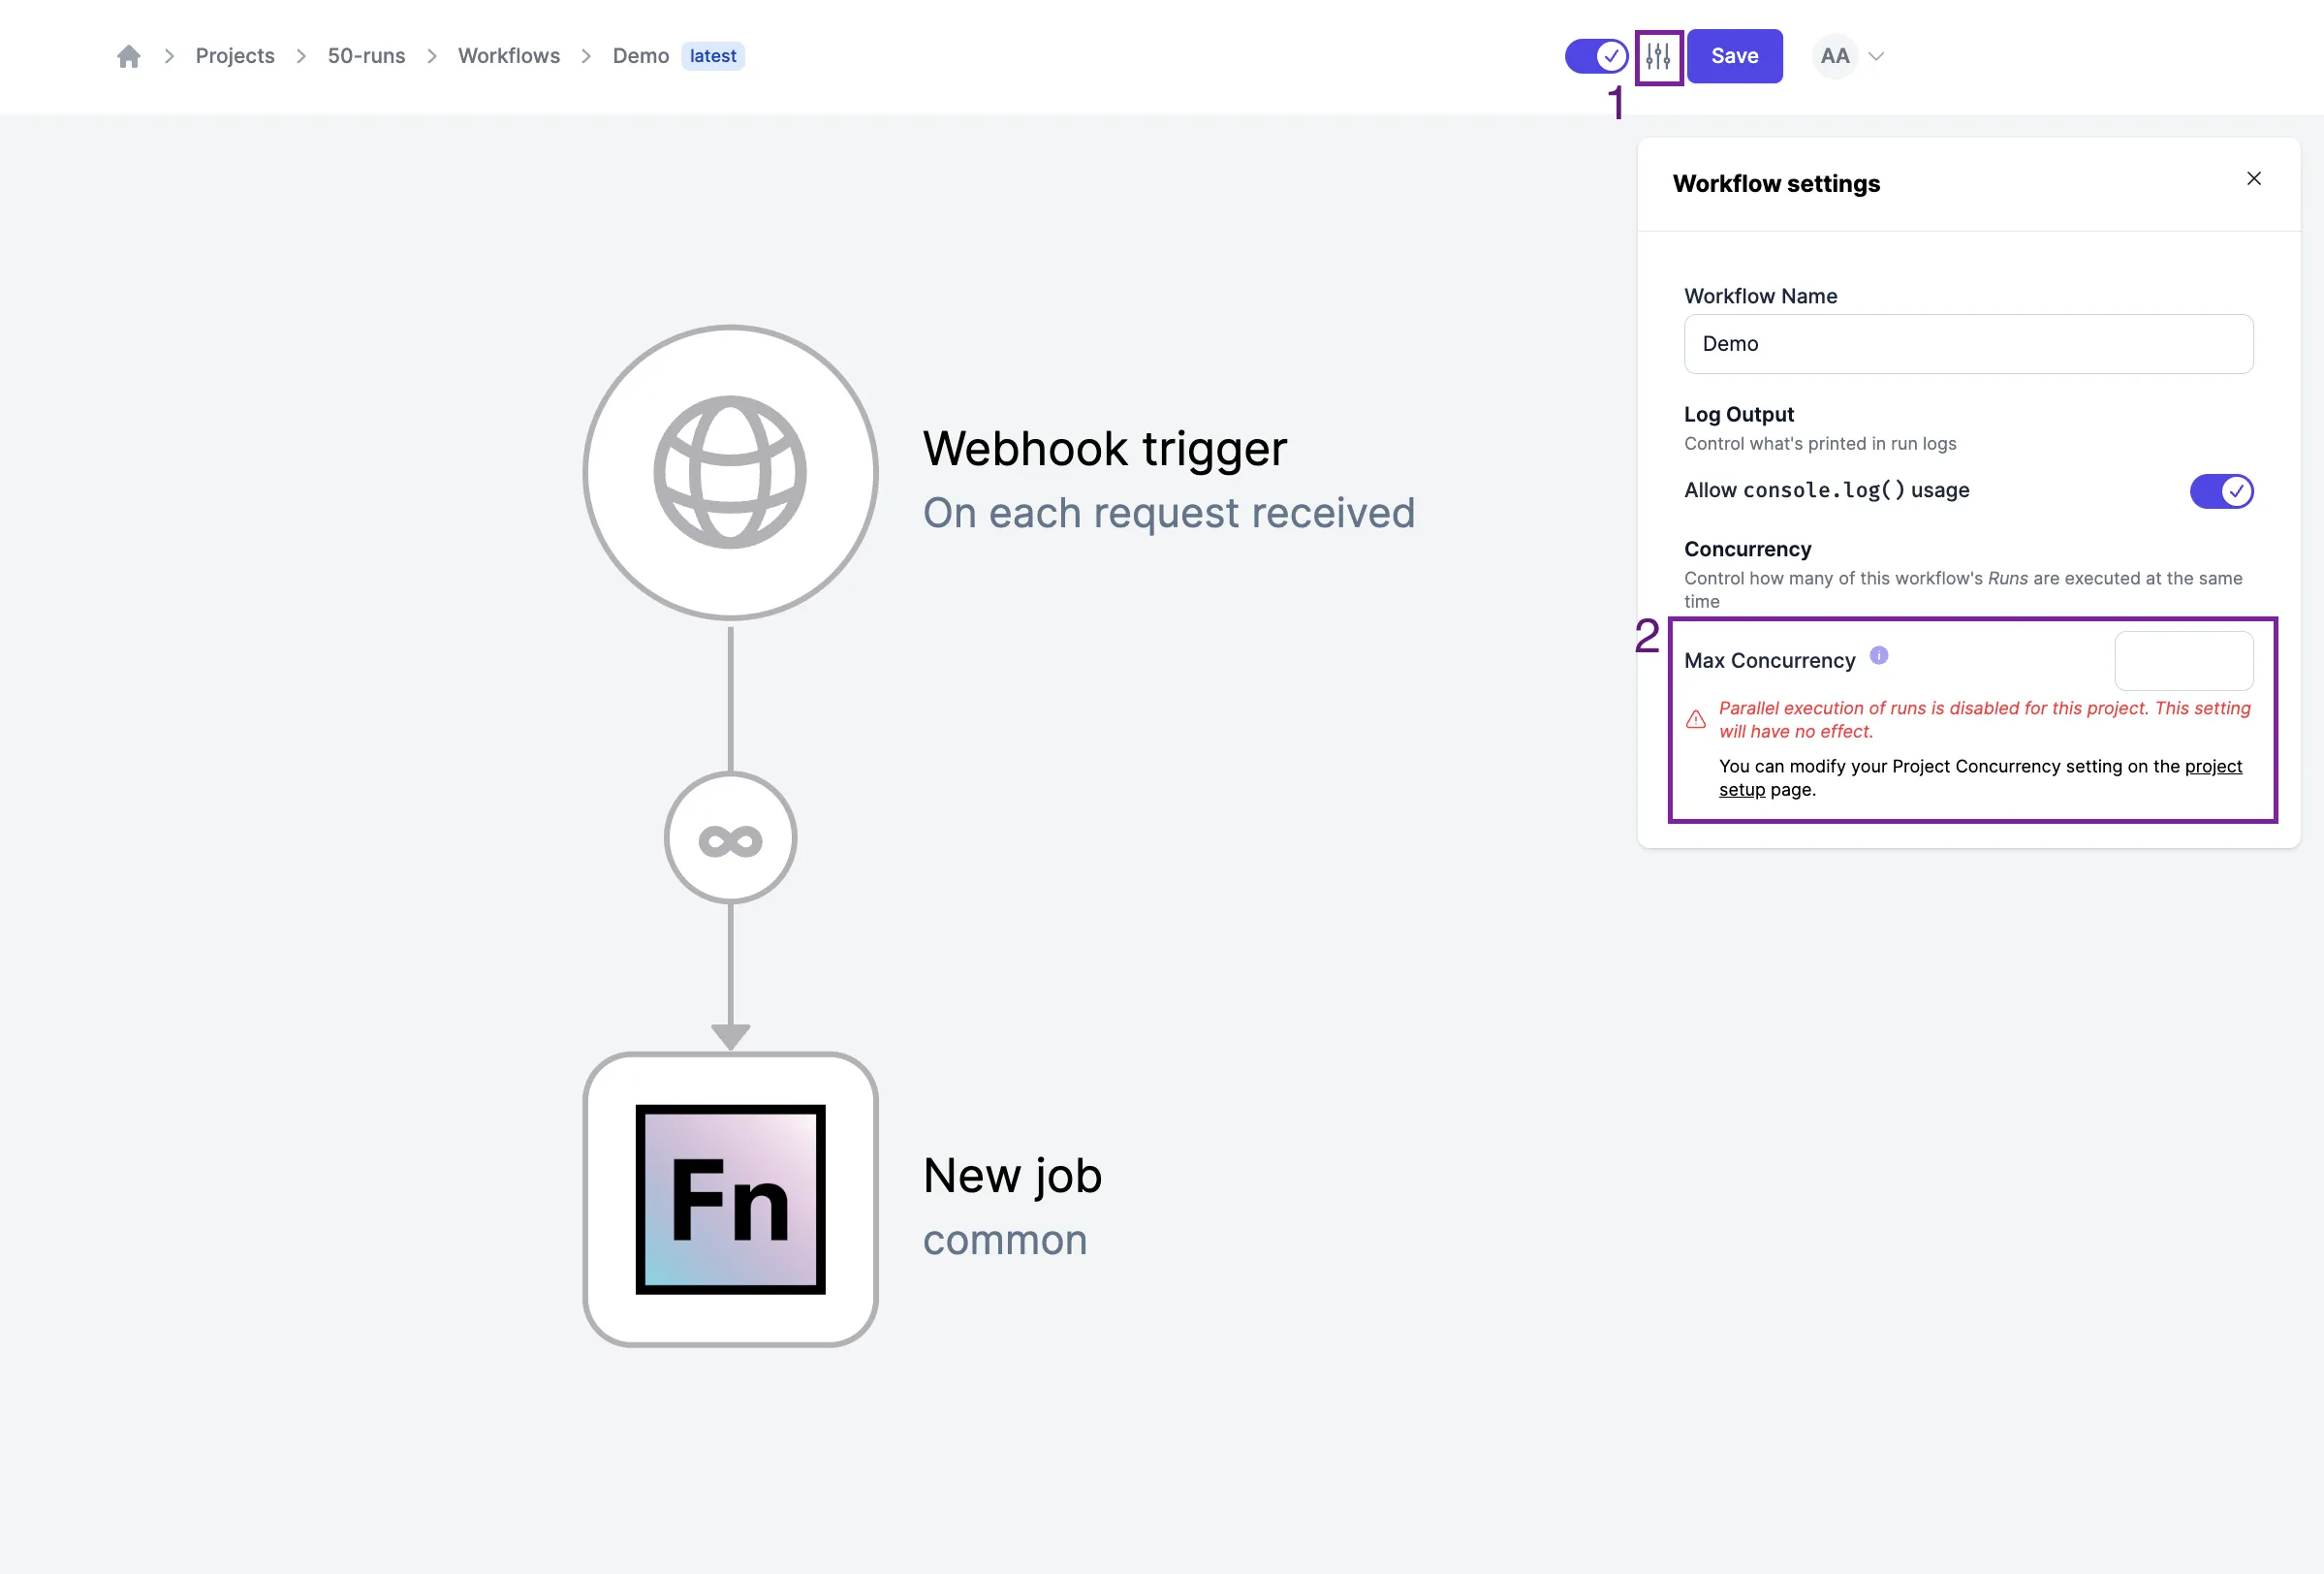
Workflow concurrency is the number of runs that will be allowed for a given workflow at the same time. In OpenFn, project owners and administrators are able to limit the maximum number of the runs that can be executed at the same time for a workflow. You might do this to ensure "one at a time" serial processing or to keep a fast OpenFn workflow from overwhelming the API rate limit of some other connected system.
Please check to make sure that your parallel execution is not disabled for your project as it will override the workflow level concurrency limit.
What happens when concurrency limit is set on a workflow?
When concurrency limit is configured for a workflow, the maximum number of runs that are executed concurrently will not exceed the number that has been set for the workflow. For example:
- Concurrency not set (or = 0): There's no artificial limit applied, and this workflow will only be limited by the total computing power available across your OpenFn installation.
- Concurrency = 1: Runs for this workflow will only take place 1-at-a-time. Each run must finish before the next run can start.
- Concurrency = 2: No more than 2 runs for this workflow can be executed at
a time and other runs will have stay
enqueued. If runs "A", "B", and "C" are all enqueued, "A" and "B" will start executing. Once "A" finishes, "C" will start. (No more than 2-at-a-time.)
Setting Concurrency for a workflow
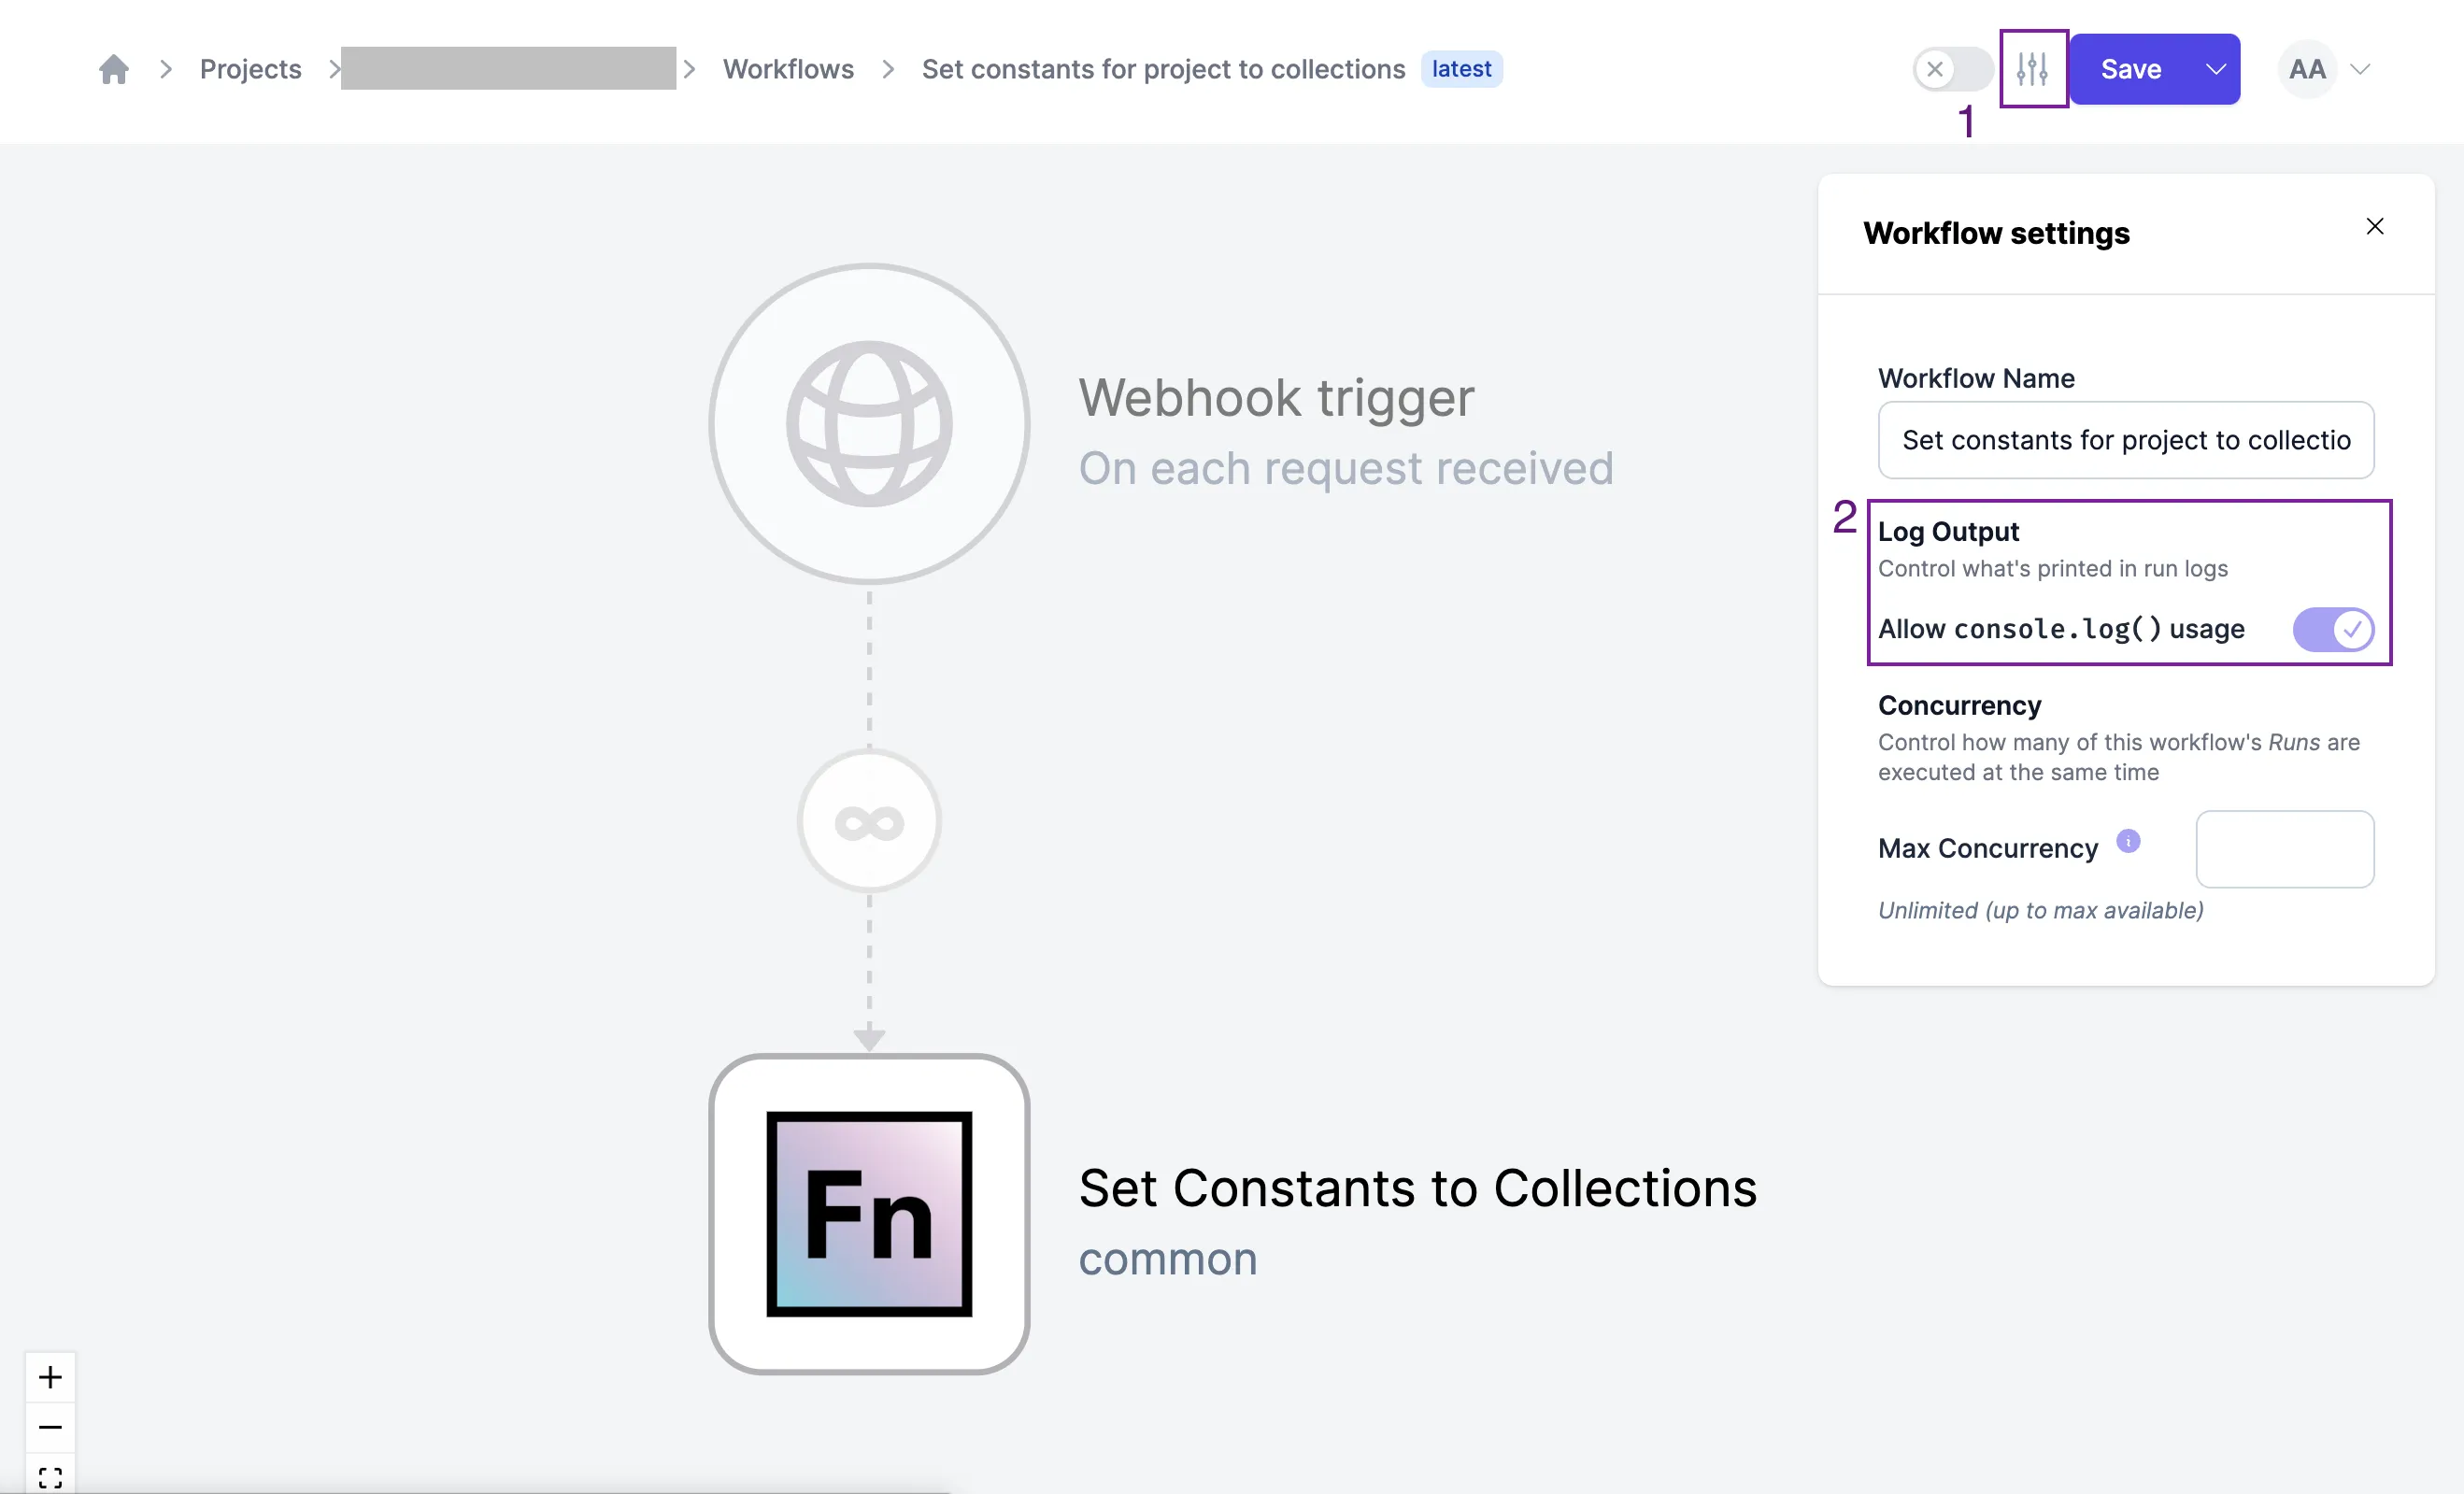
Concurrency limits can be set via the workflow settings modal on the workflow canvas.
- Click on the settings icon beside the save button on your workflow to open the workflow settings
- In the modal, enter the maximum concurrency limit
- Click save.
Log Outputs
For data security and compliance purposes, the log output of a workflow run can
be configured to disable logging console.log() statements. This can be done
via the workflow configuration modal by a project owner or administrator.
- Click on the settings icon.
- In the modal, toggle the Allow
console.log()usage switch to disable loggingconsole.log()statements. By default, this is enabled.
Keyboard Shortcuts
From the canvas you can perform certain common actions (e.g., save) using keystrokes. Check out the full list of keyboard shortcuts here.