Triggers
Triggers allow you to start the execution of Workflows automatically. They come in two types: Cron triggers and Webhook Event triggers.
Webhook Event Triggers
Webhook Event Triggers listen for inbound HTTP requests (messages from other systems), and enable real-time, event-based automation.
These triggers are fired by "pushing" data to OpenFn (i.e., by sending an HTTP “POST” request to your trigger’s designated URL).
The triggering HTTP request might be sent via a webhook in an external app, another OpenFn workflow, or manually (i.e., via cURL request).

To learn about how to add an additional layer of security to your Webhook Trigger by adding authentication, head over to our Webhook Security page.
Learn how a workflow's initial state gets built from a webhook trigger
here.
Webhook Trigger Responses
When a workflow is triggered via a webhook, OpenFn can respond to the calling system in one of two ways, depending on how the trigger is configured.
Async Mode Responds Before Start
By default, workflows are executed asynchronously.
OpenFn sends an HTTP response immediately after receiving the webhook request, once the Work Order and Run have been created. The calling system gets a fast acknowledgement and the workflow runs in the background.
Use this mode when:
- The calling system only needs confirmation that the request was received
- You want fast responses and minimal coupling
- The calling system does not need the result of the workflow run
Response:
- Status code:
200 - Headers:
x-meta-work-order-id— the ID of the created work orderx-meta-run-id— the ID of the created run
- Body:
{"work_order_id": "abc123","run_id": "xyz456"}
Sync Mode Responds After Completion
Optionally, workflows can be executed synchronously.
OpenFn holds the HTTP connection open and sends a response after the run finishes, returning the final run state as the response body. The calling system waits — sometimes seconds or minutes — for the result.
Use this mode when:
- The calling system needs the result of the workflow run
- You need the workflow’s final output to drive the next step in the caller
Default response:
- Status code:
201(configurable — see below) - Headers:
x-meta-work-order-id— the ID of the work orderx-meta-run-id— the ID of the run
- Body: a JSON object with the shape:
{"data": { /* the final run state */ },"meta": {"work_order_id": "abc123","run_id": "xyz456","state": "success","error_type": null,"inserted_at": "2026-05-21T10:00:00Z","started_at": "2026-05-21T10:00:01Z","claimed_at": "2026-05-21T10:00:01Z","finished_at": "2026-05-21T10:00:05Z"}}
data— the final run state (or a security message on failure, or a custom body — see below)meta— run metadata, including run lifecycle timestamps and finalstate("success"or"failed")
When a run fails, OpenFn returns a generic message in data rather than the
full run state, to avoid leaking sensitive data. You can still return a custom
body from a failed run using webhookResponse (see below).
Configuring custom status codes
In sync mode you can set custom HTTP status codes on the trigger (under Options → Response Status in the UI):
- Success Status Code — returned when the run completes successfully
(defaults to
201) - Error Status Code — returned when the run fails (defaults to
201)
Switching a trigger back to async mode clears any configured success or error status codes; they only apply in sync mode.
Customising the response from your job
To return a custom body or status code from values at runtime, set
webhookResponse in the state, e.g.:
fn(state => ({
  ...state,
  webhookResponse: {
    status: 200,
    body: { ack: true, id: state.data.id },
  },
}));
At the end of the run, the value of state.webhookResponse will be used to send
the HTTP response back to the caller. Changing the value during the run does not
affect the response; it's only the final state that counts.
Both status and body are optional — you can include either or both:
| Field | Behaviour when set |
|---|---|
status | Overrides the configured status code for this run |
body | Replaces the final run state under data in the response body |
| neither | Falls back to the configured status code and final run state |
webhookResponse.body only replaces the data portion of the response — meta
is always included by OpenFn. So the example above produces:
{
  "data": { "ack": true, "id": "..." },
  "meta": { "work_order_id": "...", "run_id": "...", "state": "success", ... }
}
If webhookResponse is not a JSON object (e.g. a string, number, or array), it
is ignored and the run's default status code and body apply.
If webhookResponse.status is not an integer, or webhookResponse.body is not
a JSON object, the response status falls back to the run's default (the
configured success or error code, or 201) and data is replaced with
{ "message": "Run completed, but webhook_response was malformed: ..." }.
Cron Triggers
Cron Triggers run Workflows based on a cron schedule, and are good for repetitive tasks that are time-based (e.g., every day at 8am, sync financial data between two systems).
These Triggers enable users to "pull" data from connected systems. You can pick a standard schedule (e.g., every day, or every month), or define a custom schedule using cron expressions.
The best way to learn about cron, if you're not already familiar, is through
the OpenFn interface or
crontab.guru.
Cron Triggers enable Workflows to be run as frequently as once every minute, or as infrequently as you desire and can be scheduled on very specific dates or times.
Input state for the next run
Every time a cron-triggered workflow is run it will start with the final output of the last successful run. This allows users to build workflows that make use of a "cursor" that tracks what happened last time the workflow ran. (Only processing data that changed since that last run, for example.)
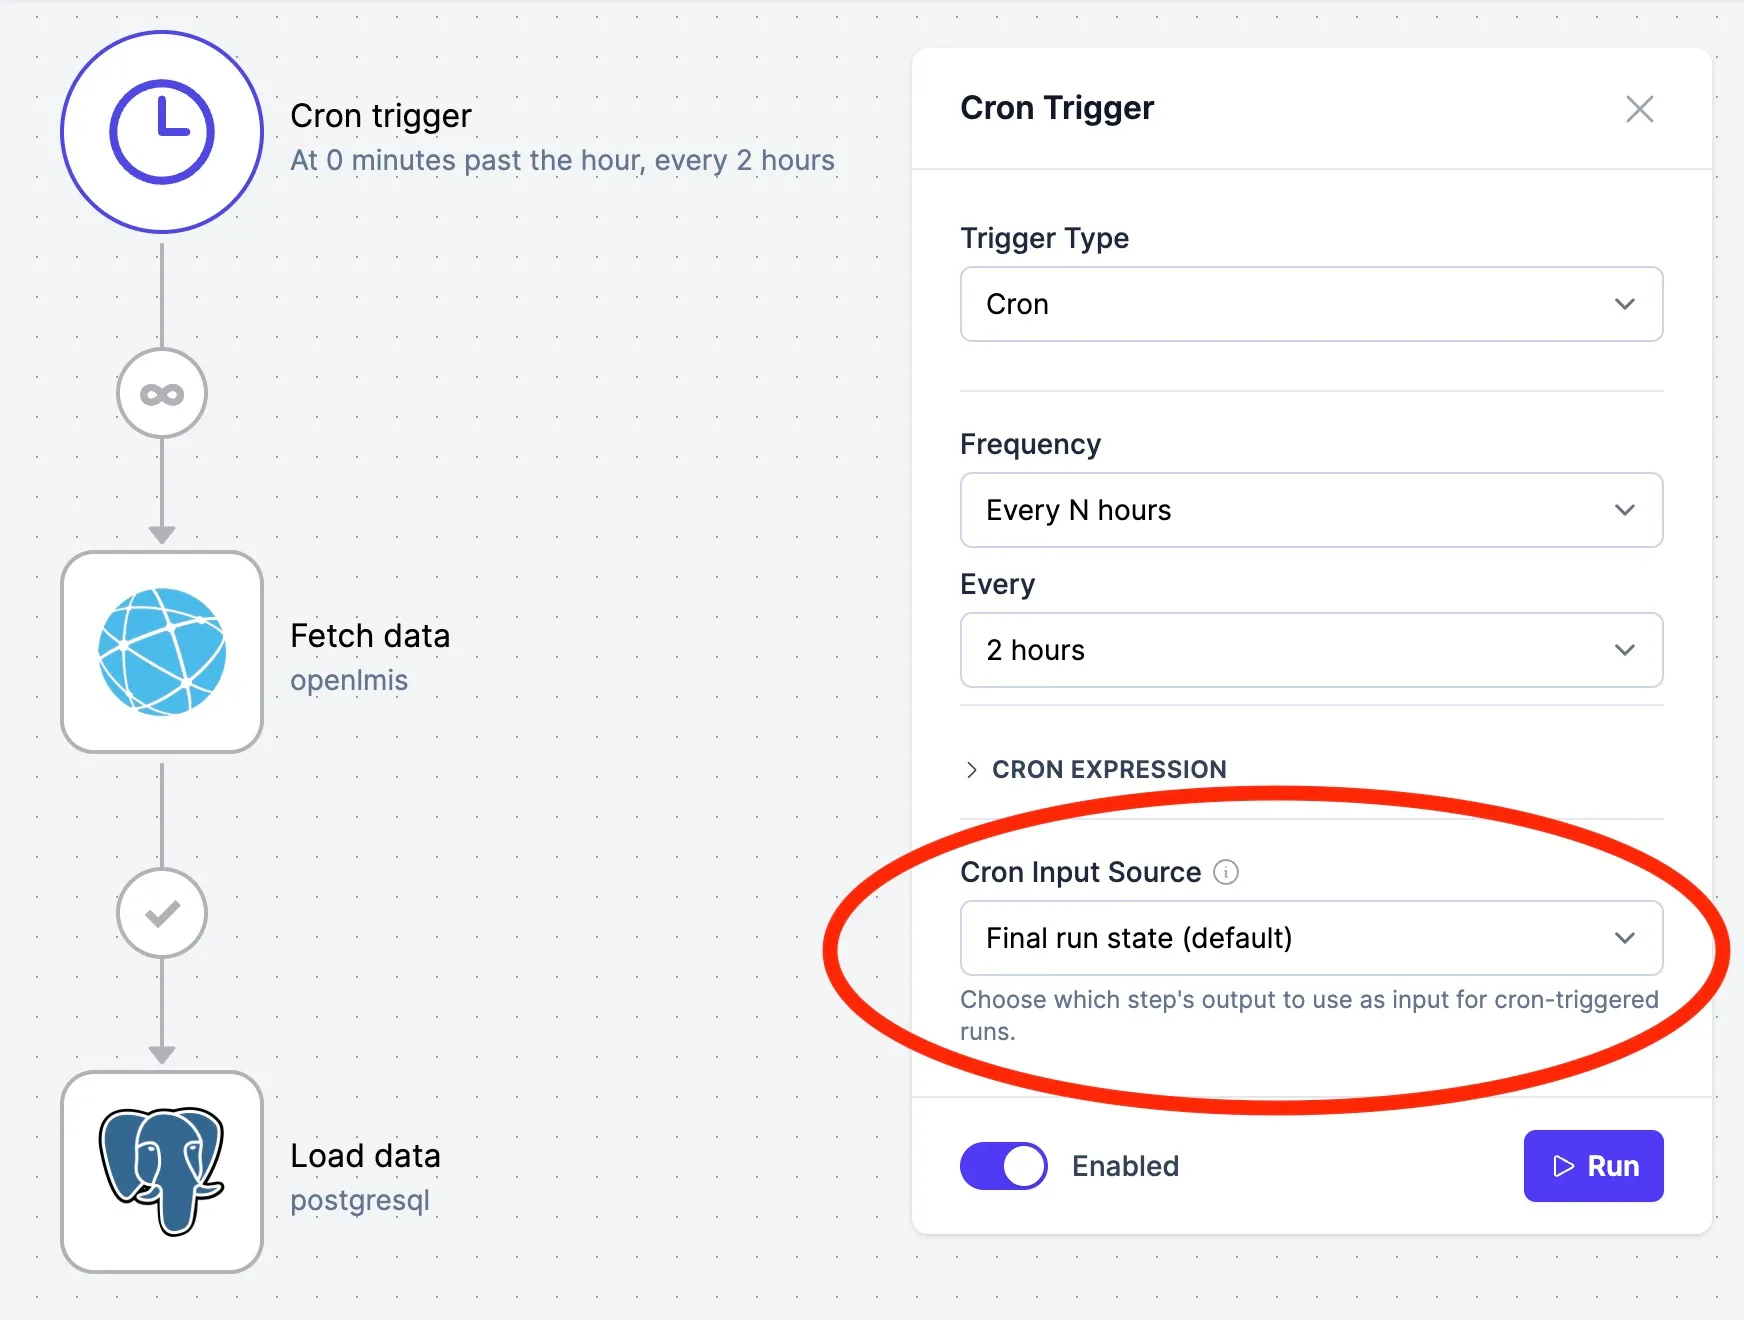
By default, the input state for the next cron run will be the final output state of the previous run, but you can configure this to use the output state from a specific step in your earlier run by changing the "Cron Input Source".
More on state in cron-triggered runs can be found in the
"Input and Output State" docs.
Managing the size of state for Cron Workflows
Since state is passed between each run of a cron Workflow, if your Workflow Step
adds something new to state each time it runs, it may quickly become too large
to be practically handled. Imagine if a server response were adding, via
array.push(...), to state.references each time the job ran. OpenFn supports
up to 50,000 bytes (via Erlang's byte_size), though most final_state byte
sizes are between 100 and 1000.
If the size of your final_state exceeds 10,000 bytes, OpenFn will send project
collaborators a warning email. If it exceeds 50,000 bytes, your run will still
succeed but its final_state will not be saved and the next time that job runs
it will inherit the previous, un-updated final state. (I.e., the last state that
was < 50,000 bytes.)
A quick fix for final state bloat
Most often, final state bloat is due to improper handling of
state.references or state.data. This can be fixed by cleaning up your final
state by adding and customizing the following lines either to the callback
of your language-package's operation (if it allows for one) or by appending a
fn(...) operation after your final operation.
fn(state => {
  state.custom = somethingIntentional;
  state.data = {};
  state.references = [];
  return state;
});
Kafka Triggers
Kafka triggers were removed in v2.18.2. A workflow can no longer be started by consuming from a Kafka cluster.
Existing Kafka triggers were converted to disabled webhook triggers rather than deleted, so the workflows they belonged to are intact. To keep one running, point the sending system at the trigger's webhook URL and enable it.
The KAFKA_* environment variables no longer do anything. If you're running
with KAFKA_TRIGGERS_ENABLED switched on, take a backup and switch it off
before upgrading. Stay on the previous release if you still need Kafka.