Sandboxes
Sandboxes are a way to develop fixes and new features on workflows without affecting live, or "production", runs.
A sandbox is essentially a clone of a project, with its own private history, workflows, collections, and settings. It shares the parent project's credentials and billing, but everything else is isolated.
The idea is that you can develop workflows in total isolation from the main project, and once you're done, merge (read as "push" or "promote") changes back.
Sandboxes work best when they're short-lived, so right now they are scheduled for deletion automatically after merging. While you can create as many sandboxes as you like (subject to your usage allowance), we recommend keeping the number low to reduce the risk of merge conflicts.
Isolated Context
A sandbox is an isolated copy of your original project with its own context. Most things in a sandbox are private:
- Workflows (jobs, edges, and triggers; triggers are disabled at creation)
- Collections (the names are copied, the data isn't)
- Keychain credentials
- Project members (seeded from the parent at creation, then independent)
- Most project settings (also seeded from the parent, then independent)
Run history and dataclips aren't copied — sandboxes start with an empty history and accumulate their own as workflows run.
A few things are shared with the parent rather than copied:
- Credentials. The same credentials remain available in the sandbox; only the link between the credential and the project is duplicated. Editing a credential affects every project that uses it.
- Subscription. Runs and AI tokens used in a sandbox count toward the parent's usage allowances.
- Webhook authentication methods. These live on the parent and are shared — the sandbox's webhook triggers reference the parent's methods. The Webhook Security tab on the sandbox is read-only and links back to the parent for management. Each sandbox webhook trigger still gets its own unique URL.
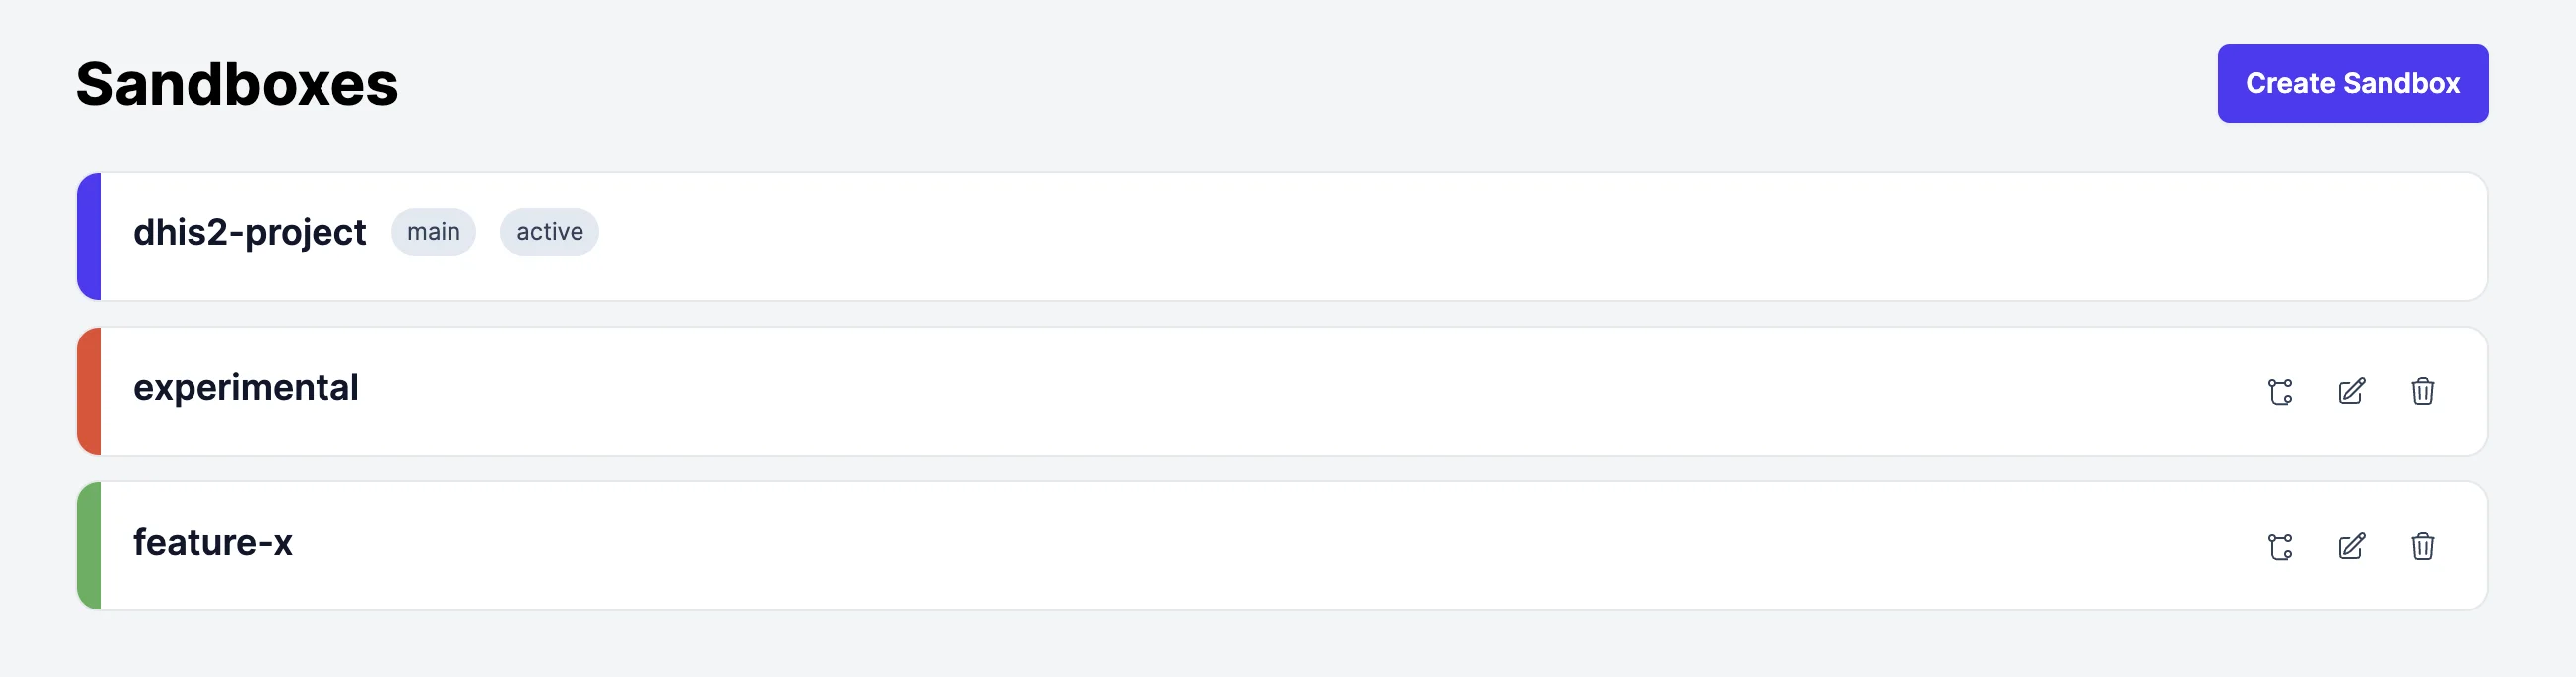
Creating sandboxes
To create a sandbox, you need to be an editor, admin, or owner of the
parent project. Enter the parent project, click on Sandboxes in the side
menu, and click Create Sandbox.
You'll need to set a name for the sandbox. This must be unique across sandboxes
within the project. If you're familiar with git, treat it like a branch name.
Otherwise, you can either give it a general name like testing, or name it for
a specific feature, like new-patient-workflow.
A color will be randomly selected to associate with the sandbox. You'll see this color on the project picker in the breadcrumb while you're inside the sandbox, so it's easy to tell where you are. You can select a different color if you like.
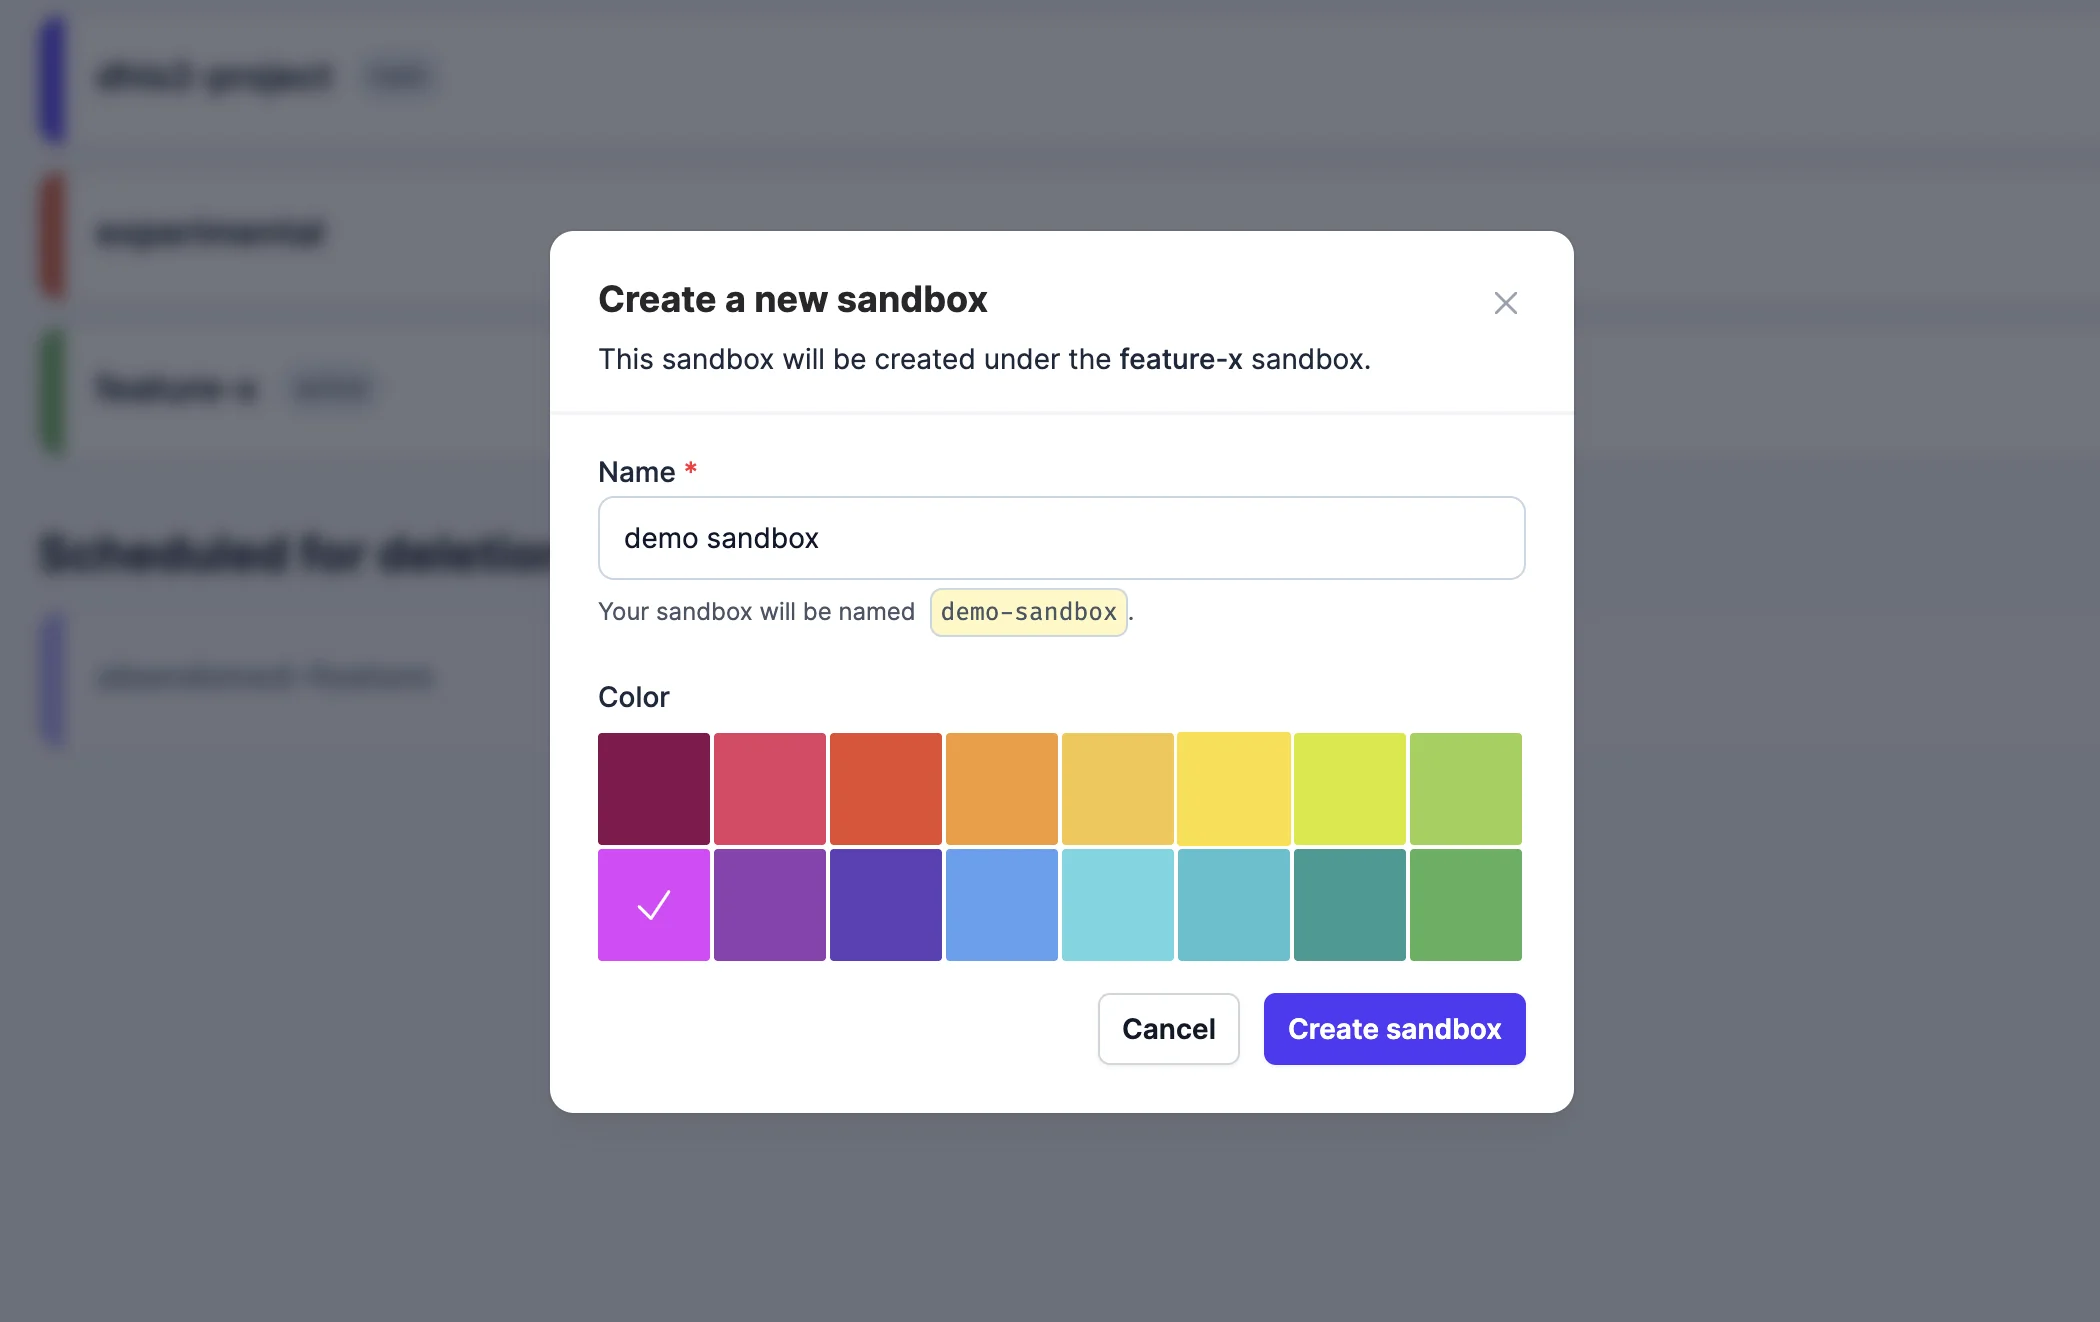
Click Create Sandbox when you're ready. You'll automatically enter the sandbox.
When the sandbox is created, the parent's project members are copied across: the
creator becomes the sandbox owner, any parent owners are demoted to admin,
and other members keep their original role. After that, the sandbox manages its
own membership: adding or removing someone on the parent doesn't affect existing
sandboxes underneath.
All workflow triggers on the new sandbox start disabled. This is to avoid duplicating production runs from the moment the sandbox exists. You can re-enable any trigger you want to test from the sandbox's workflow page.
After creation, the Edit action on a sandbox card lets you rename it and change its color. Everything else (workflows, credentials, membership, environment, and other settings) is managed from inside the sandbox itself.
Limits
There are two practical limits on creating sandboxes:
- Active sandbox count. Your subscription includes a cap on how many active (non-scheduled-for-deletion) sandboxes you can have. When you hit the cap, the Create Sandbox button is disabled with a tooltip explaining why. Scheduled-for-deletion sandboxes don't count, so you can free up a slot by deleting one you no longer need.
- Nesting depth. A sandbox can itself have sandboxes underneath, and so on, up to a configurable depth (default 5). Once the parent is at the cap, the Create Sandbox button on its sandboxes page is disabled with a "Maximum sandbox nesting depth reached" tooltip.
Who can do what
Sandbox access mirrors regular projects: what you can see and do depends on your
role on the project you're acting on. The User.role enum (:user /
:superuser) is a user type for global user-management screens, not a project
role.
| Action | Required role |
|---|---|
| See a sandbox | Direct project_users row, or support user with allow_support_access on the sandbox |
| Open a sandbox | Same as above |
| Create a sandbox | editor, admin, or owner on the parent |
| Edit or delete a sandbox | admin or owner on the sandbox itself, or admin/owner on the workspace root |
| Merge a sandbox | admin or owner on the source, and editor+ on the merge target |
| Cancel a scheduled deletion | Same as edit or delete |
The global project picker hides projects you can't see.
Viewing a sandbox
You can see all sandboxes on a project from the Sandboxes page in the side menu. From here, click a sandbox name to enter it. You can also enter a sandbox from the global project picker (Ctrl/Cmd+P).
When you're inside a sandbox, the project picker in the breadcrumb shows the sandbox's name and picks up the sandbox's chosen color, so it's easy to tell which version of your project you're looking at.

Each sandbox has its own isolated Workflows, Collections, History, and settings. As you click through the pages, you'll notice that your original project's details are excluded. This is because your sandbox is an independent clone of the original project.
Each tab on the Settings page shows a banner explaining how its changes relate to the parent project:
- Sandbox Identity, Collaboration, Sync to GitHub, Data Storage, History Exports: changes are private to the sandbox and do not sync on merge.
- Credentials: changes will sync to the parent on merge.
- Security: read-only on the sandbox; managed in the parent project.
- Webhook Security: parent-managed. The methods are shared and enforced on the sandbox's webhook triggers, but they can only be created, edited, or deleted from the parent.

Environments
Environments allow you to run a Workflow with a special set of credential values, separate to your main project. This lets you use development servers, modes, and databases while building your sandbox, without interfering with live production services.
The environment is just a label, and each credential used in your workflow has a
set of values associated with that label. For example, when connecting to DHIS2,
your main credential will contain private login details. But your dev
environment might use the public sandbox and so contain a different username and
password.
By default, all Sandboxes are given the environment dev. You can change this
from the Settings page.
All environments are securely stored and encrypted within our database, so it's perfectly safe to duplicate production credentials across multiple environments.
For each Credential used in your workflow, you must ensure there is a value set to match your sandbox environment. If you do not configure your credentials, the Workflow will fail with clear instructions on how to correct it.
Merging sandboxes
Once you've finished making changes to your workflows, it's time to merge them back into the parent project (or any other project you can write into).
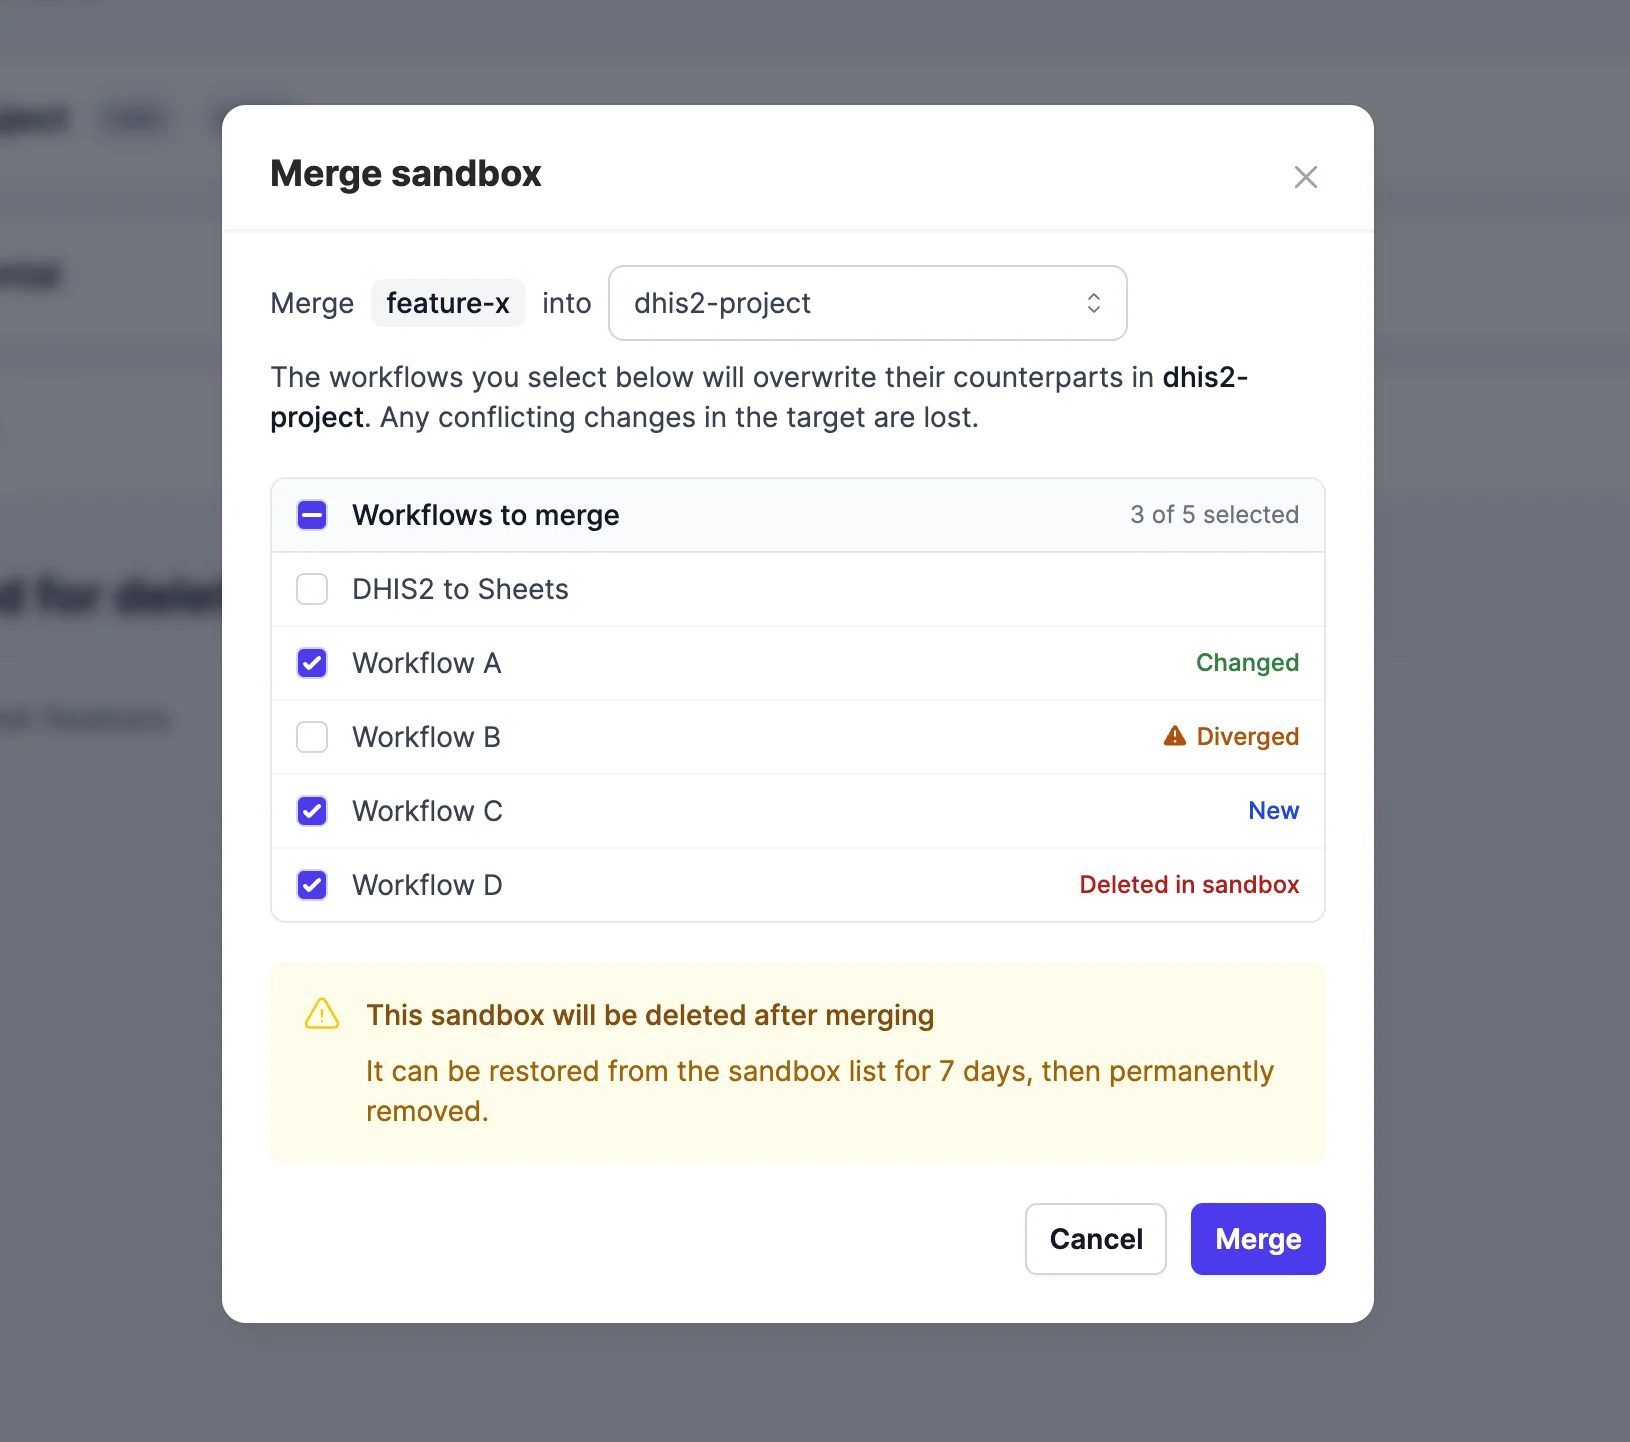
Head to the Sandboxes page, find the sandbox in the list, and click the Merge icon on the right-hand side. You'll be prompted to select the target project to merge into. Usually you'll want to merge into the original parent, which is selected by default.
You can also pick which Workflows to include in the merge. This helps reduce conflicts with any changes on the underlying Project, and helps you understand the consequences of the merge.
When merging, we replace the contents of workflows in the target project with those in your sandbox. Renaming a workflow will make it look like the workflow was removed from the base, and a new workflow added.
Collections are merged by relationship, not by data. A collection that exists only on the sandbox is created empty on the target. A collection that exists only on the target is removed (along with its items). A collection with the same name on both sides is left alone — neither side's items are copied across.
To merge a sandbox you need to be admin or owner of the source (the
sandbox you're merging from); the Merge button is disabled otherwise. You also
need editor+ on the target project, otherwise the merge submission is
rejected.
After merging, the source sandbox is scheduled for deletion with the configured grace period. It moves to the "Scheduled for deletion" section of the sandboxes list, where it can be restored during the window if you change your mind. Any environments and credentials associated with the project are unaffected.
If the sandbox you're merging has its own sandboxes underneath, those are scheduled for deletion as well. The merge confirmation modal shows you how many descendants will be retired alongside the source.
Conflicts
If you've ever worked with a source version control system, like git or Subversion, you'll be familiar with the idea of conflicts.
A conflict can happen when you try to merge a sandbox into a target project and
the target has changed since the sandbox was created. Say you change the adaptor
of one step in the sandbox from common to http, while a colleague changes
the adaptor of the same step on the main project to salesforce. There's no
automatic way to combine those.
To help you see what's going on, the merge confirmation modal tags every workflow with one of four labels:
- Changed: the workflow was modified in the sandbox and the target's copy will be replaced.
- Diverged: the workflow was modified in the target since the sandbox was created. Including it in the merge will overwrite those target changes. Diverged workflows are flagged with an amber warning icon.
- New: the workflow doesn't exist in the target and will be created.
- Deleted in sandbox: the workflow was deleted in the sandbox. Including it removes it from the target.
You pick which workflows to include. Selecting a Diverged one is the explicit choice to overwrite the target's version with the sandbox's. There's no in-app conflict resolver: it's accept-the-sandbox or leave the workflow out.
You can use git and the CLI to resolve conflicts on diverged workflows locally: see Resolving Merge Conflicts
If you need to combine changes from both sides, pull both projects via the CLI, resolve the differences locally, and push the result back.
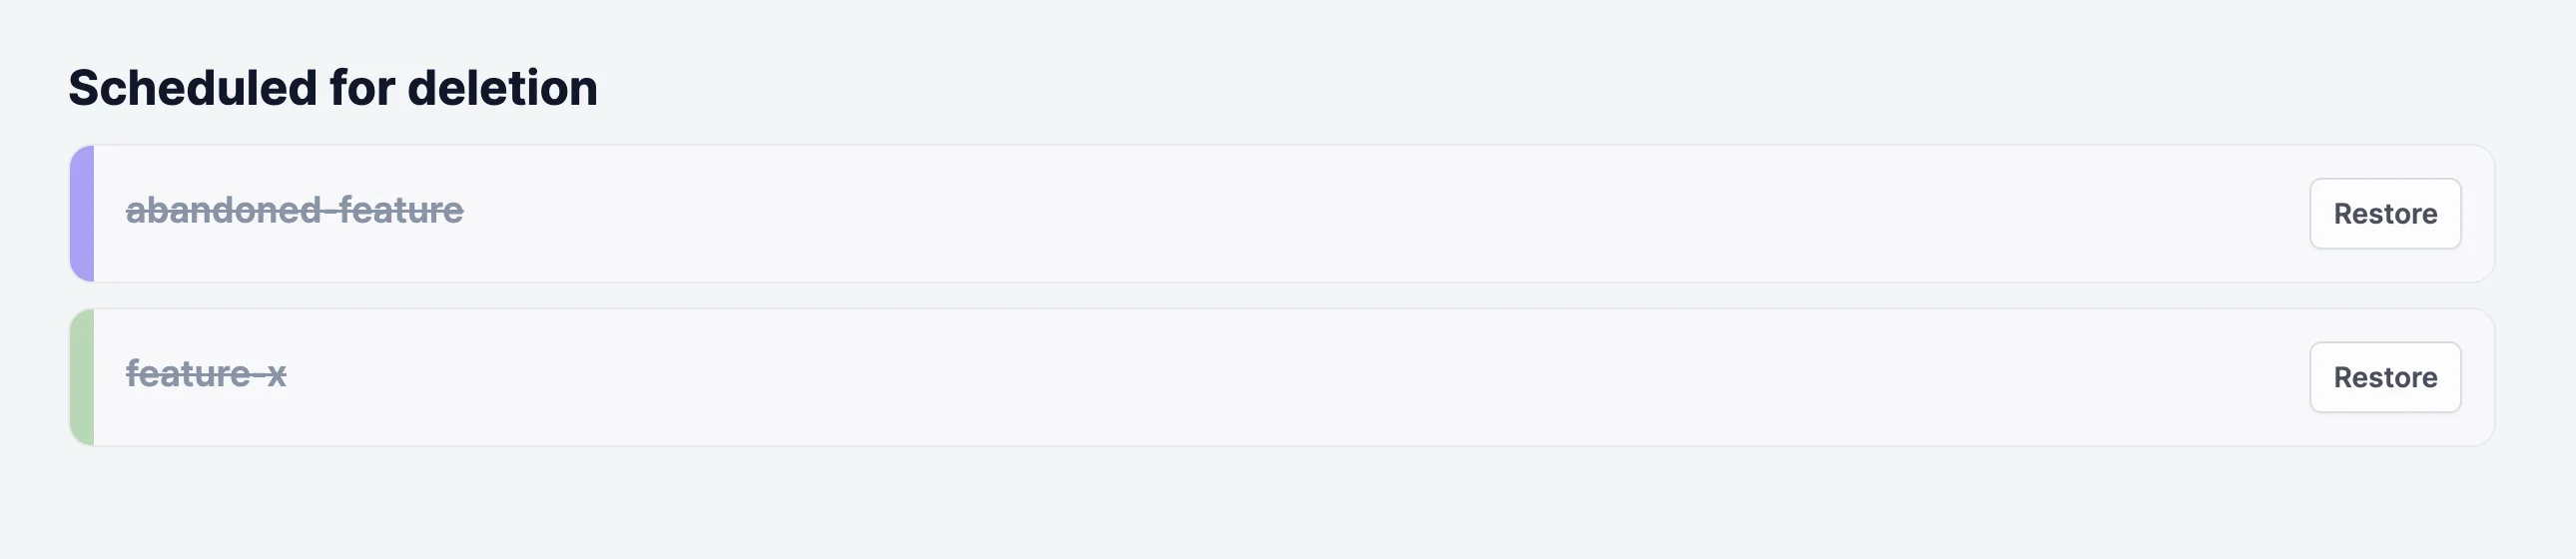
Restoring a deleted sandbox
When a sandbox is deleted, either explicitly or as part of a merge, it isn't removed immediately. The sandbox (and any sandboxes underneath it) is scheduled for deletion, with all its workflow triggers disabled, and a worker hard-deletes it after the configured grace period.
During that window, the sandbox shows up in the "Scheduled for deletion" section
at the bottom of the sandboxes list. Anyone with admin or owner rights on
the sandbox (or the workspace root) can click Restore to cancel the
scheduled deletion. Restoring re-activates the sandbox and its descendants;
triggers stay disabled and need to be turned back on manually.
Once the grace period elapses and the purge worker has run, the sandbox is gone for good.
Editing sandboxes locally
Sandboxes are fully compatible with the CLI.
Use openfn project pull to fetch a sandbox locally, and openfn project push
to push changes back to the sandbox in the app.
You can use openfn project merge to merge two local projects together, and
then openfn project deploy to sync with the app.
If you're working with several sandboxes in one workspace, two things help:
openfn project fetchauto-aliases sandboxes. When you fetch a sandbox without setting--alias, the CLI uses the sandbox id as the alias so multiple sandboxes can coexist in the same workspace without colliding with the parent project or each other.openfn project checkout <project>switches the active project in the workspace. Use it to flip between sandboxes you've already pulled.